GWS Application and Configuration
Process
- Apply for a GWS trial account
- Configure GWS account
- Set up DKIM verification
- Set up SPF verification
Test Environment
- GWS Starter
- Domain registered with Google Domains
- DNS Server using GCP Cloud DNS
Steps
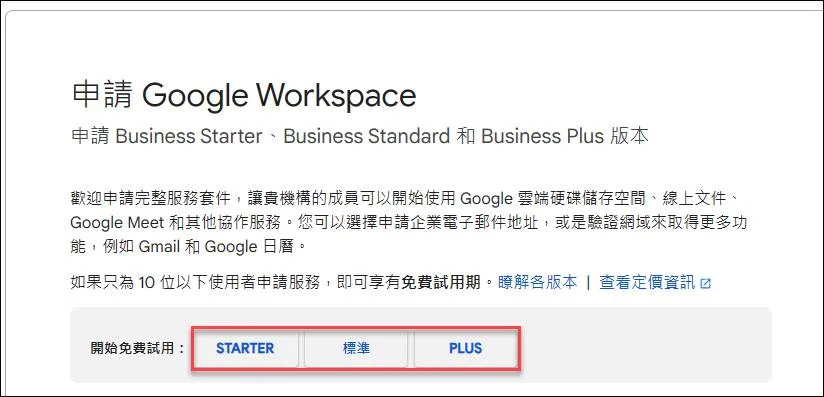
Apply for GWS Trial Account
Apply at the following website, where you can try three versions
Apply for Google Workspace - Google Workspace Admin Help
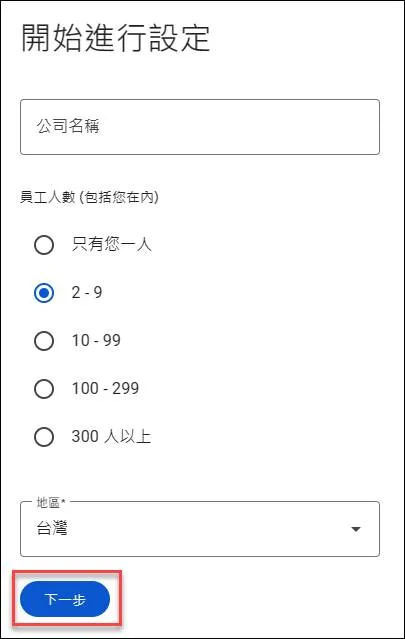
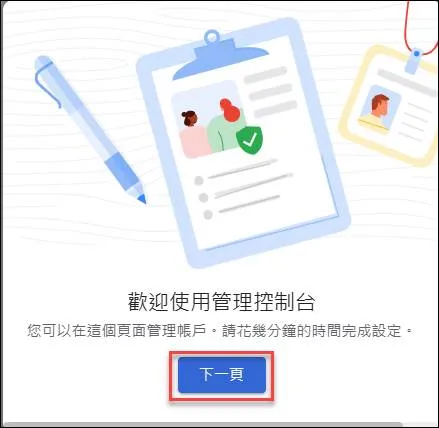
Click Next
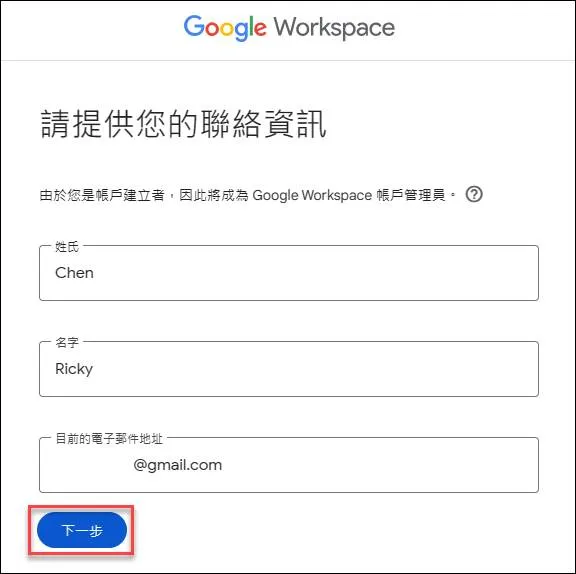
Enter your name and email, then click Next
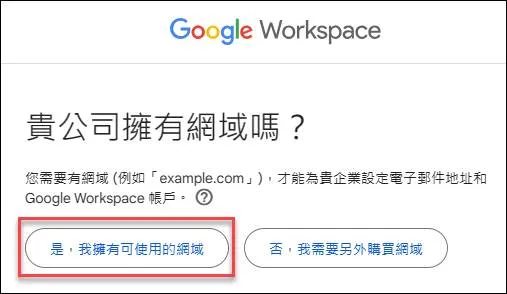
If you already have a domain, click on the left
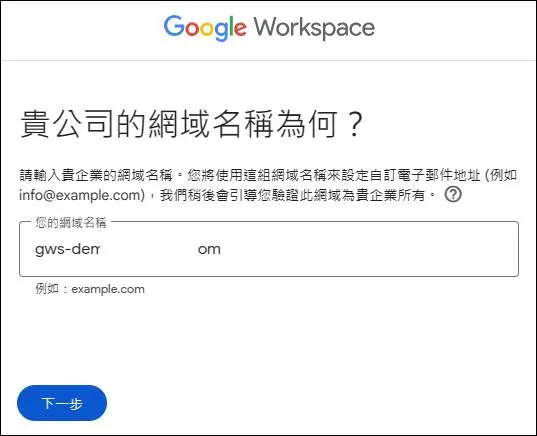
Enter the domain name and click Next
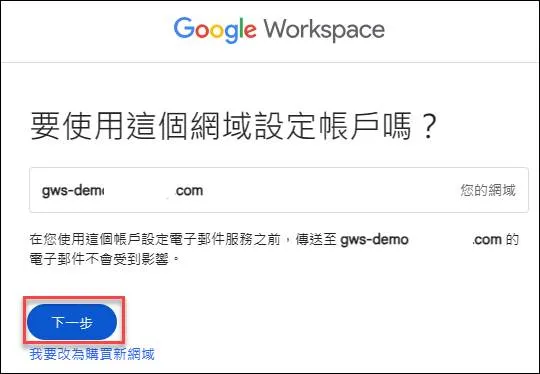
Confirm the domain usage and click Next
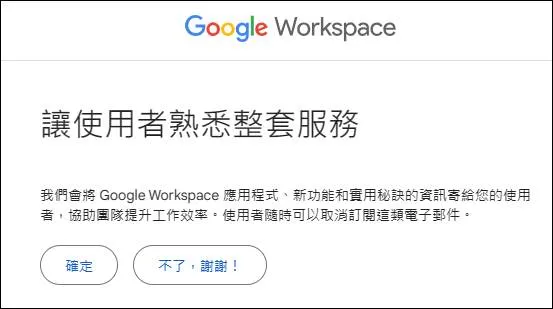
You can click OK or skip
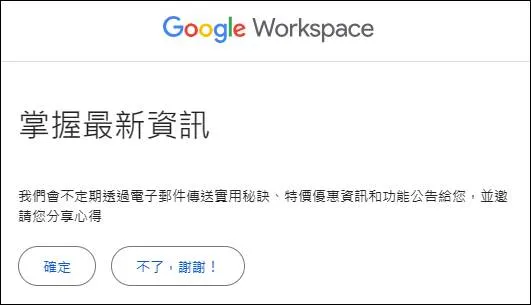
You can click OK or skip
Enter the admin account username and password, complete the CAPTCHA, and finally agree and continue

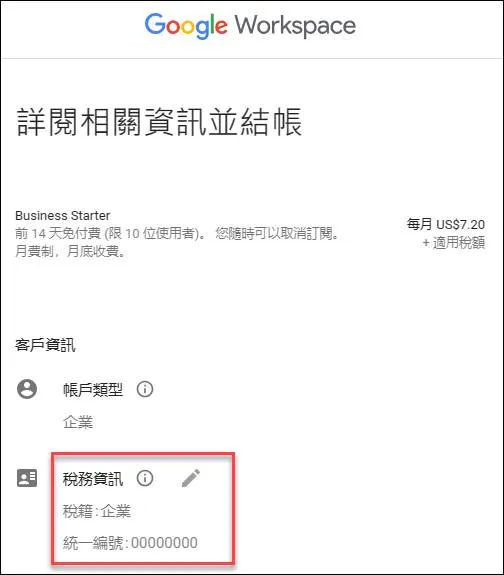
Set up GWS Billing
Log in to GWS
Agree to the terms
Click on 14-day free trial
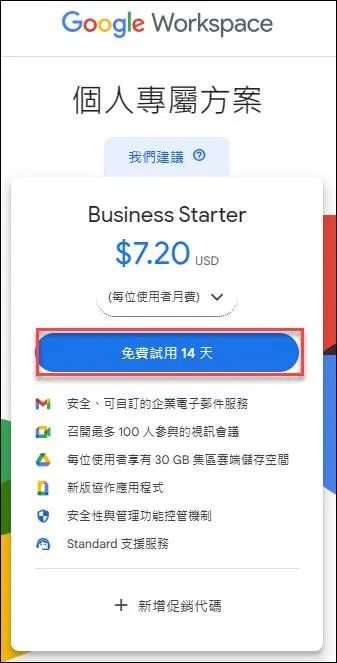
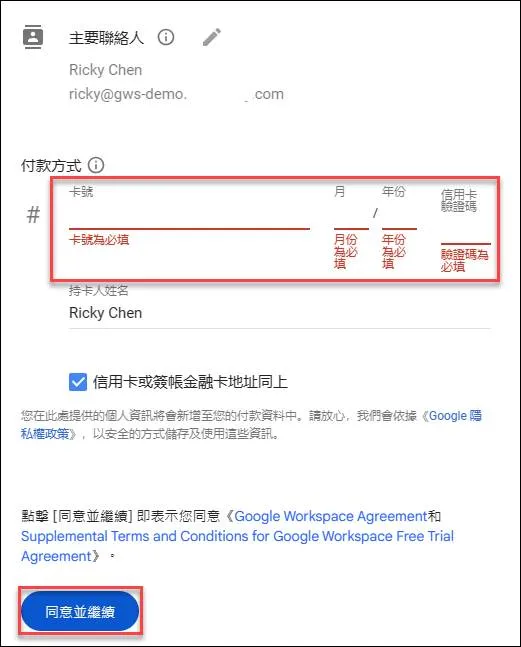
Trial accounts still require a credit card
After filling in, agree and continue
You will receive an email informing you of the trial end date
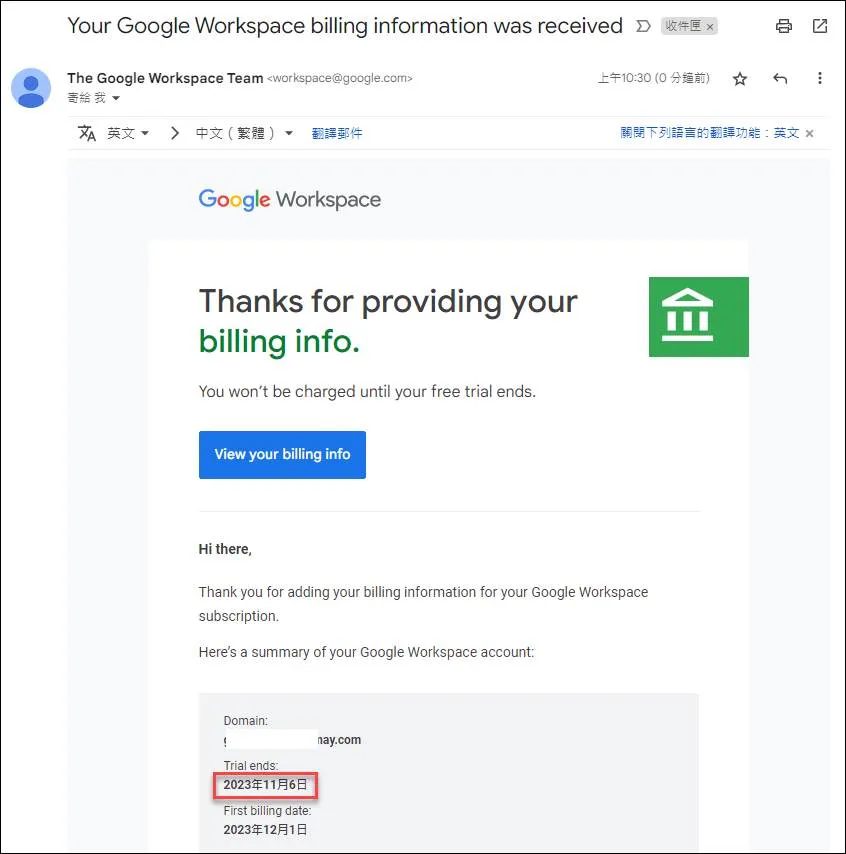
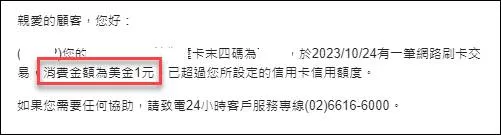
Your credit card will be charged one dollar
You will then enter the admin console
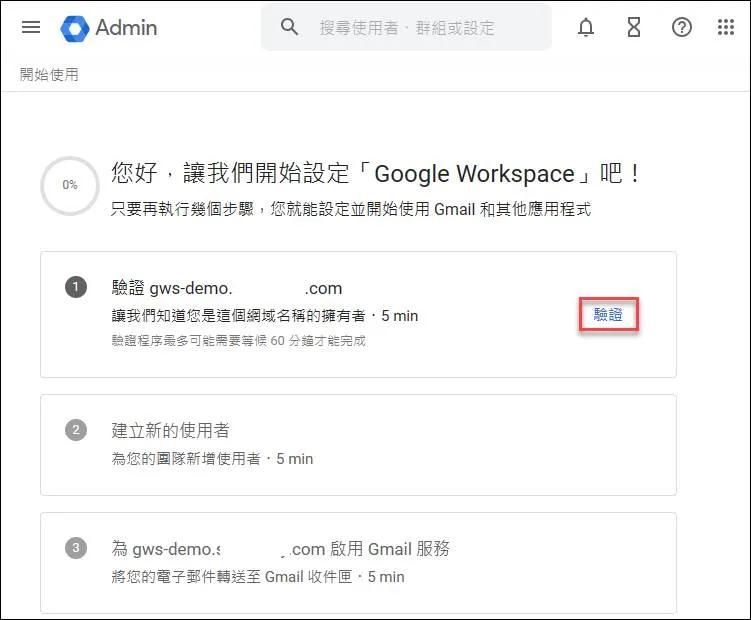
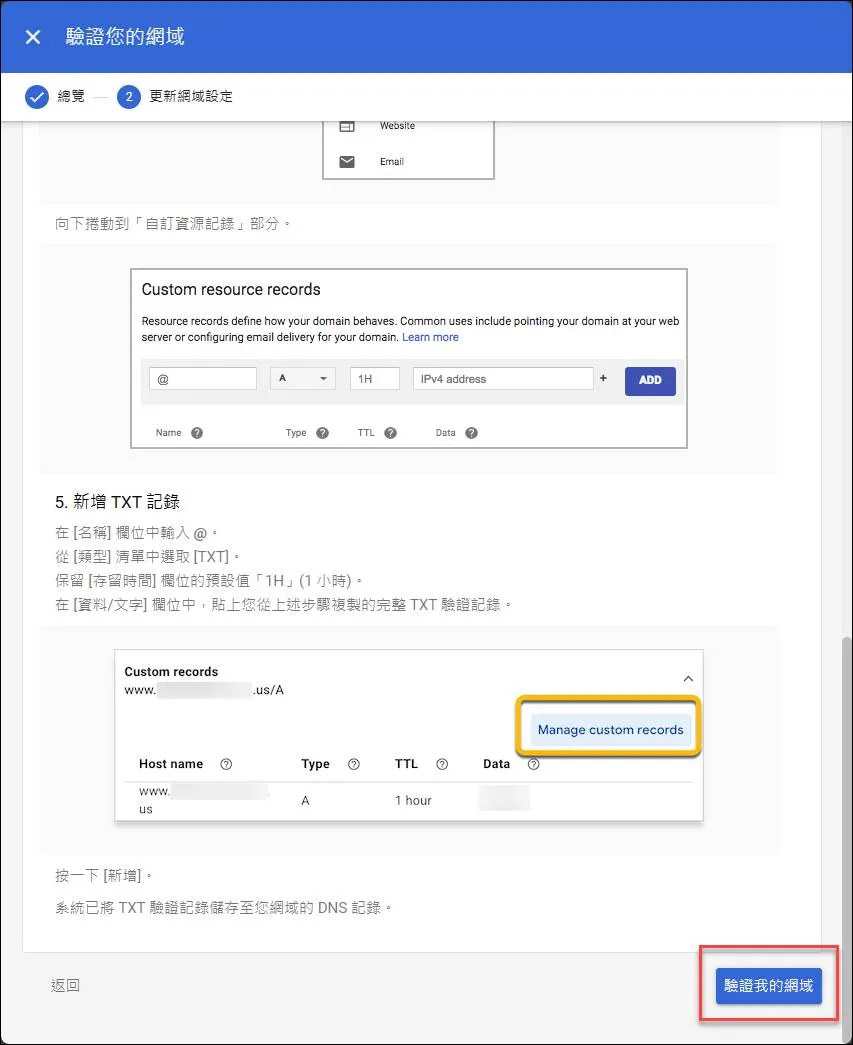
Verify Domain
You need to verify the domain first, click on Verify
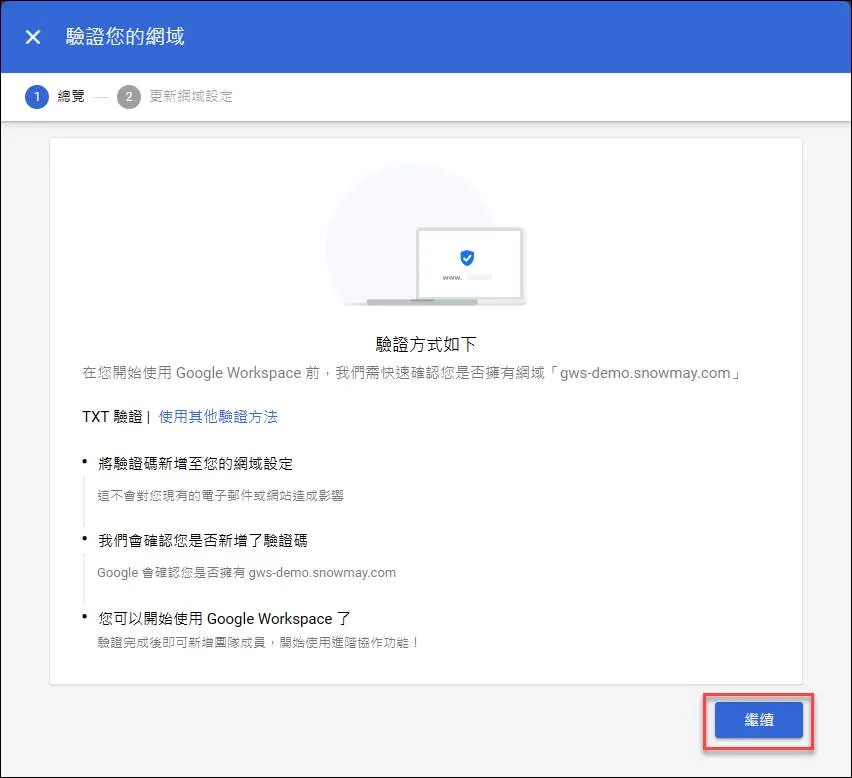
Click Continue
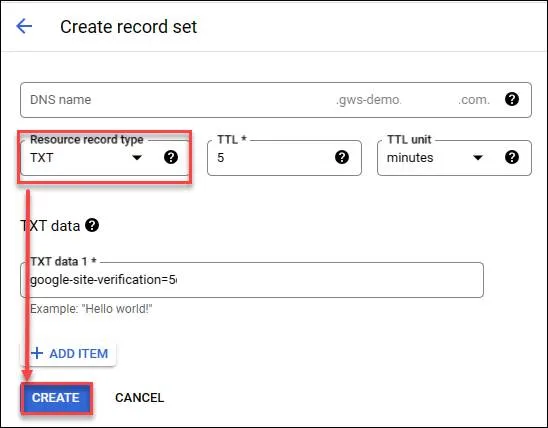
Copy the TXT record
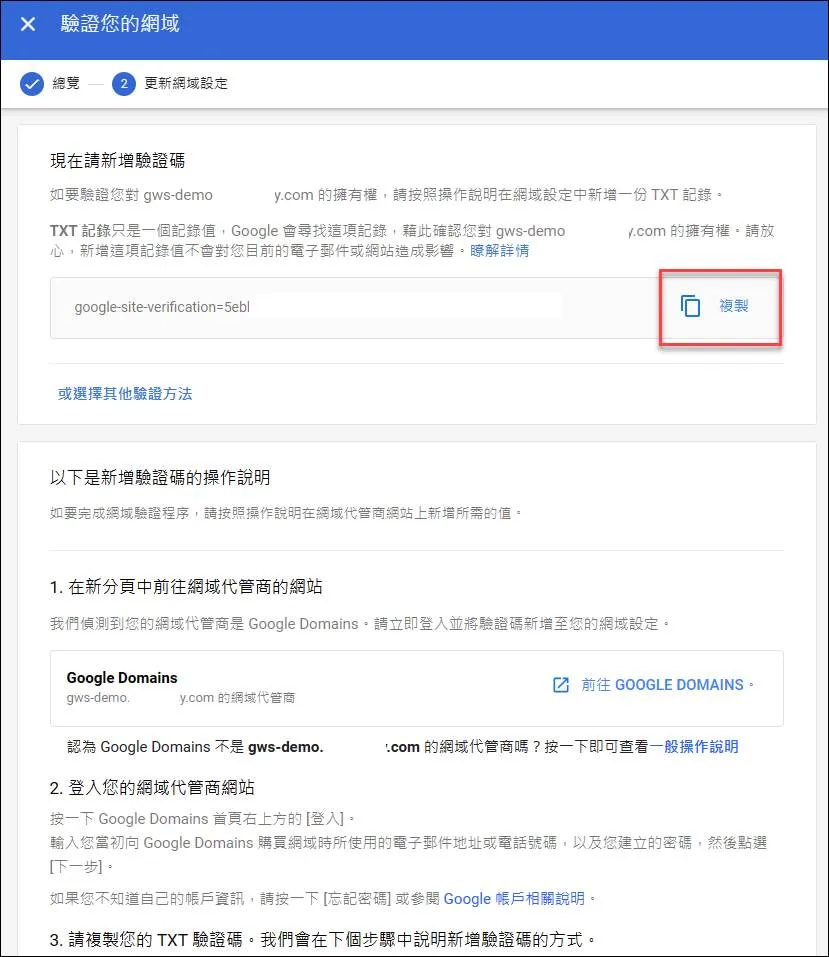
Go to GCP CloudDNS to set up the TXT record
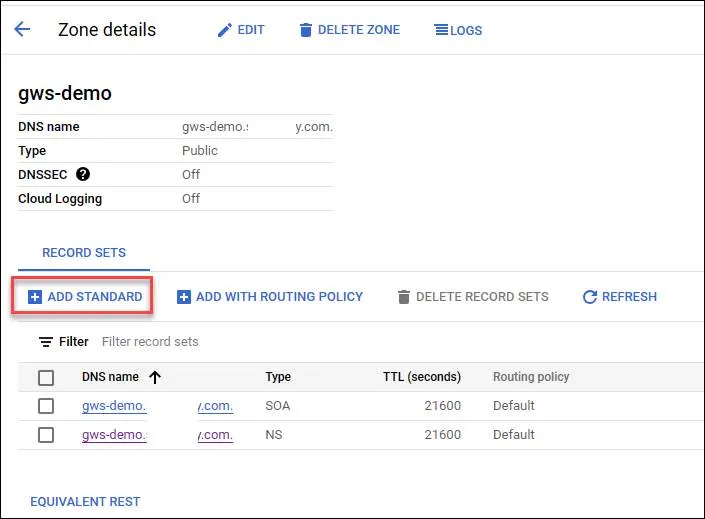
Create the record
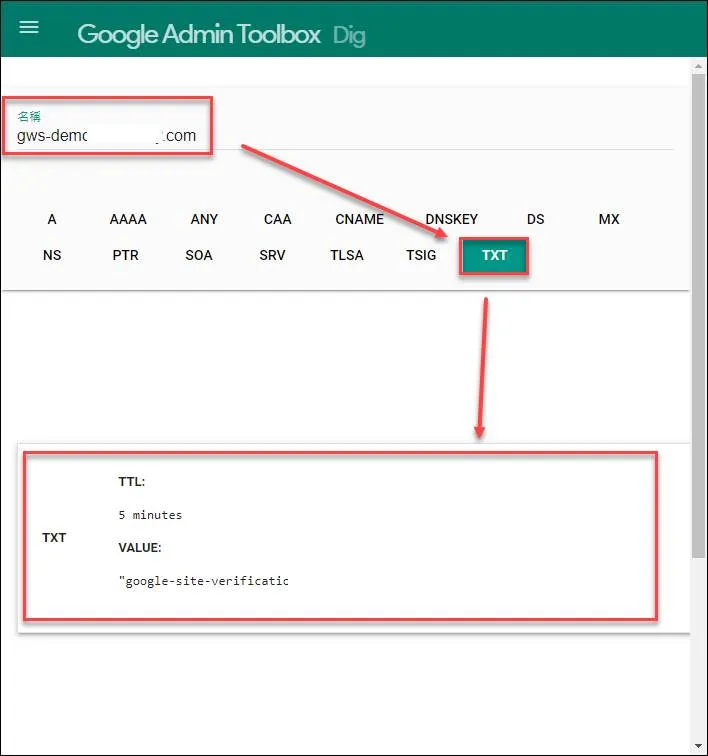
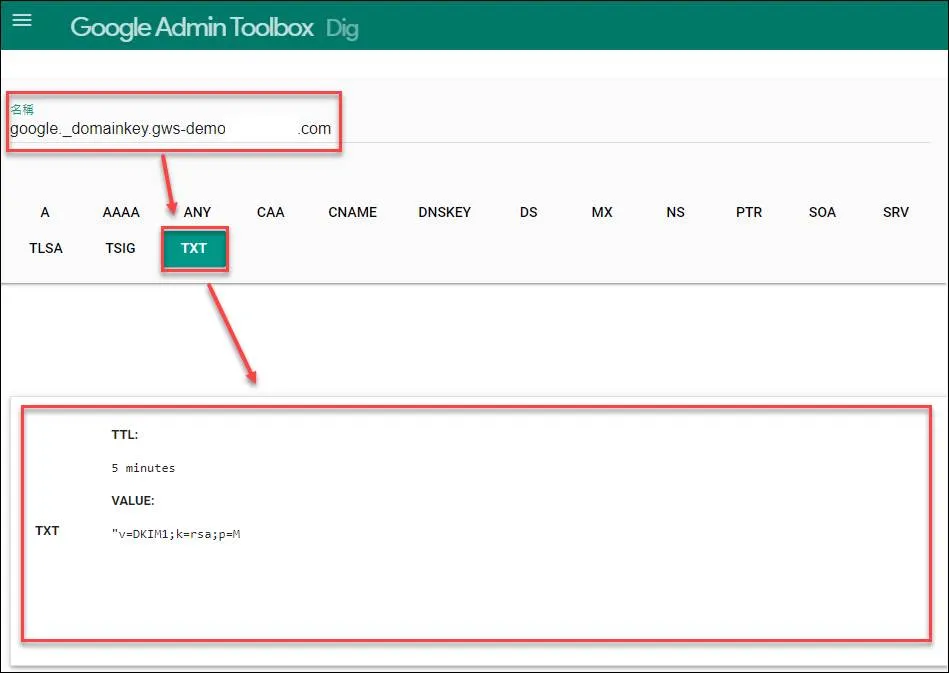
You can check if it’s effective at Google Dig tool
Start verification
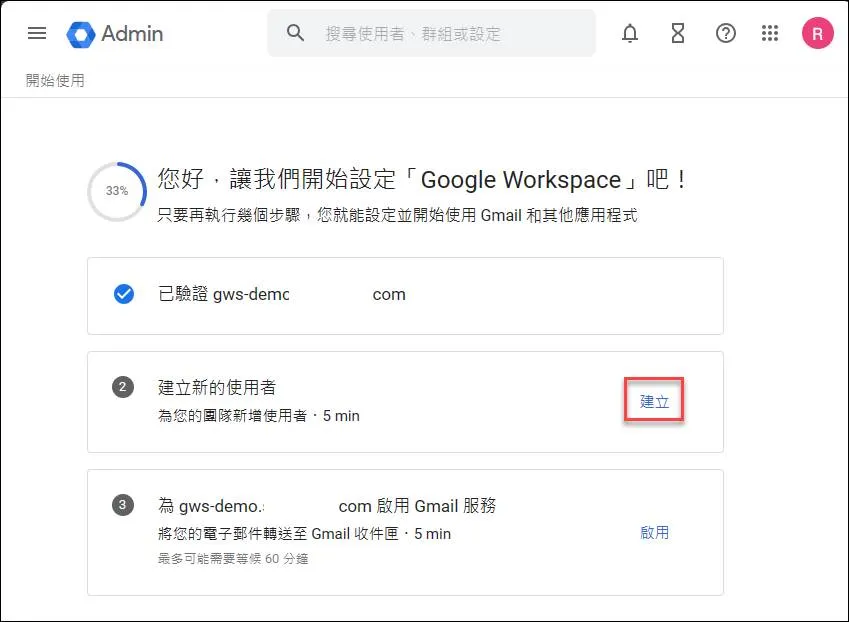
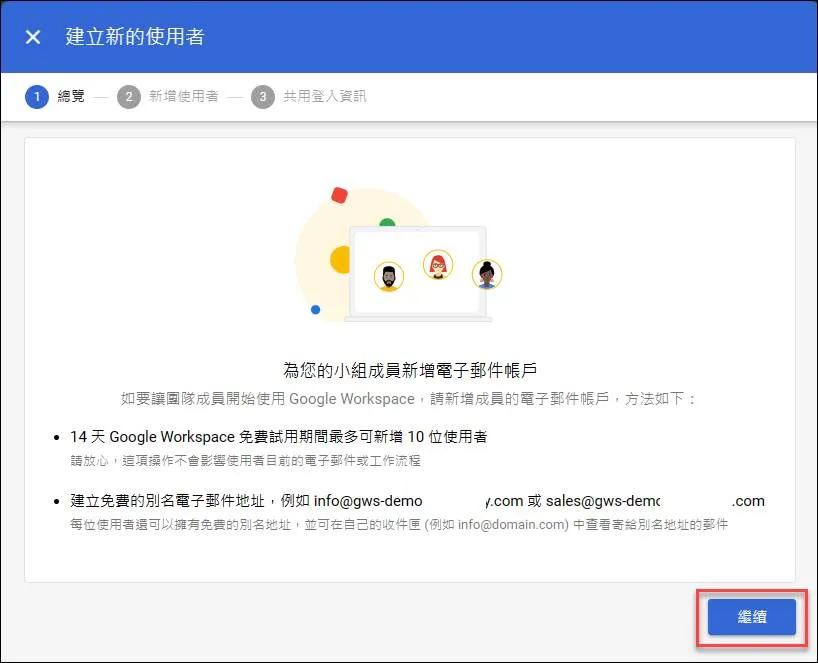
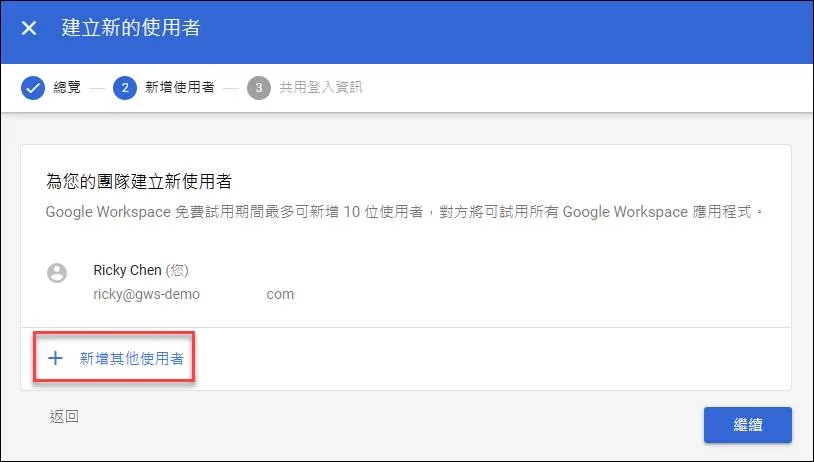
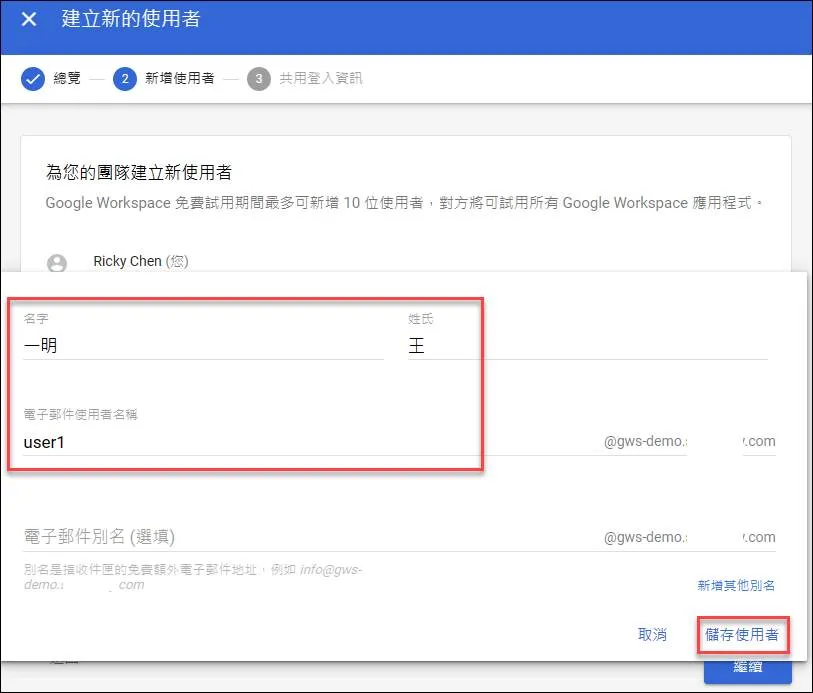
Create Users
Click Create
Click Continue
Click Add more users
Enter name and account
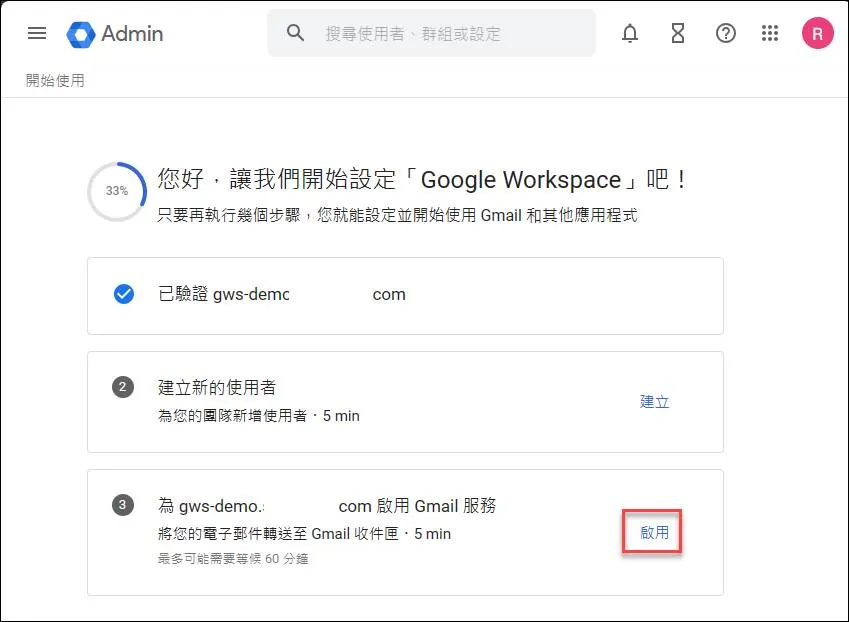
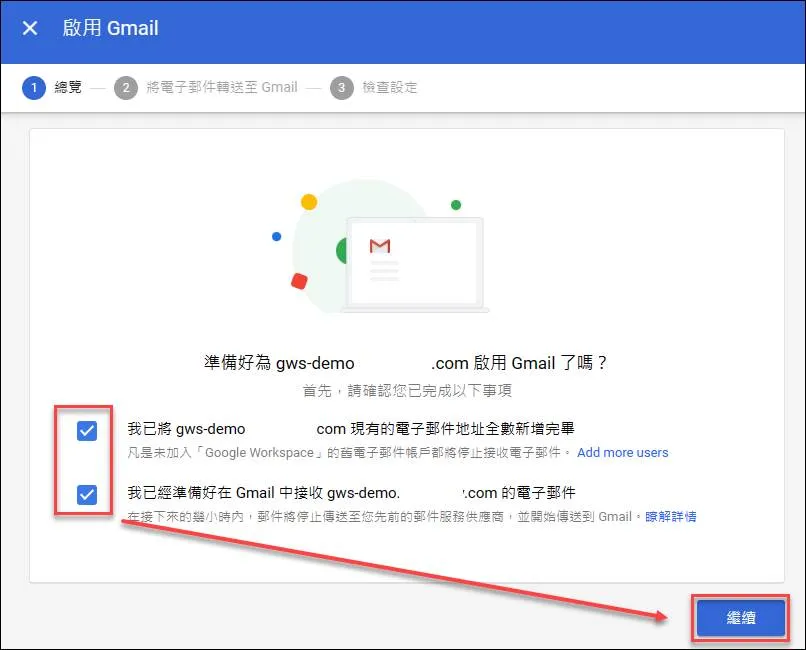
Enable Gmail Service
Click Enable
Check and click Continue
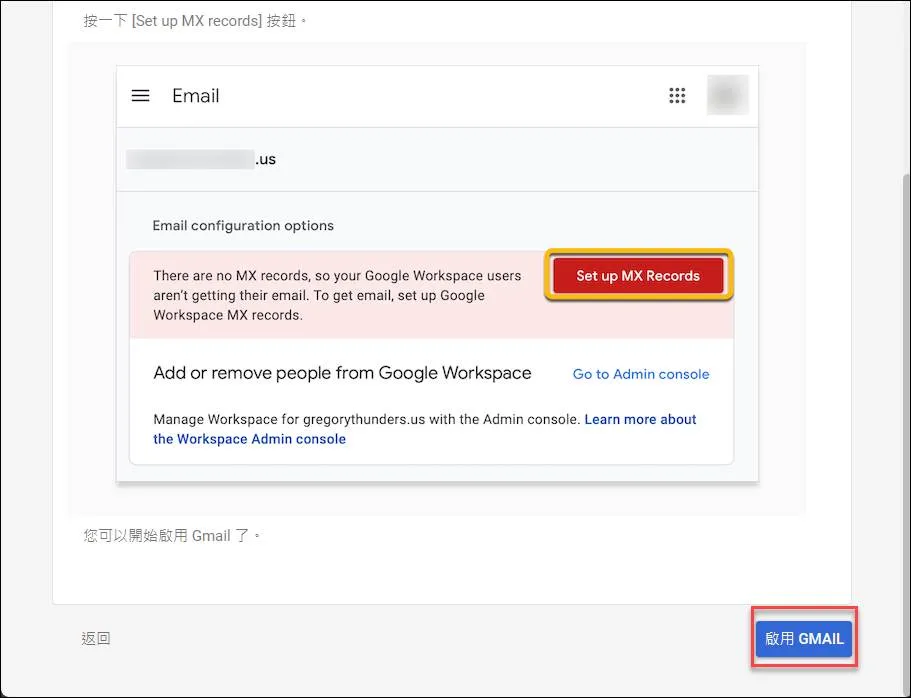
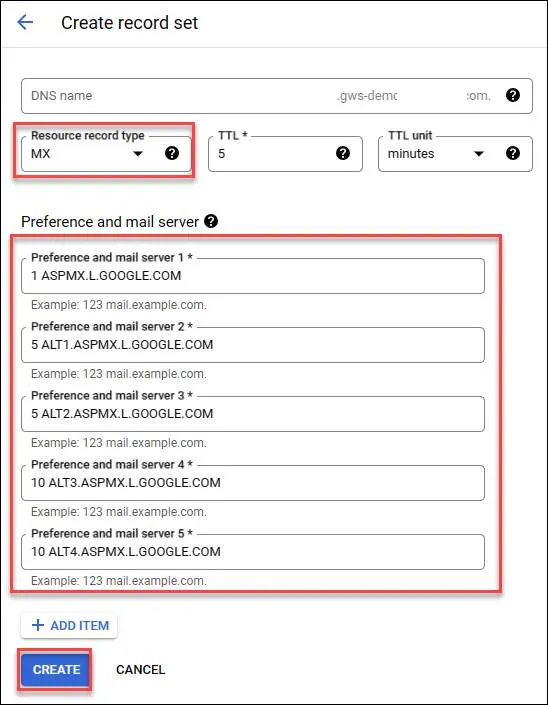
Set up MX Records
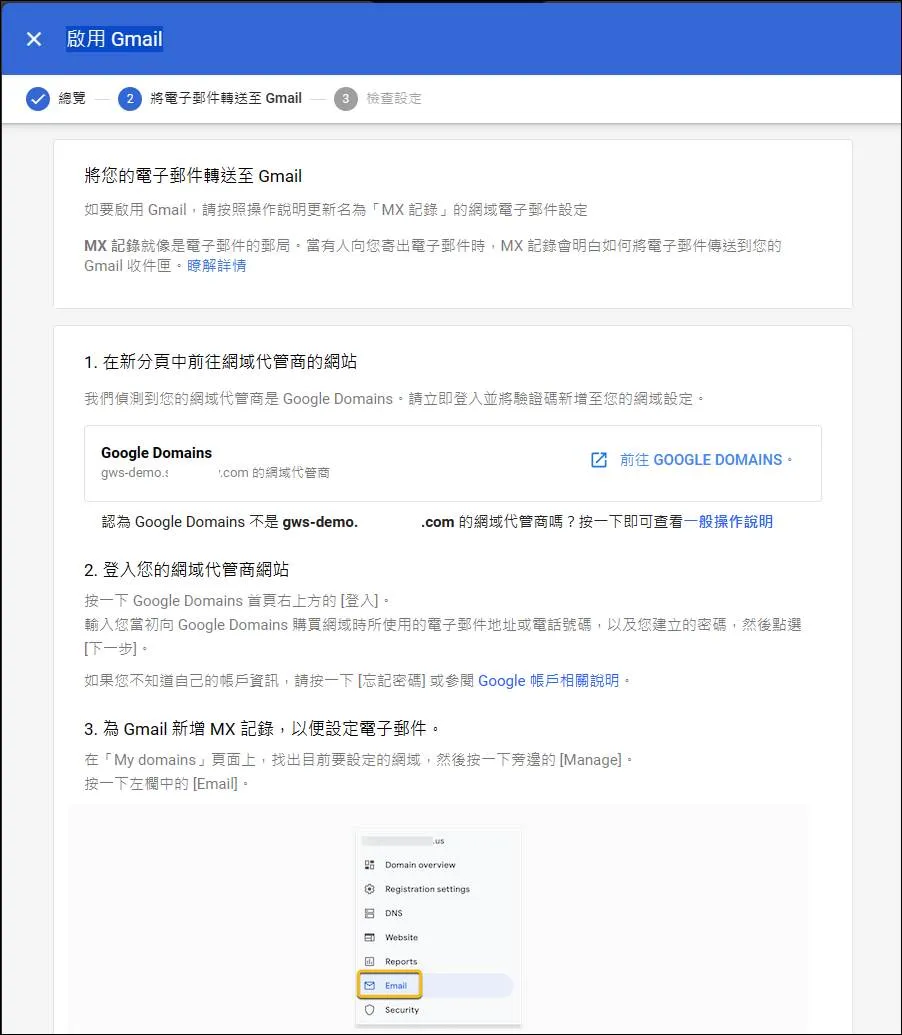
Scroll to the bottom and click Enable Gmail
MX record settings appear
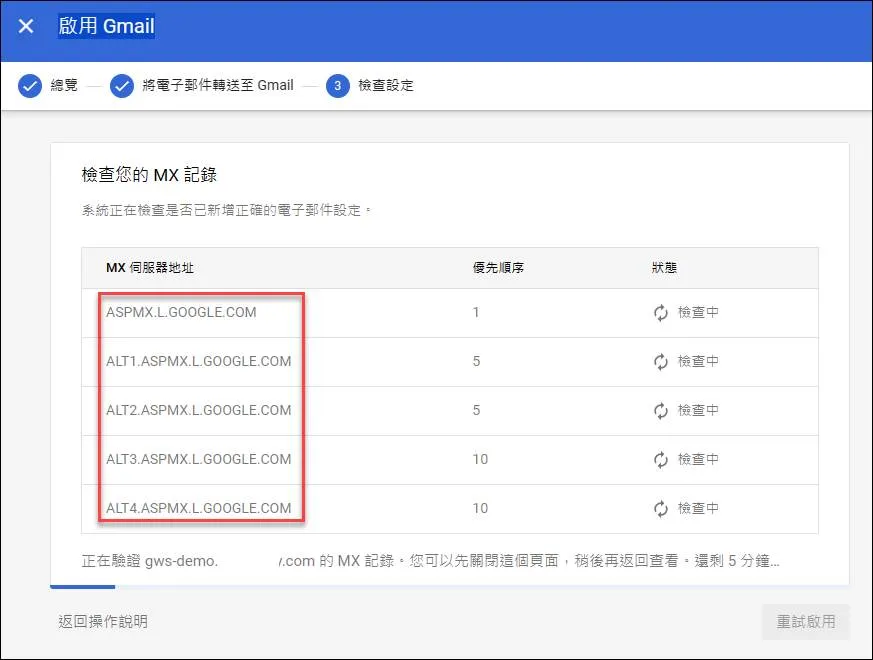
Go to GCP CloudDNS to set up, but add numbers before MX records, these numbers are priority
After completion, you’ll reach this page

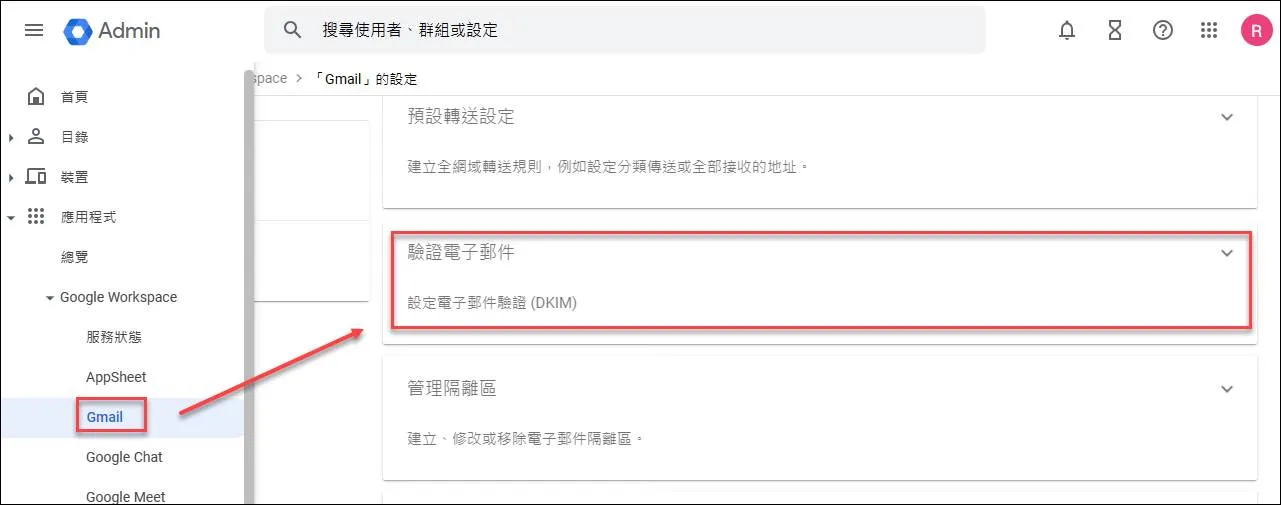
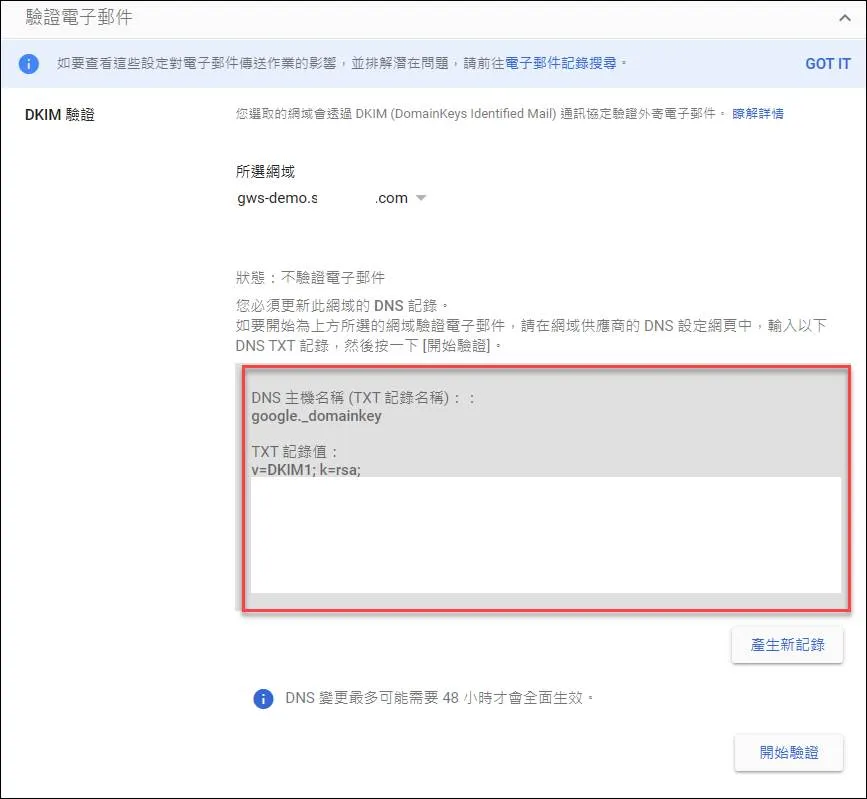
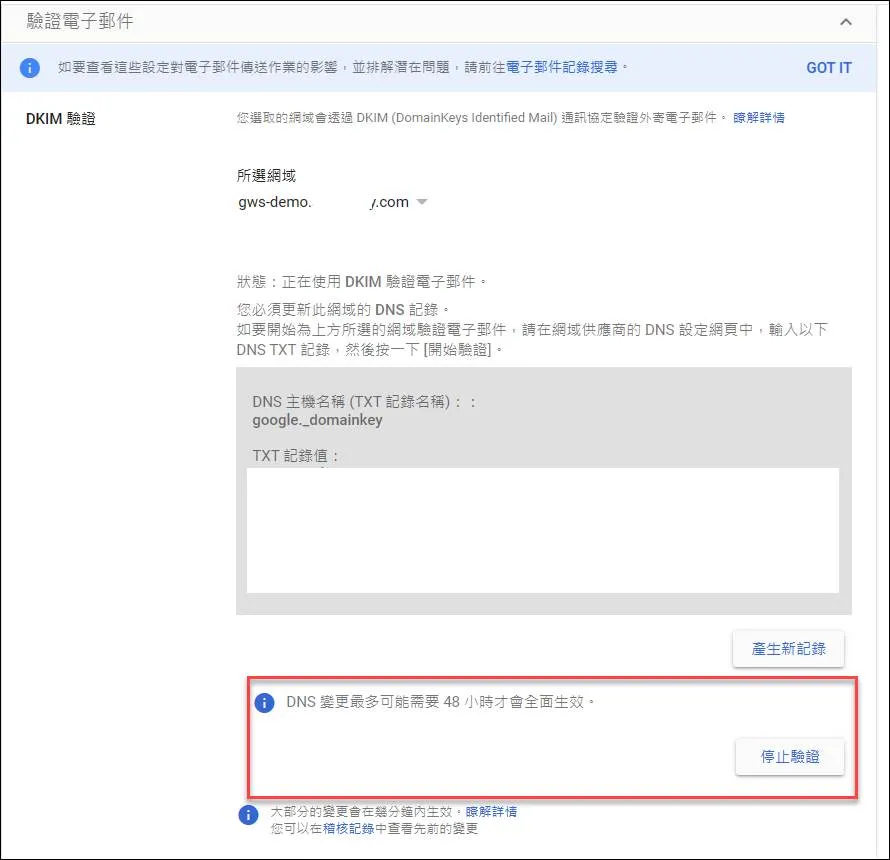
DKIM Verification
Enter
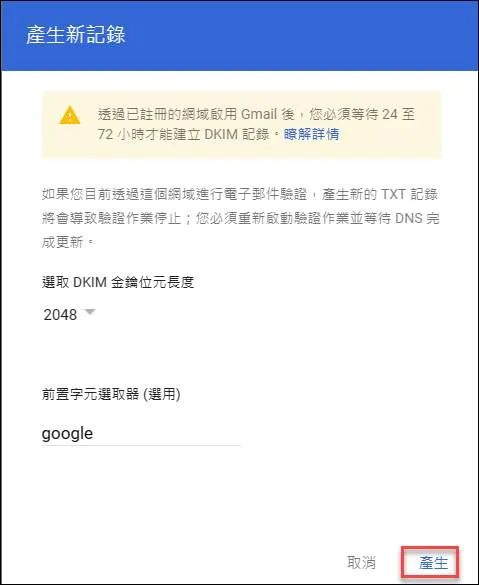
Click Generate new record

Click Generate
Copy the record
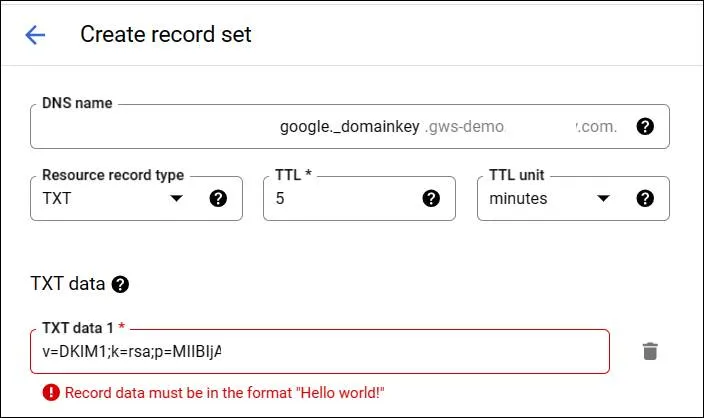
Paste into GCP CloudDNS, you’ll find it can’t pass verification
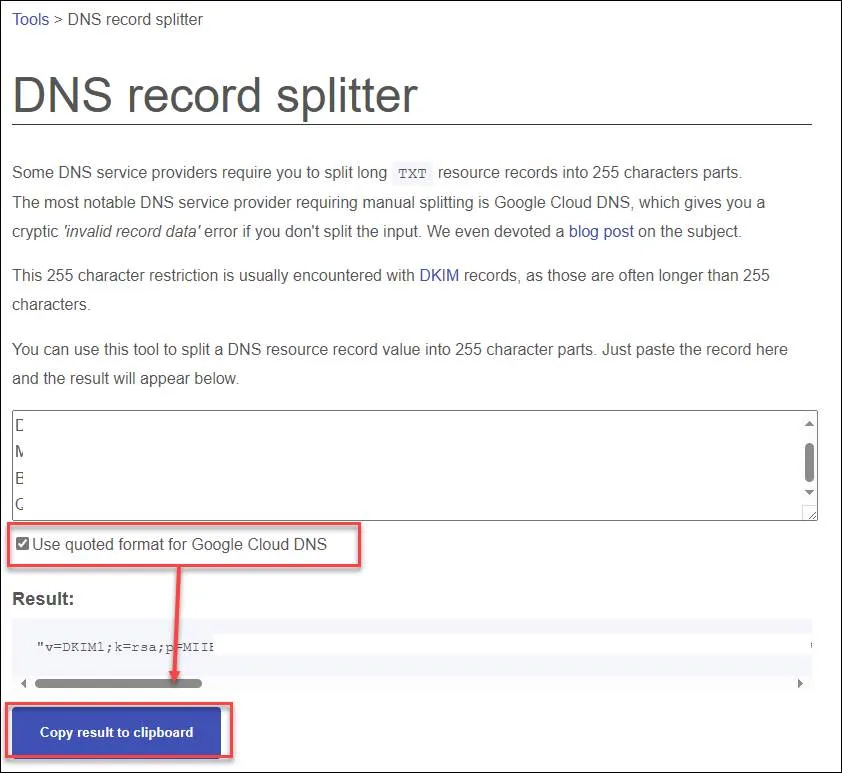
Paste the TXT content into DNS record splitter - Mailhardener tools, check “Use quoted format for Google Cloud DNS” and copy
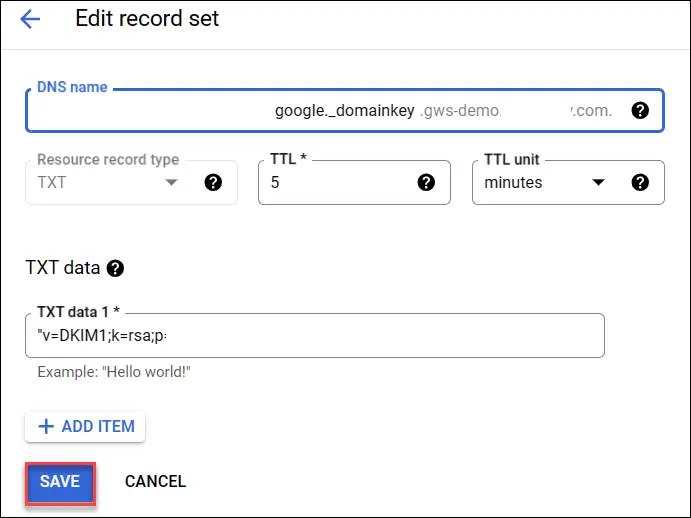
Paste into the interface to create and save
Check Google Dig tool to confirm if it’s working properly
Wait for it to take effect after completion
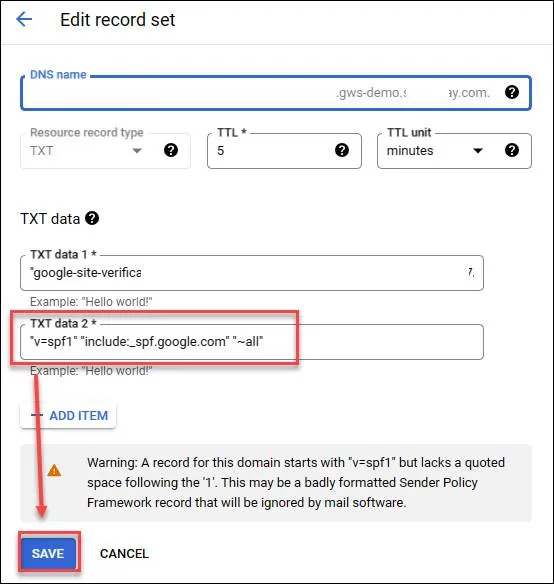
SPF Verification
Paste the TXT record "v=spf1" "include:_spf.google.com" "~all" into DNS