Replicating data from SQL Server to BigQuery by DataFusion
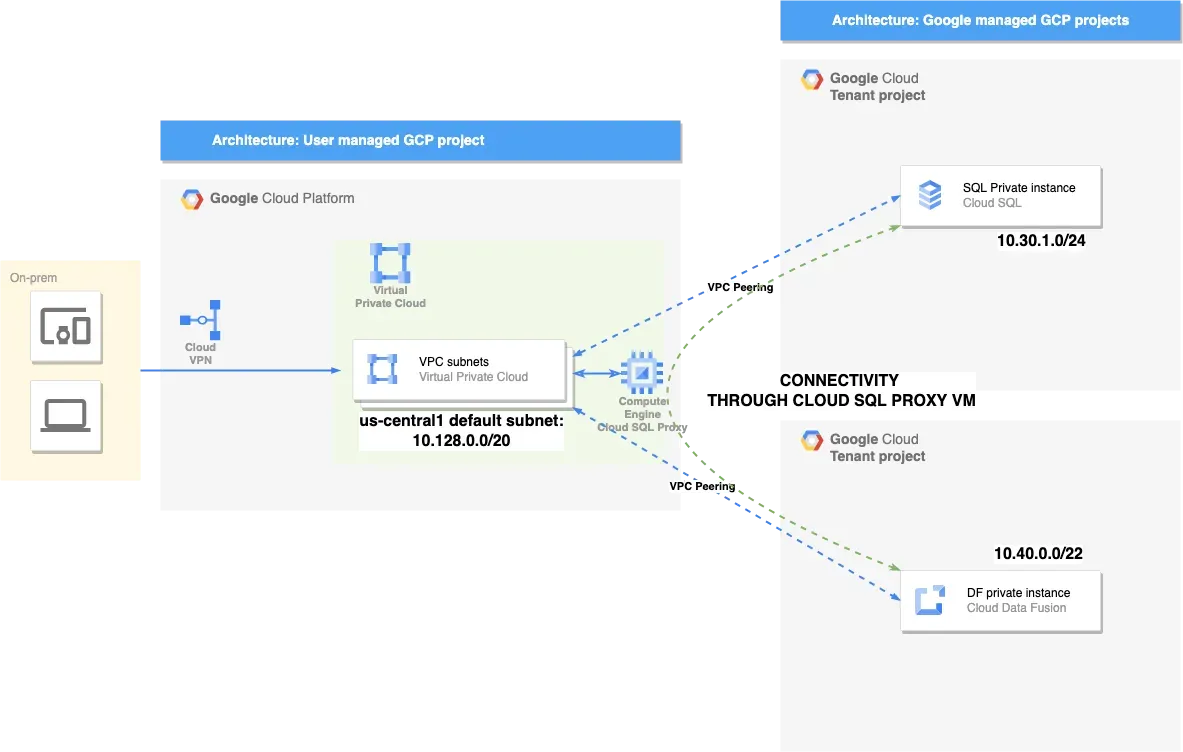
Scenario
- Refer to the official Replicating data from SQL Server to BigQuery guide for setup
- Refer to Connect Private Data Fusion instance with a Private Cloud SQL instance using CloudSQL proxy for setup

Therefore, a connection must be made through a GCE Proxy
Implementation Method
Prerequisites
Enable APIs
- Click here to enable related APIs
API activation link as follows:
1https://console.cloud.google.com/flows/enableapi?apiid=datafusion.googleapis.com,bigquery.googleapis.com,storage.googleapis.com,sqladmin.googleapis.comCreate VPC
1export PRJ_ID="PROJECT_ID"2export VPC_NAME="NAME"3
4gcloud compute networks create ${VPC_NAME} --project=${PRJ_ID} --subnet-mode=custom --mtu=1460 --bgp-routing-mode=regional5
6gcloud compute networks subnets create ${VPC_NAME}-us --project=${PRJ_ID} --range=10.1.1.0/24 --stack-type=IPV4_ONLY --network=${VPC_NAME} --region=us-central1 --enable-private-ip-google-access7
8gcloud compute --project=${PRJ_ID} firewall-rules create ${VPC_NAME}-allow-rdp --direction=INGRESS --priority=1000 --network=${VPC_NAME} --action=ALLOW --rules=tcp:3389 --source-ranges=0.0.0.0/09
10gcloud compute --project=${PRJ_ID} firewall-rules create ${VPC_NAME}-allow-internal --direction=INGRESS --priority=1000 --network=${VPC_NAME} --action=ALLOW --rules=all --source-ranges=10.0.0.0/8
Create CloudSQL
Create CloudSQL for MSSQL, enable private IP, and then create test data
Create Test Data
- Import test data
- Need to use SSMS tool to connect to the MSSQL host; this example uses GCE
- First, create a Windows Server 2022 host
- Download and install SSMS tool
- Enable CDC synchronization
Import Test Data
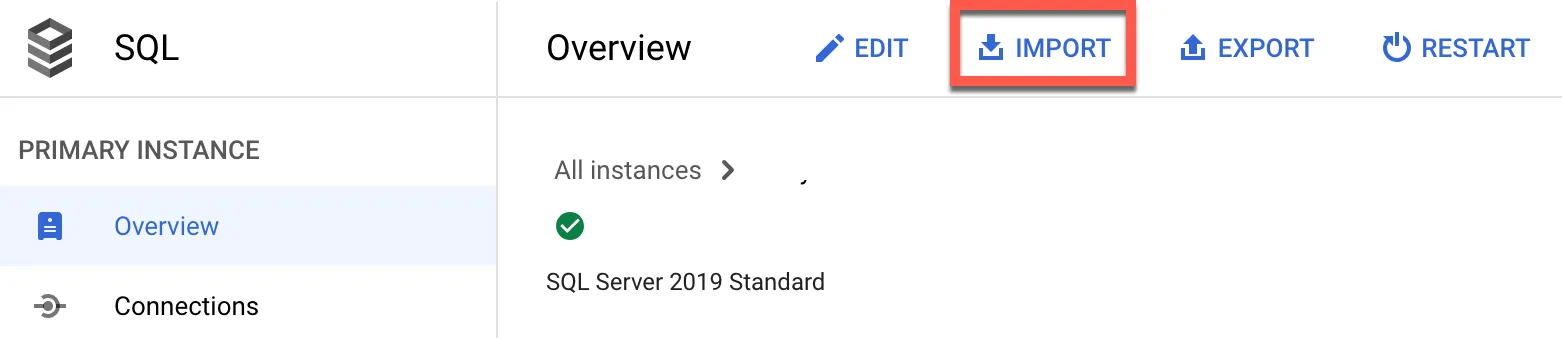
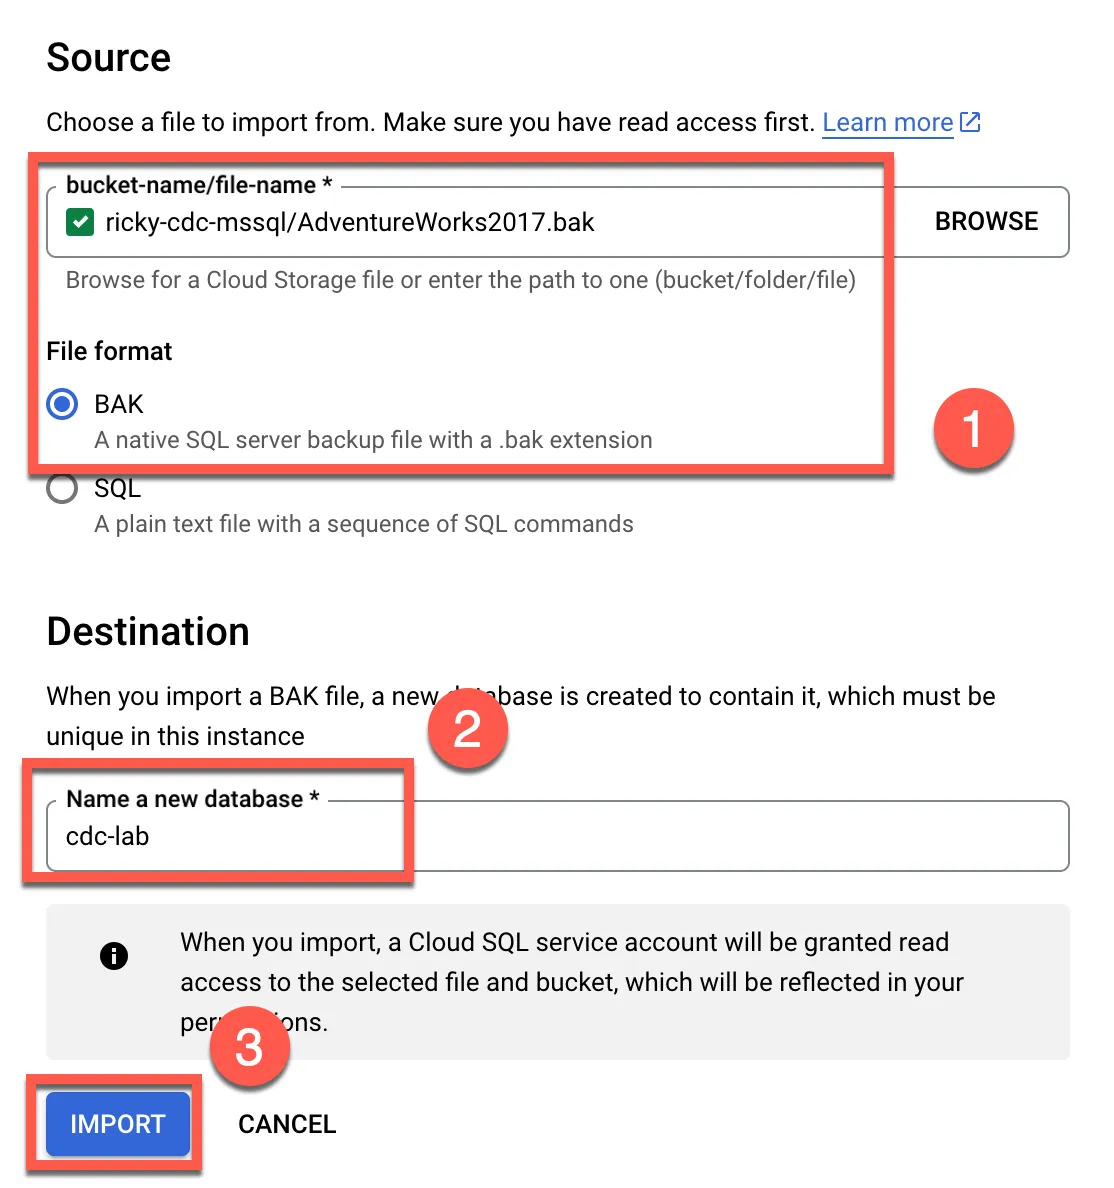
Download AdventureWorks2017.bak file and import it into the database. In CloudSQL, select import
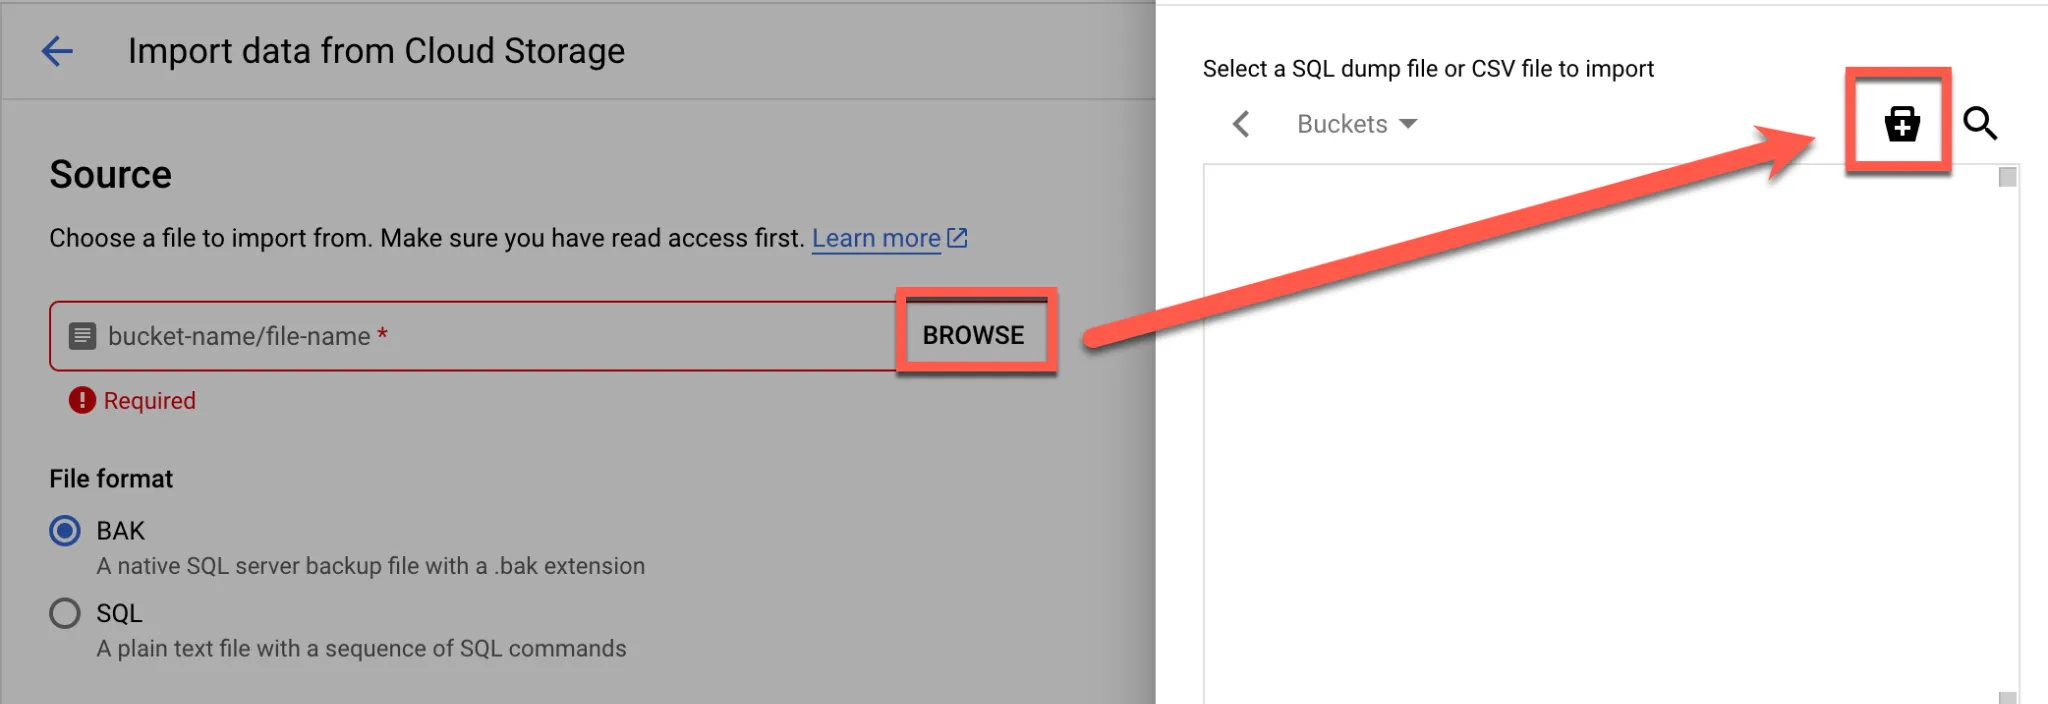
Click BROWSE to create a new Bucket
Enter Bucket name
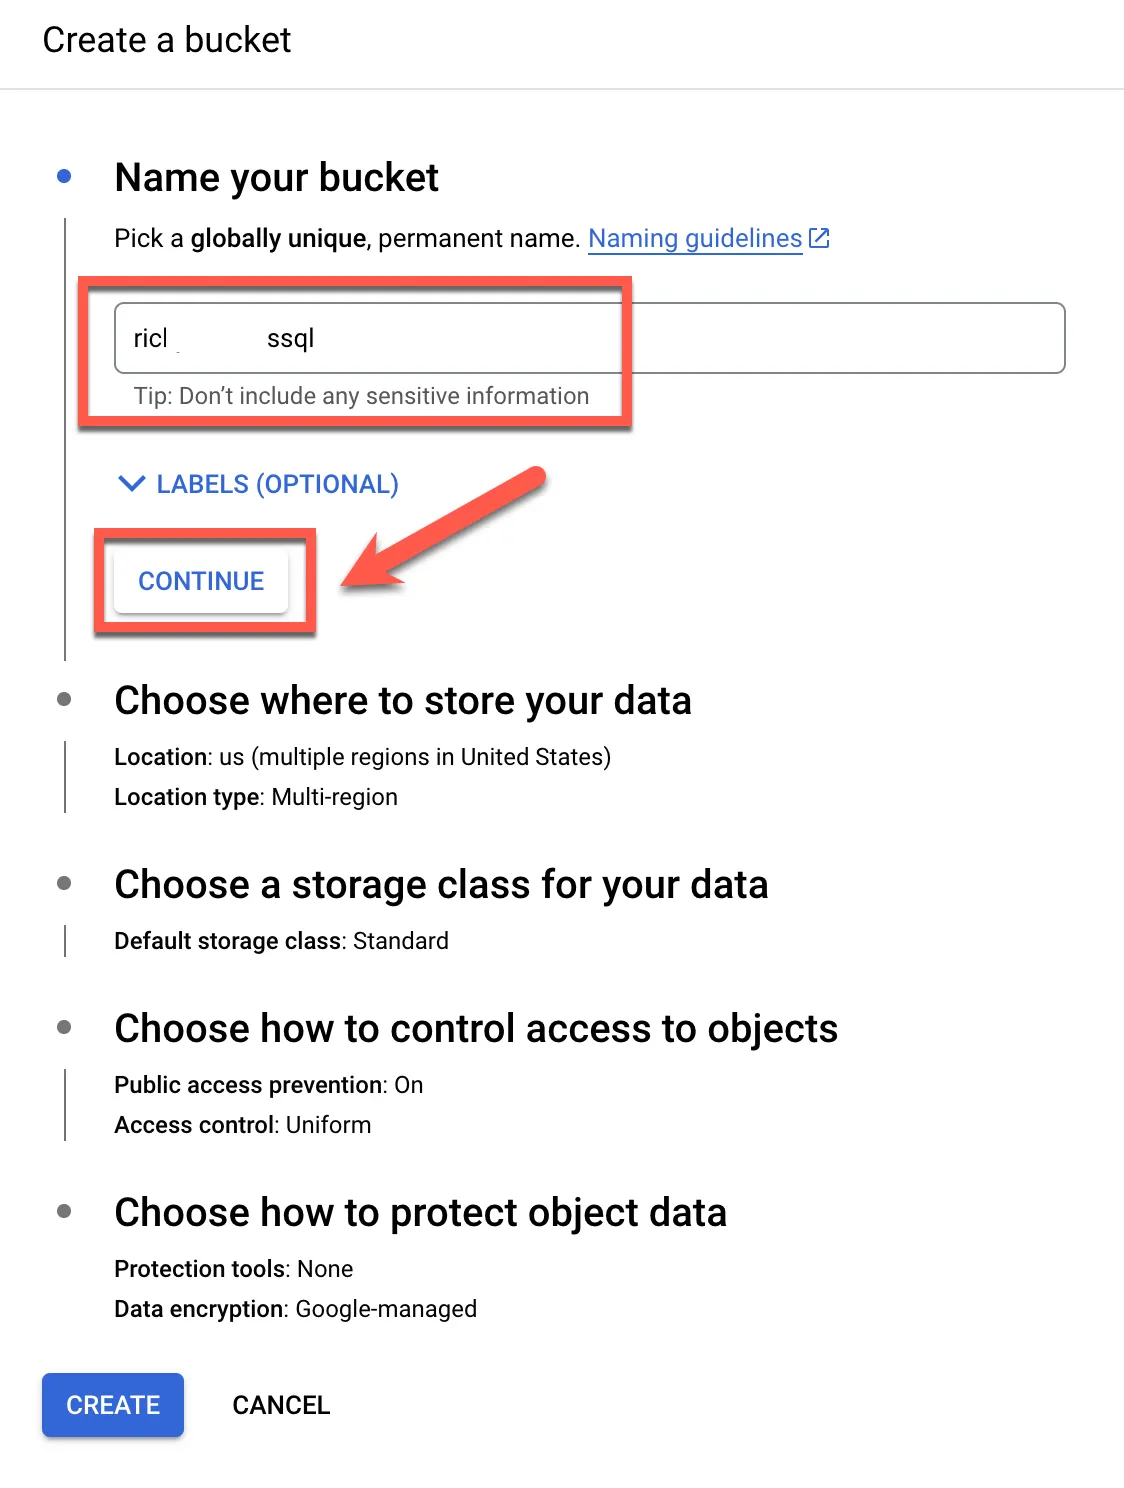
Select Region
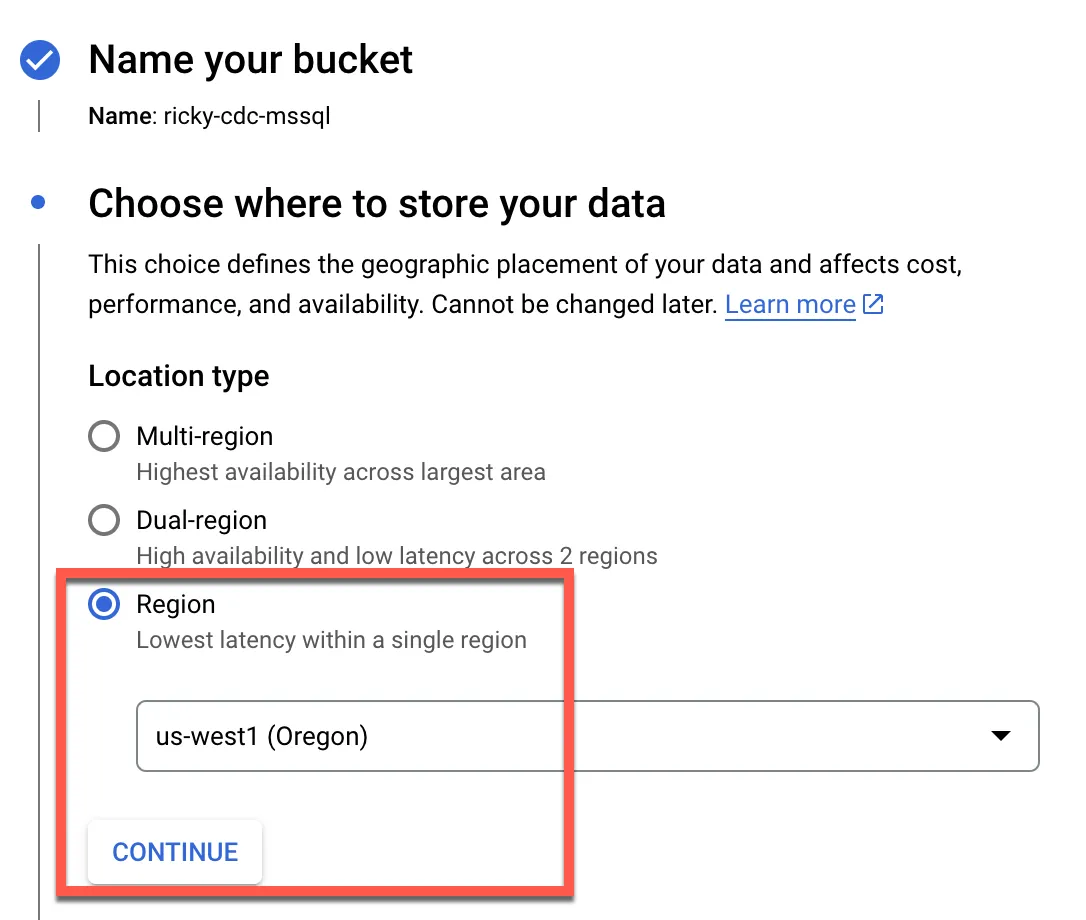
Use default, click continue
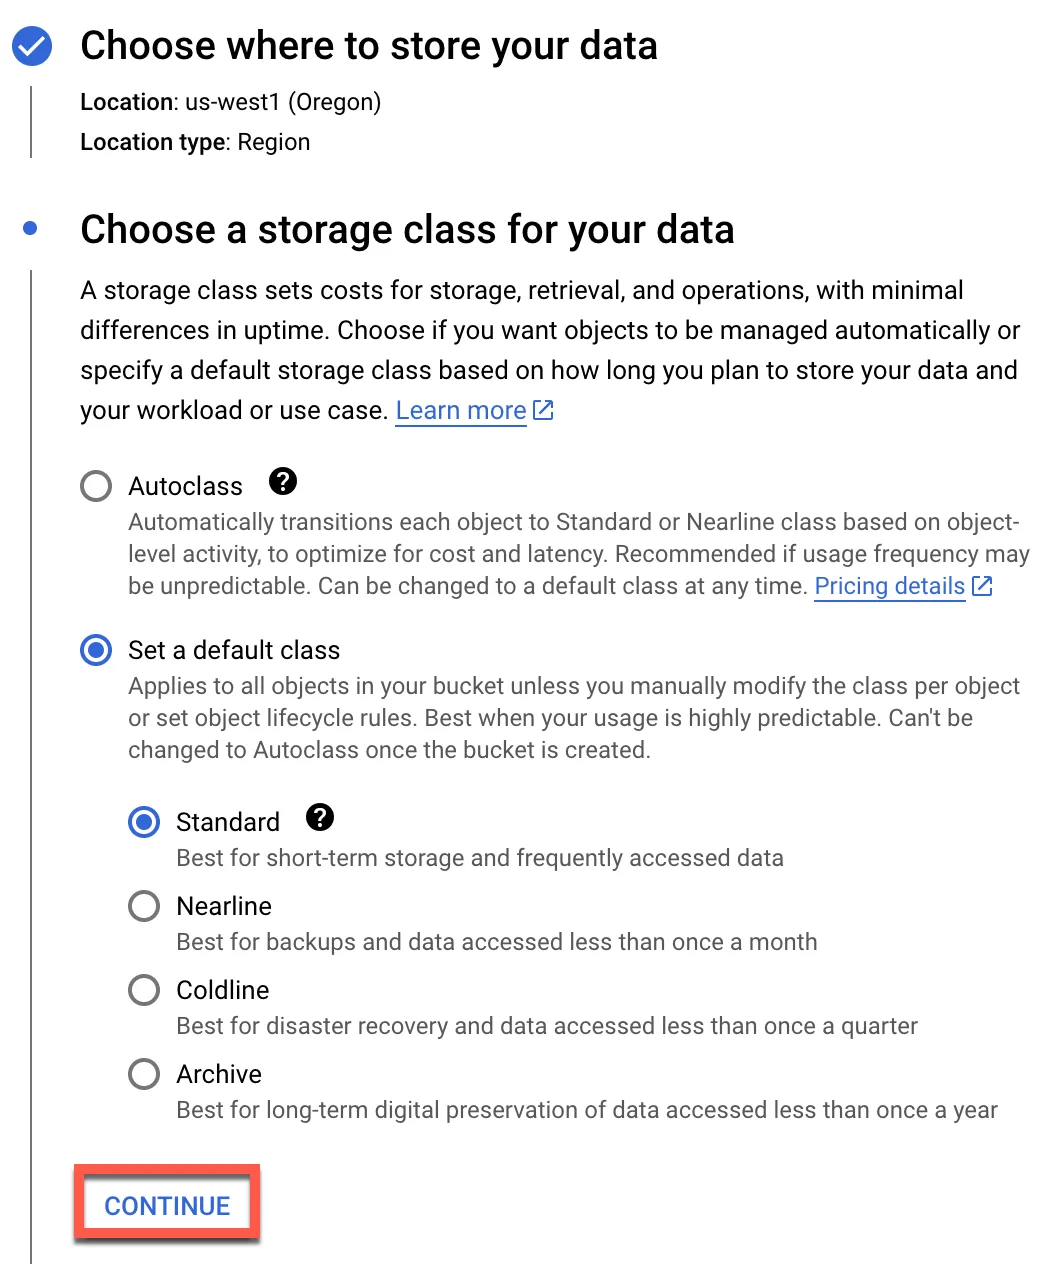
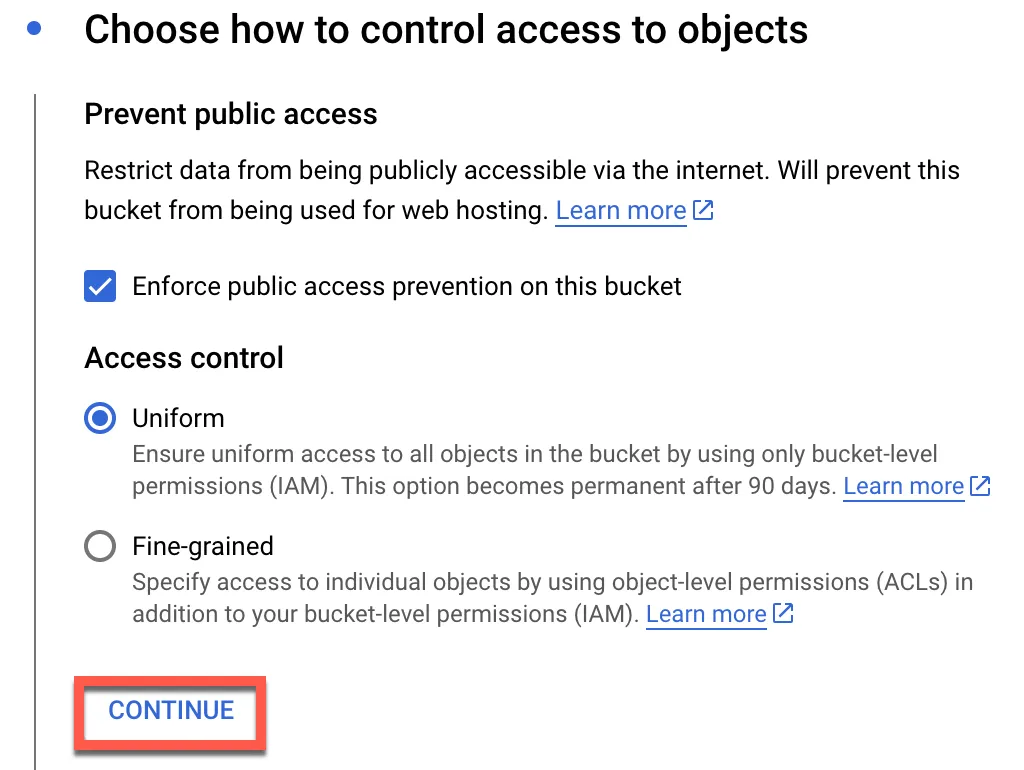
Again, select default
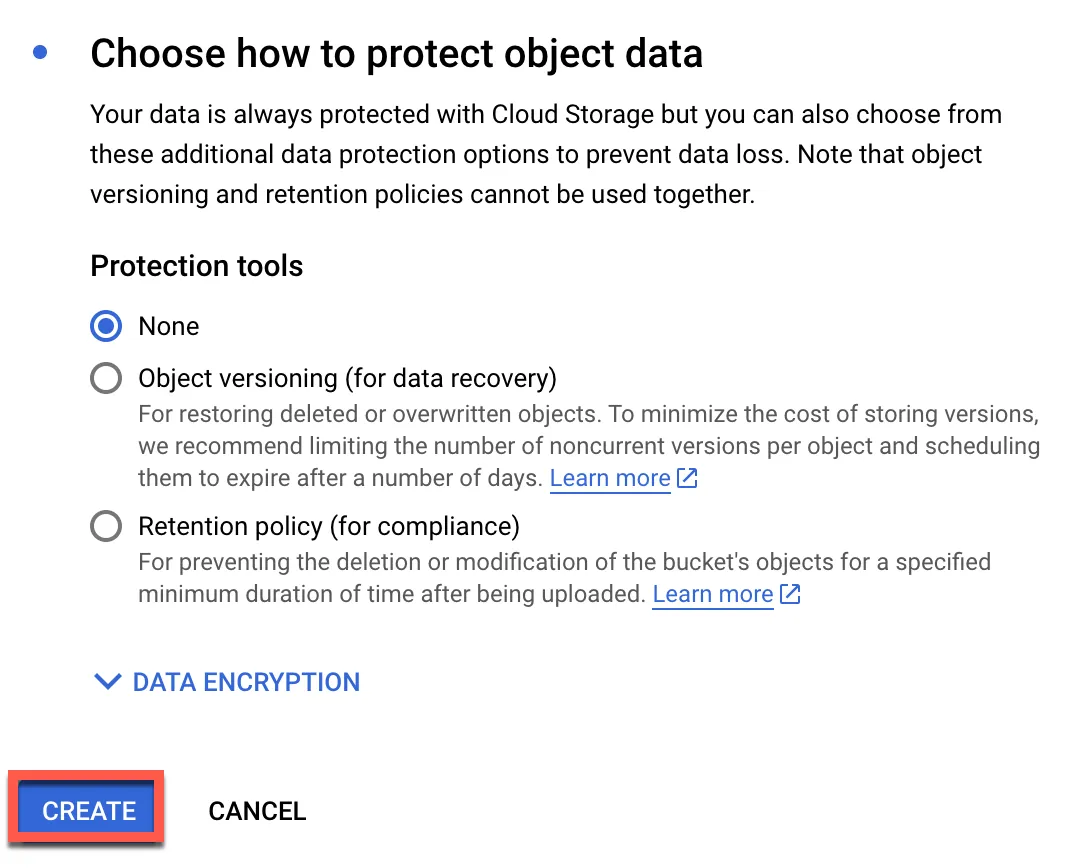
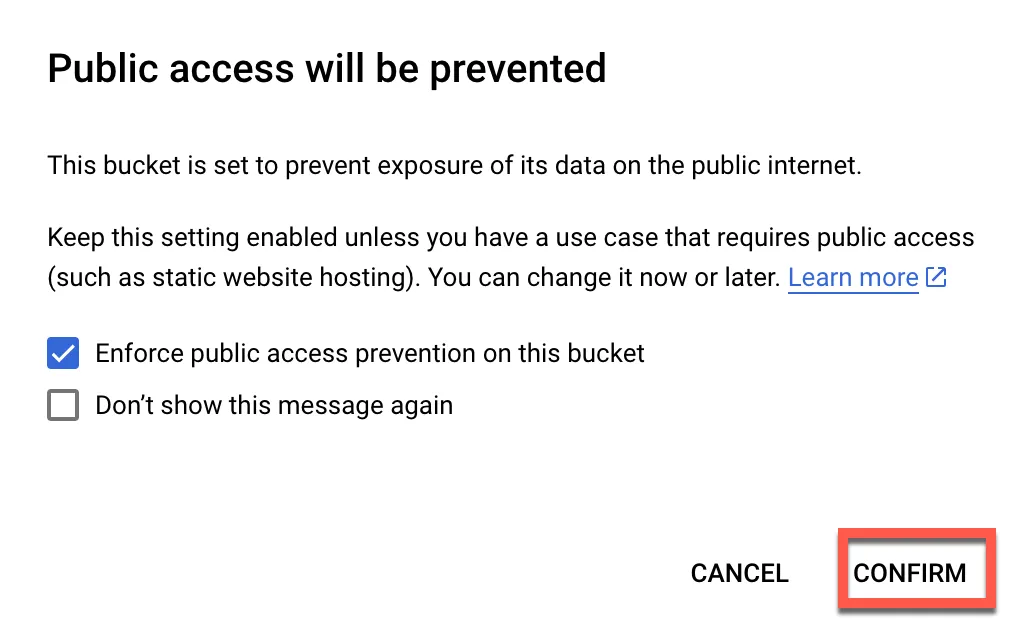
Click create
Click confirm
After uploading to the Bucket, select the bak file
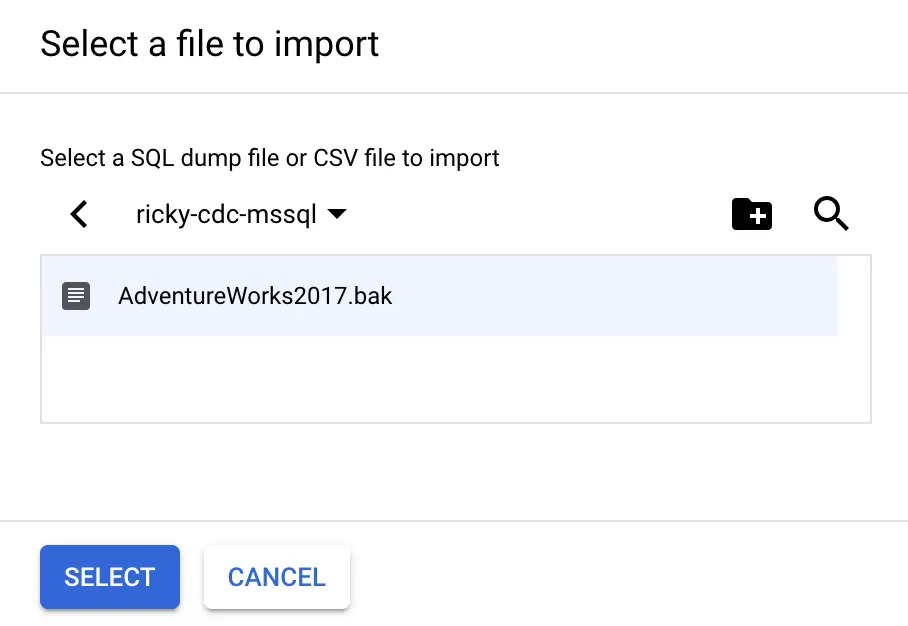
- Select the bak file uploaded to the bucket
- Enter the database name to be created after import
- Import
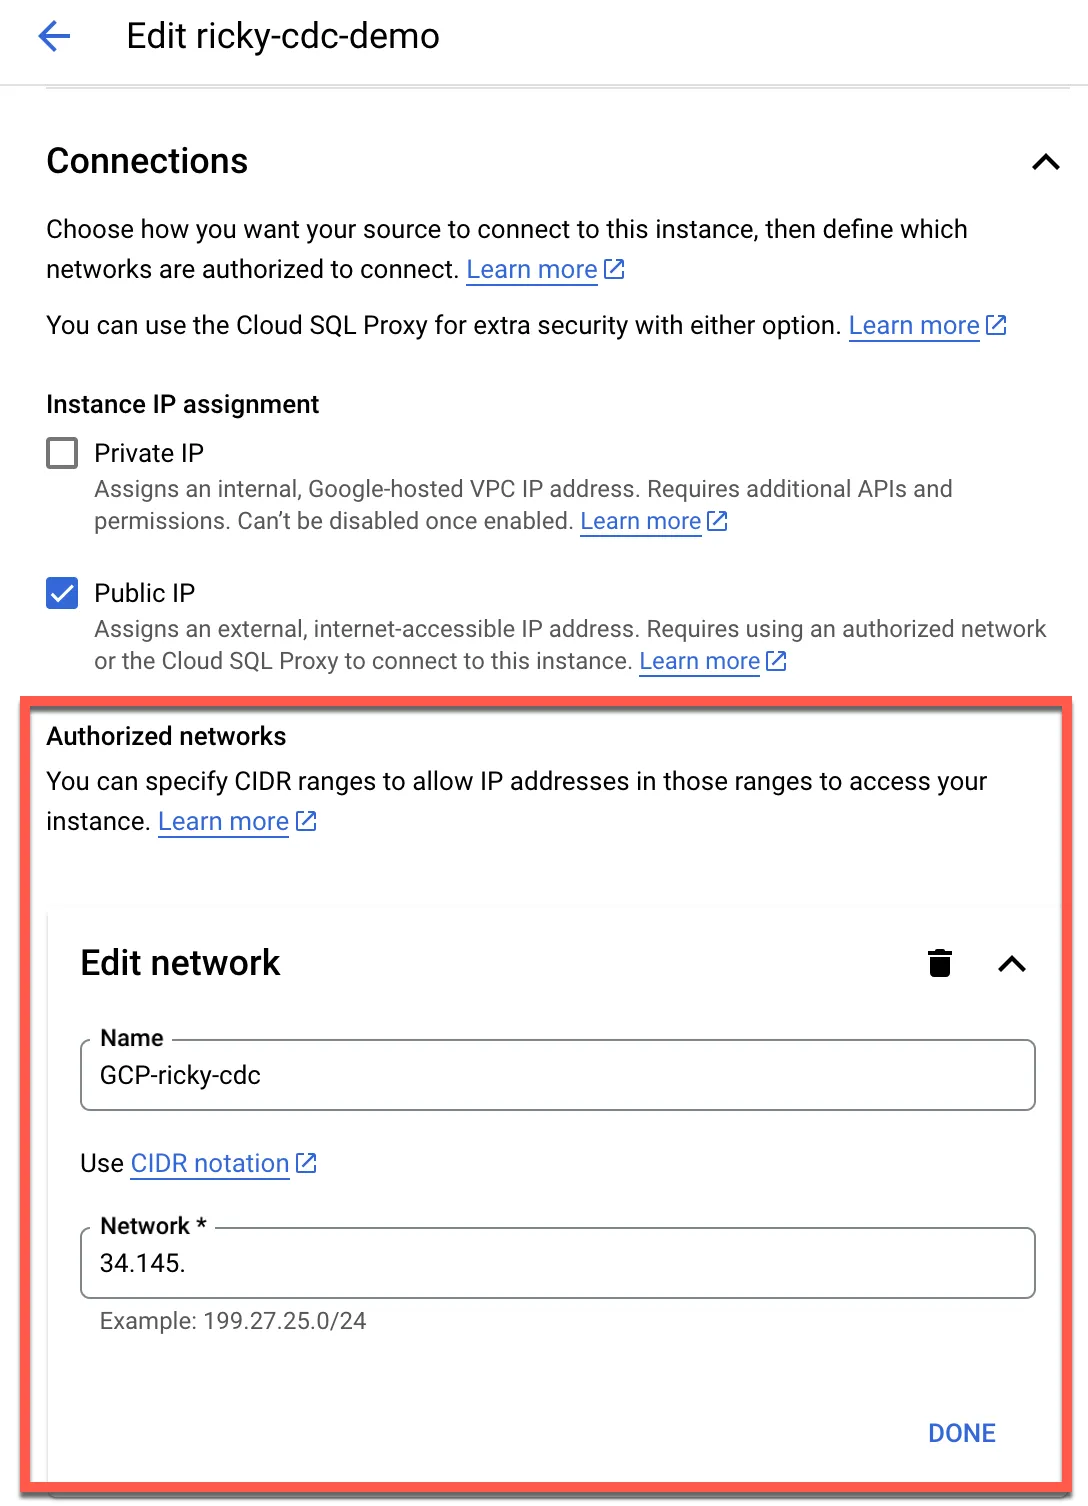
Set up Authorized network
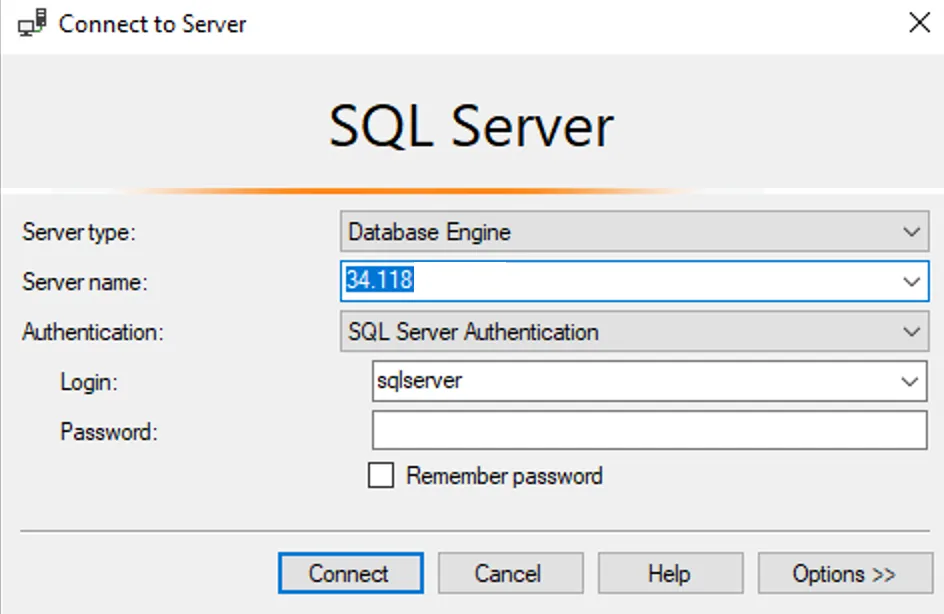
Verify using SSMS
Enter CloudSQL IP for Server name, both internal and external IP are acceptable Select SQL Server Authentication for Authentication Default Login is sqlserver Password is the one set previously
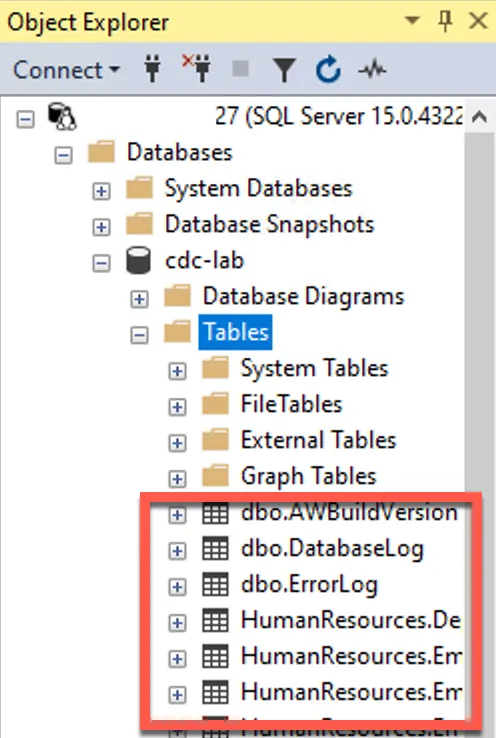
Check if import was successful
Set up CDC Synchronization
Refer to Enable change data capture (CDC) for setup
Enable database CDC synchronization feature
1EXEC msdb.dbo.gcloudsql_cdc_enable_db [DB_NAME]Expected result

Enable CDC capture job
1EXEC sys.sp_cdc_start_job @job_type = N'cleanup'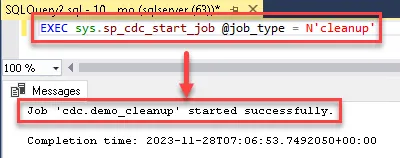
Enable table synchronization
1EXEC sys.sp_cdc_enable_table2 @source_schema = N'dbo',3 @source_name = N'age',4 @role_name = N'CDC'Verify if enabled successfully
1EXECUTE sys.sp_cdc_help_change_data_capture2 @source_schema = N'dbo',3 @source_name = N'age'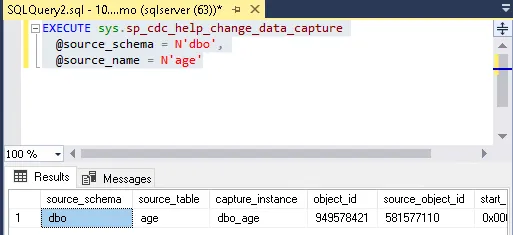
Create CloudSQL Proxy VM
Since DataFusion cannot directly connect to CloudSQL, we must create a GCE running CloudSQL Proxy for connection
First, create an Ubuntu 20.04 VM and install MSSQL Client packages following these steps
Install SQL Server command-line tools on Linux - SQL Server | Microsoft Learn
1curl https://packages.microsoft.com/keys/microsoft.asc | sudo tee /etc/apt/trusted.gpg.d/microsoft.asc2curl https://packages.microsoft.com/config/ubuntu/20.04/prod.list | sudo tee /etc/apt/sources.list.d/mssql-release.list3sudo apt-get update4sudo apt-get install mssql-tools18 unixodbc-dev5echo 'export PATH="$PATH:/opt/mssql-tools18/bin"' >> ~/.bashrc6source ~/.bashrcDownload CloudSQL Proxy
1cd /opt2curl -o cloud-sql-proxy https://storage.googleapis.com/cloud-sql-connectors/cloud-sql-proxy/v2.7.2/cloud-sql-proxy.linux.amd643chmod +x cloud-sql-proxySet up startup, remember to replace CloudSQL Connection name
1export INSTANCE_CONNECTION_NAME="YOUR_CONNECTION_NAME"2echo "/opt/cloud-sql-proxy --address 0.0.0.0 --port 1433 ${INSTANCE_CONNECTION_NAME} --private-ip &" > /opt/start_proxy.sh3sed -i '1i #!/bin/sh' /opt/start_proxy.sh4chmod +x /opt/start_proxy.sh5echo "[Unit]6Description=start cloudsql proxy7
8[Service]9ExecStart=/opt/start_proxy.sh10Type=oneshot11RemainAfterExit=yes12
13[Install]14WantedBy=multi-user.target" > /etc/systemd/system/cloudsqlproxy.service15systemctl daemon-reload16systemctl enable cloudsqlproxy.service
Test using sqlcmd
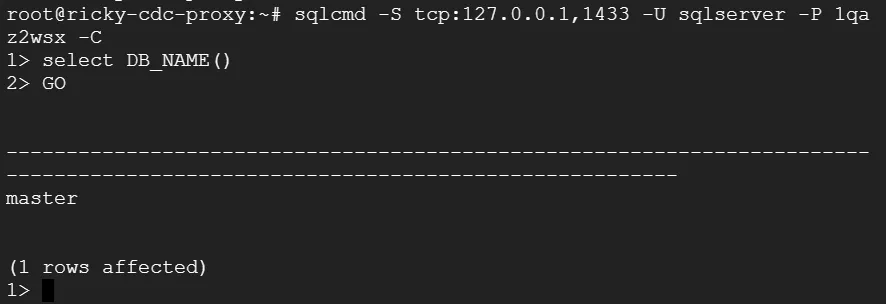
1/opt/start_proxy.sh2sqlcmd -S tcp:127.0.0.1,1433 -U YOUR_USERNAME -P YOUR_PASSWORD -CYou can use the following command to query the database
1select DB_NAME()2GOOutput example
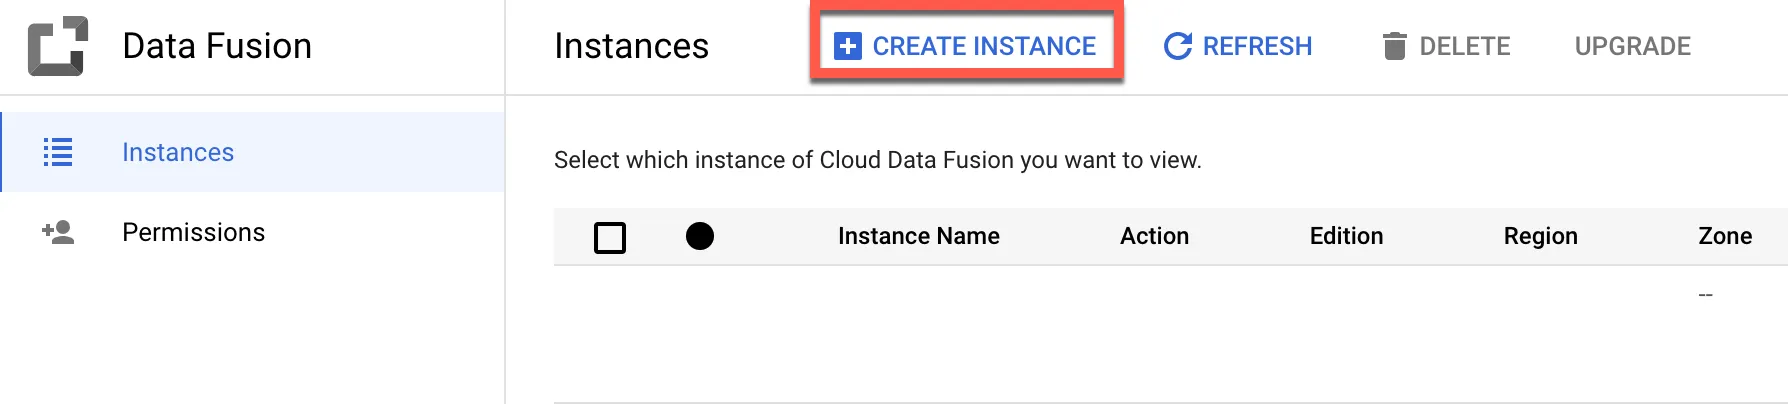
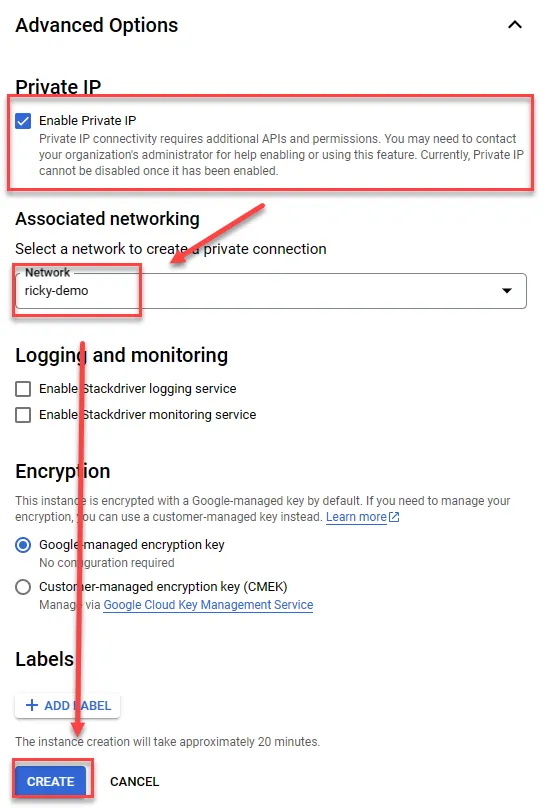
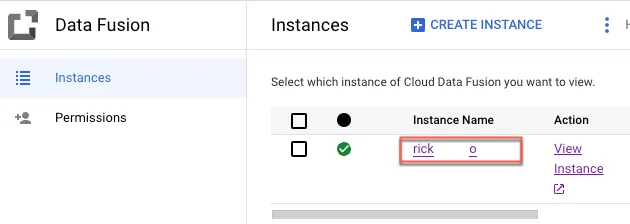
Create Cloud Data Fusion instance
Click here to create instance
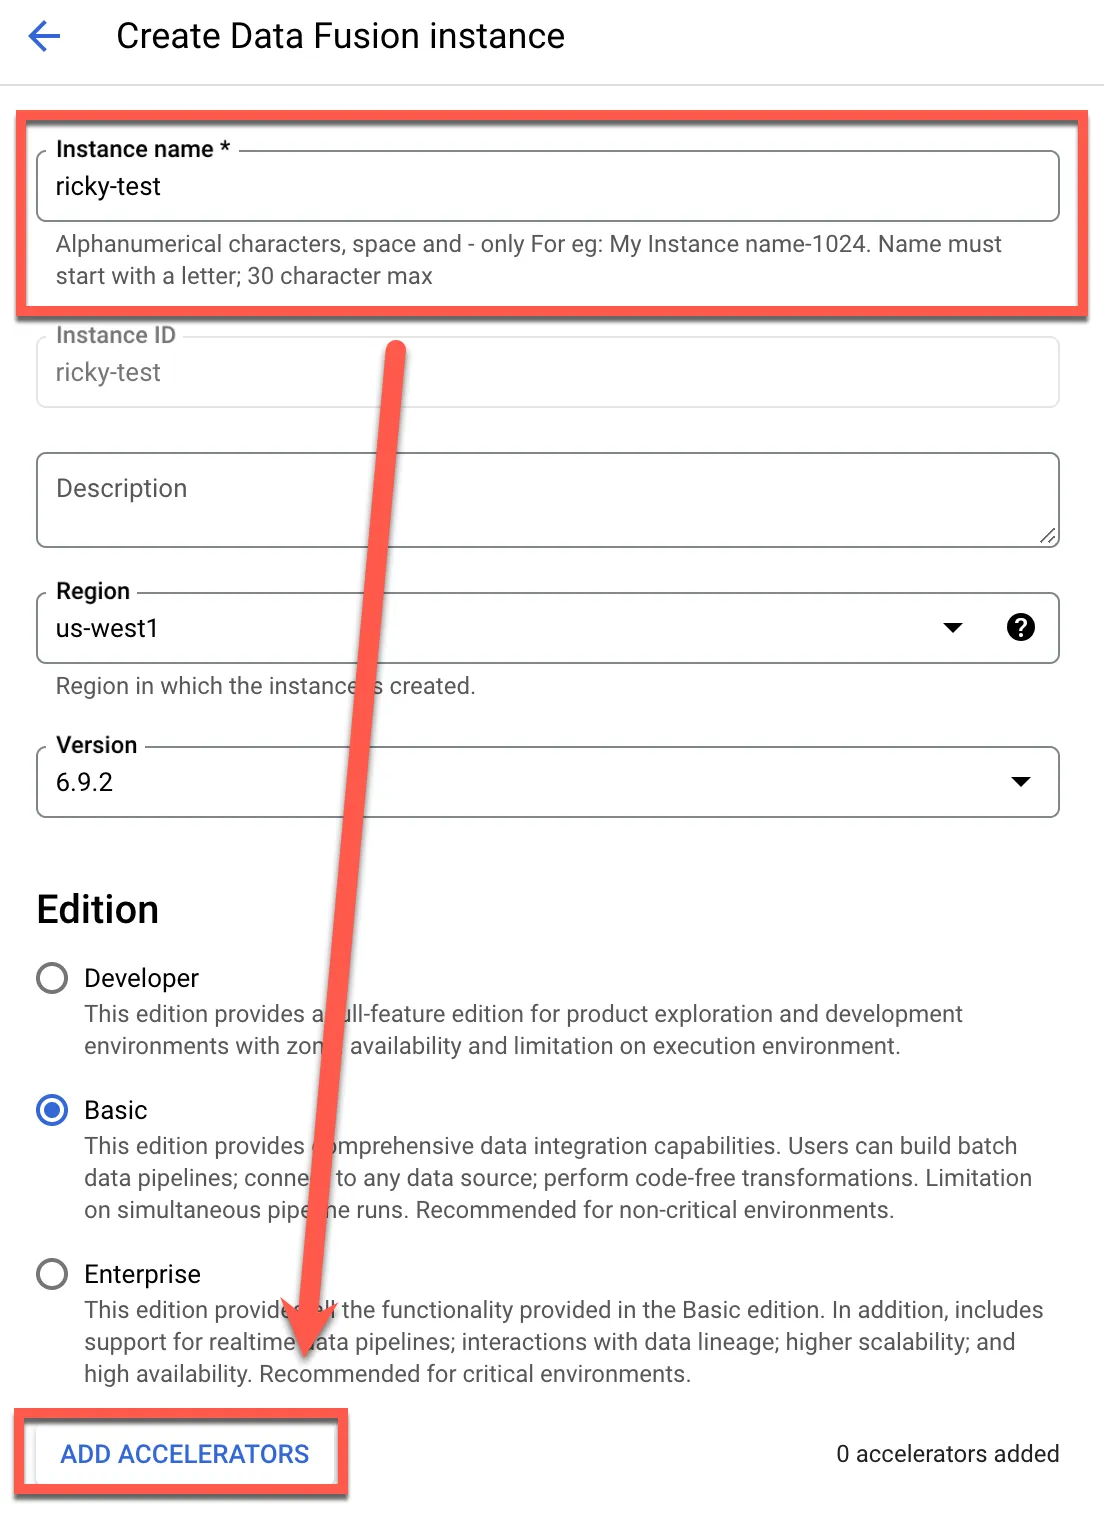
Enter a name, then click Create
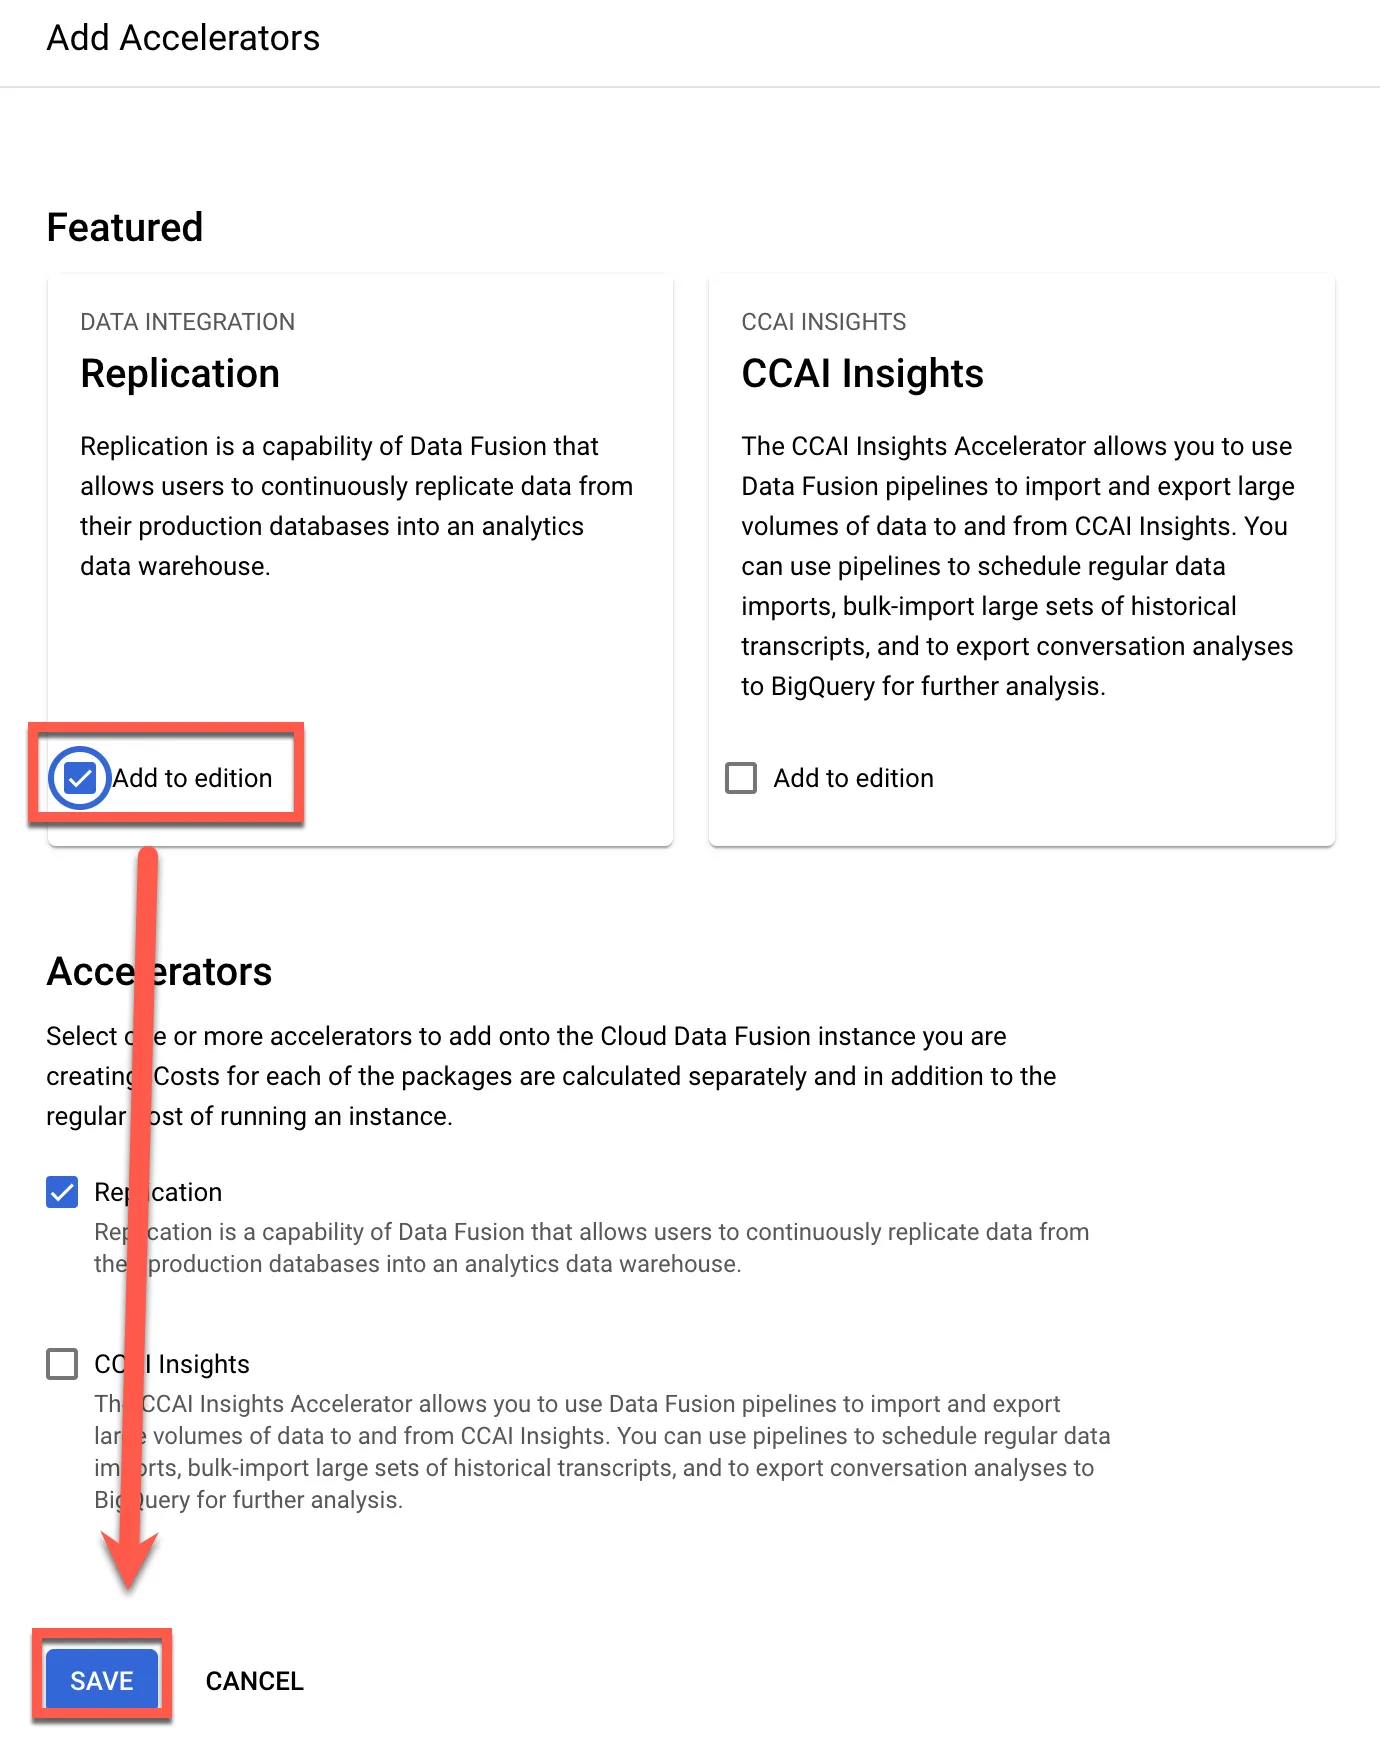
Click Add to edition
Check Enable Private IP
Set up VPC Peering
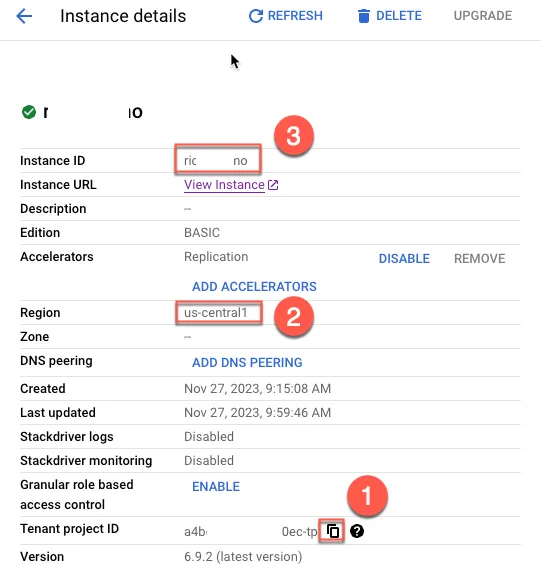
First, copy necessary information from Data Fusion
- Copy Project ID
- Copy Region
- Copy Instance ID
Go to VPC and add PEERING
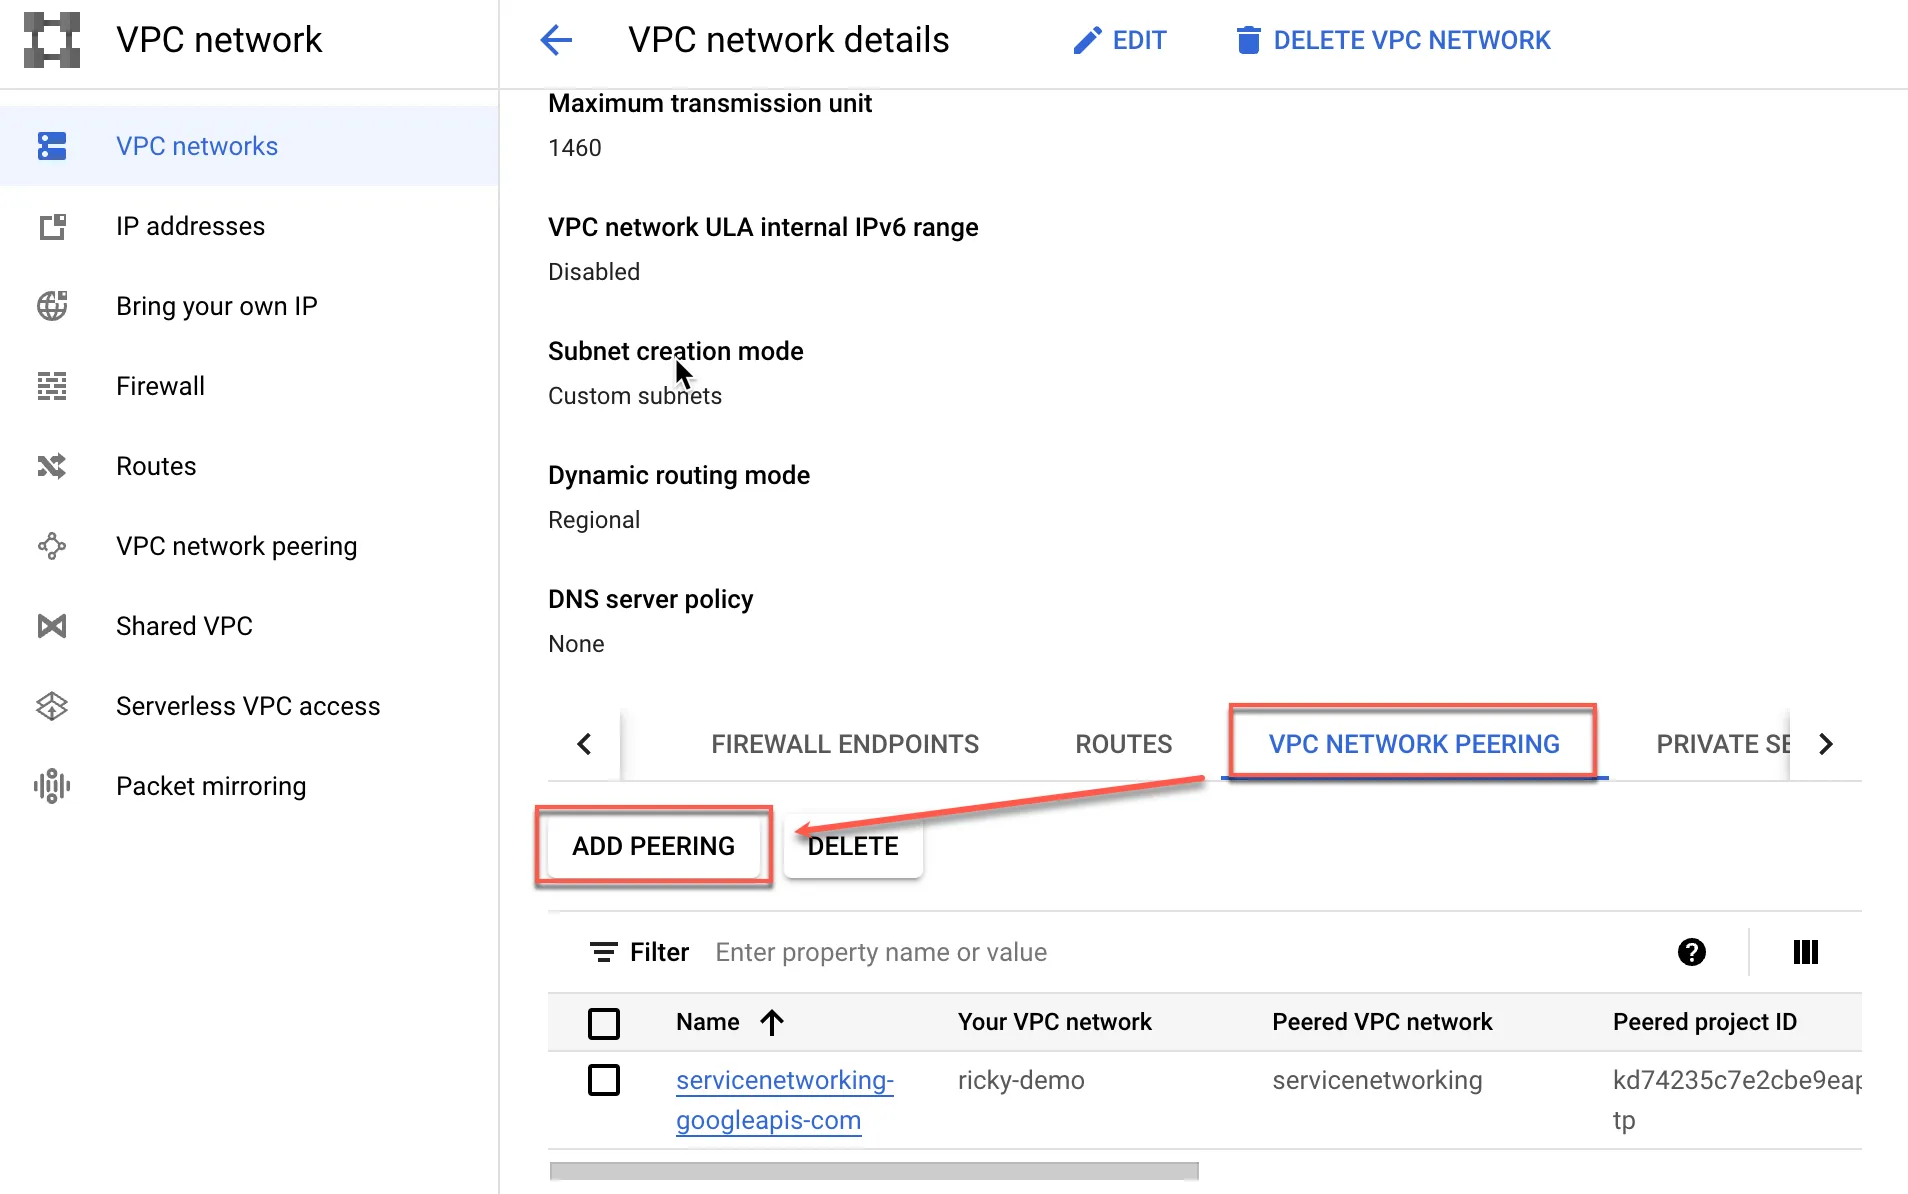
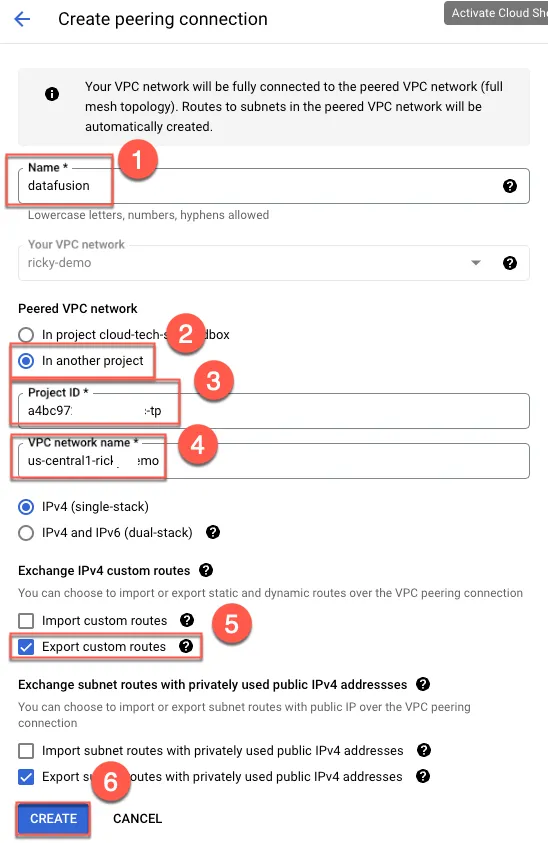
Create PEERING
- Enter name
- Select other PROJECT
- Paste the ProjectID from the previous step
- Paste steps 2+3 from the previous step, in the format “Region”-“InstanceID”
- Check Export custom routes
- Create
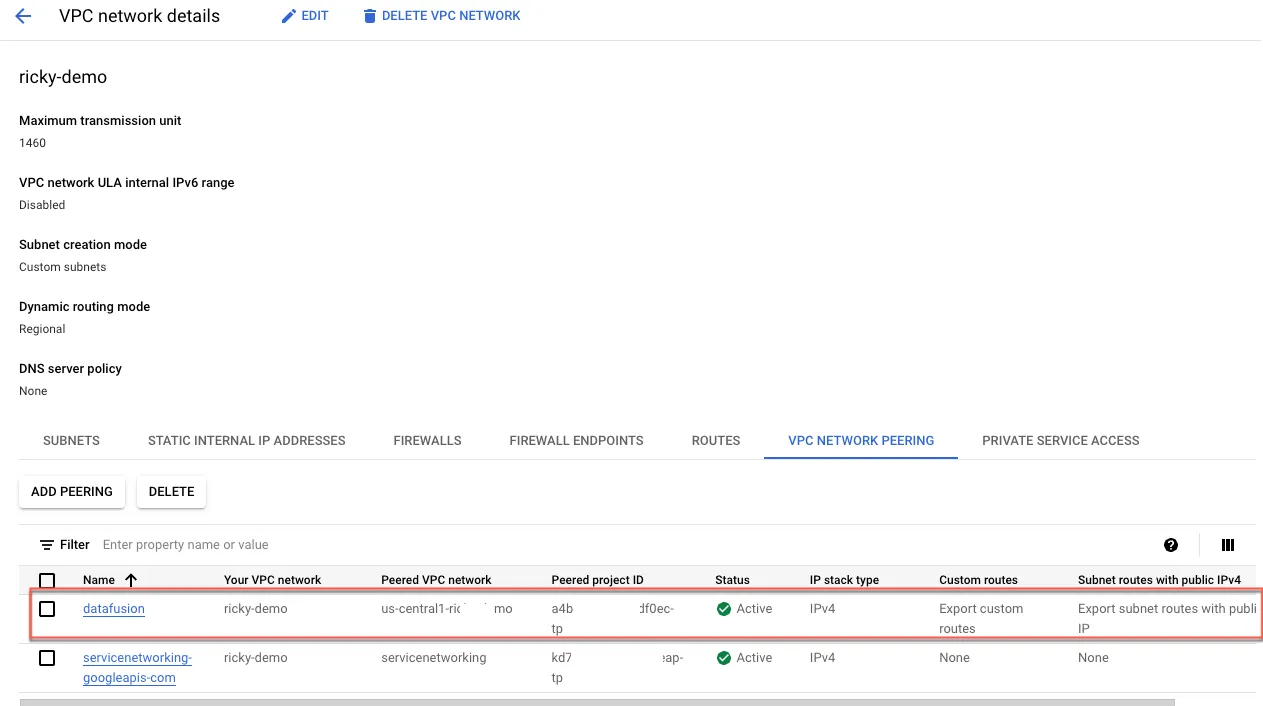
After creation, PEERING will appear
Configure instance
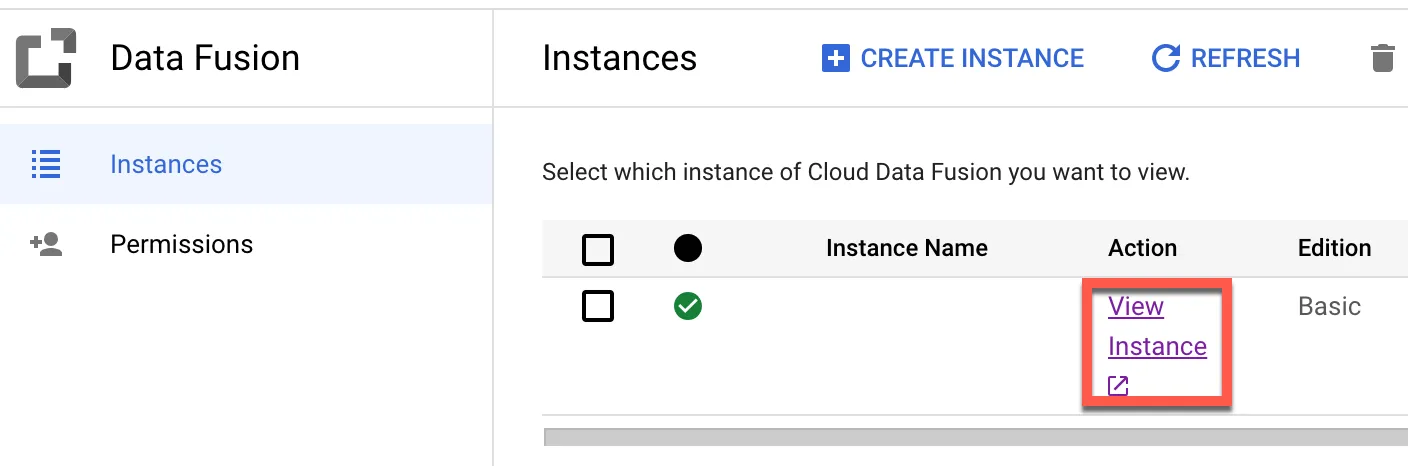
Download JDBC version 9.4, extract it, then click View Instance. Using the latest version may result in encryption issues preventing connection
Click Continue
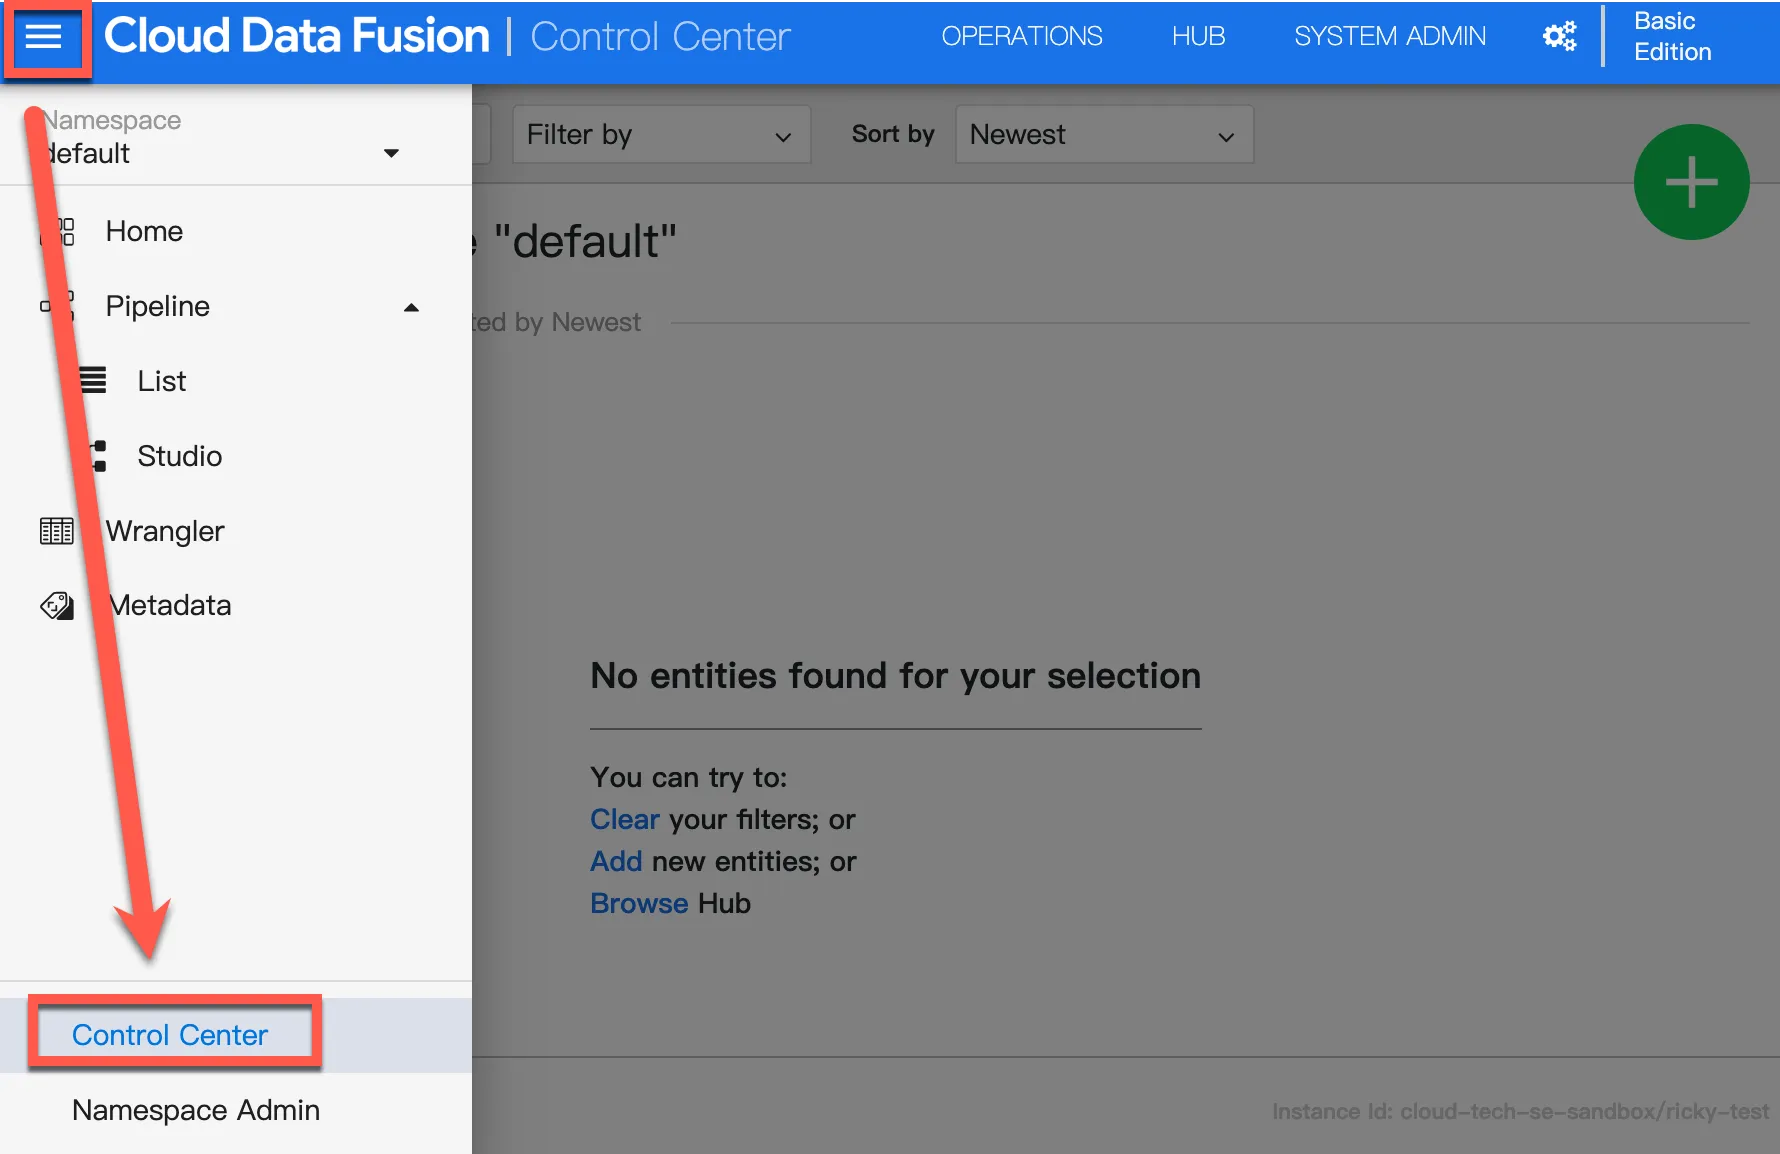
Click Control Center
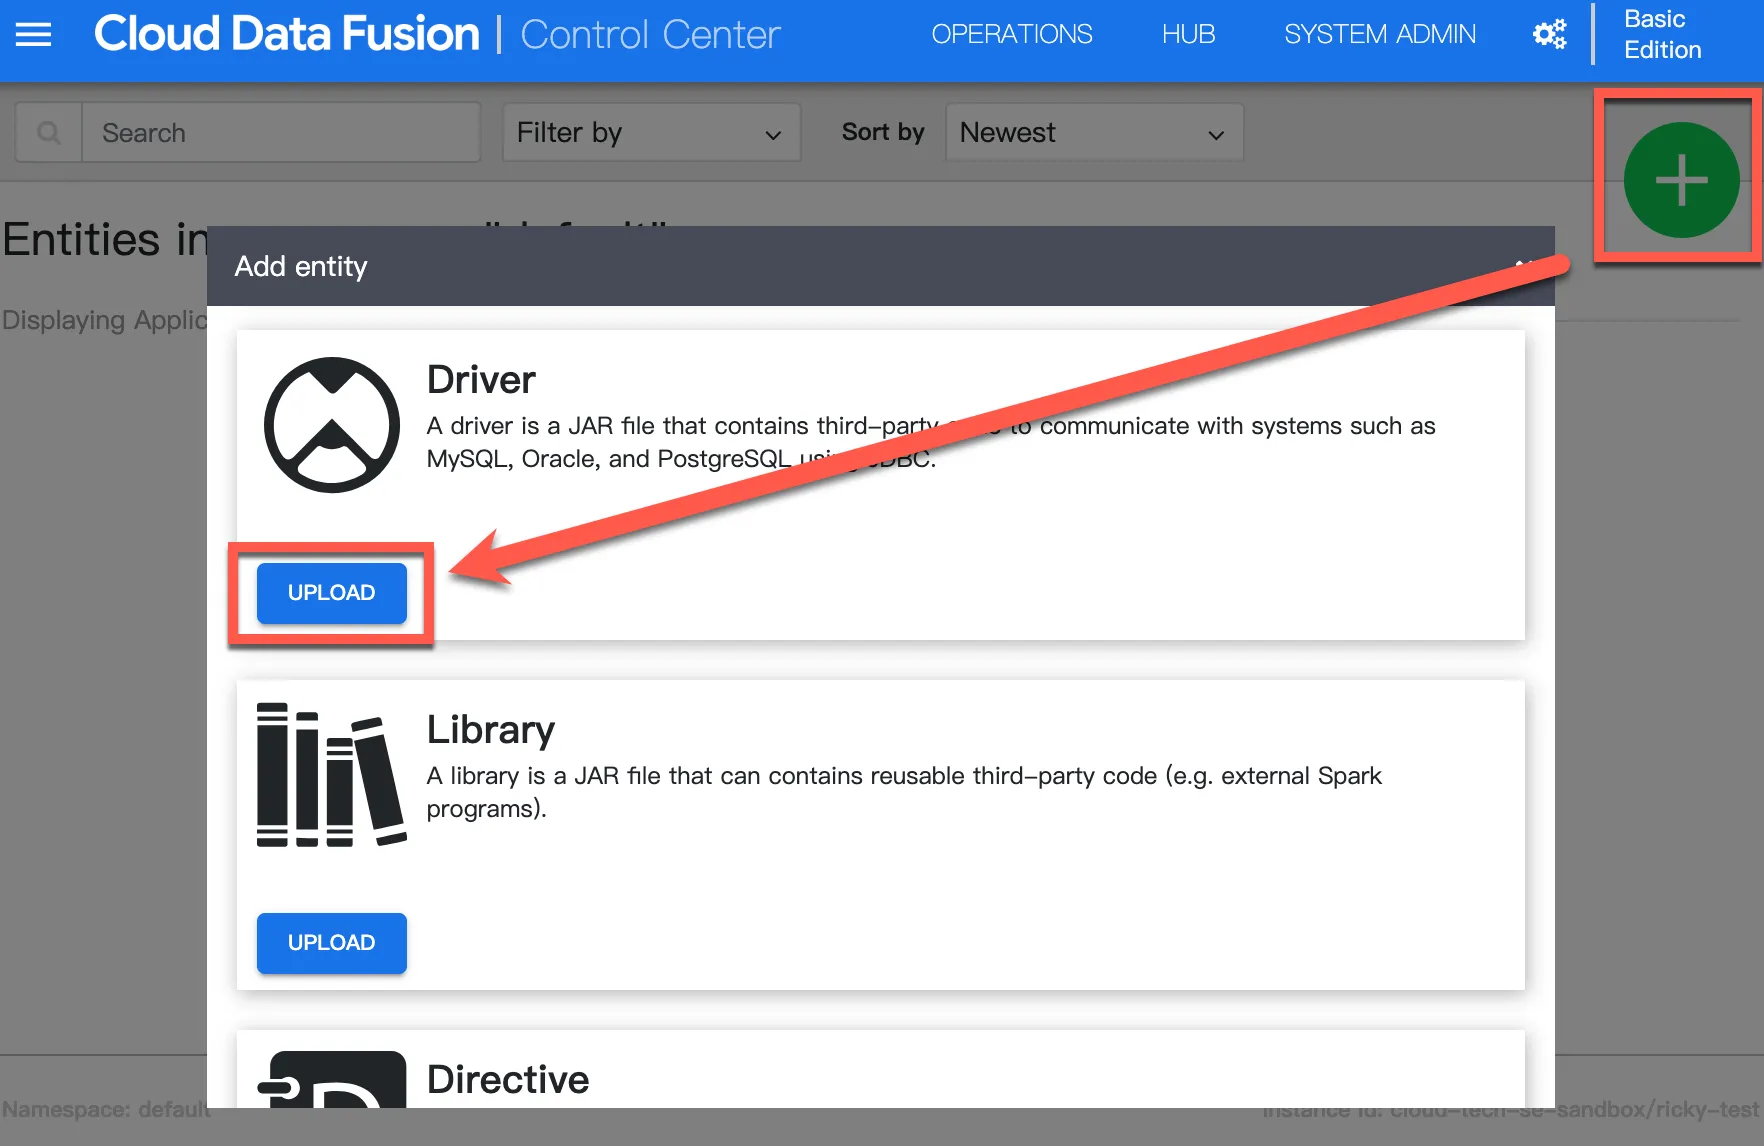
Click +, then upload Driver
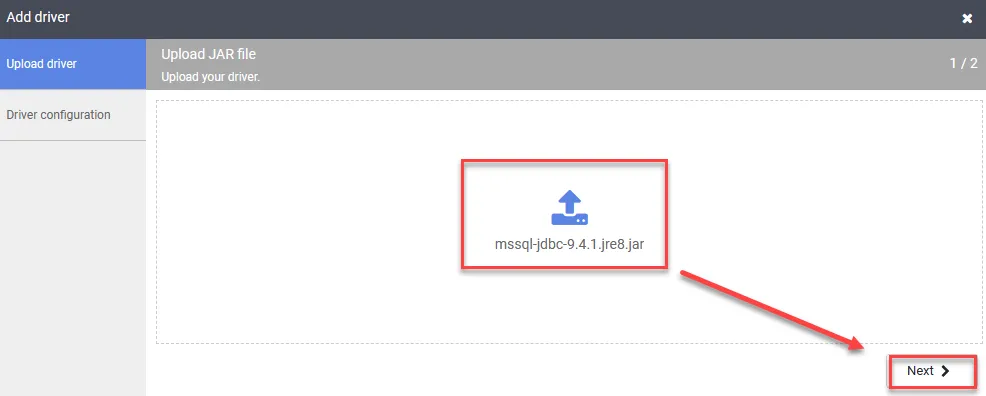
Upload the mssql-jdbc-9.4.1.jre8.jar file
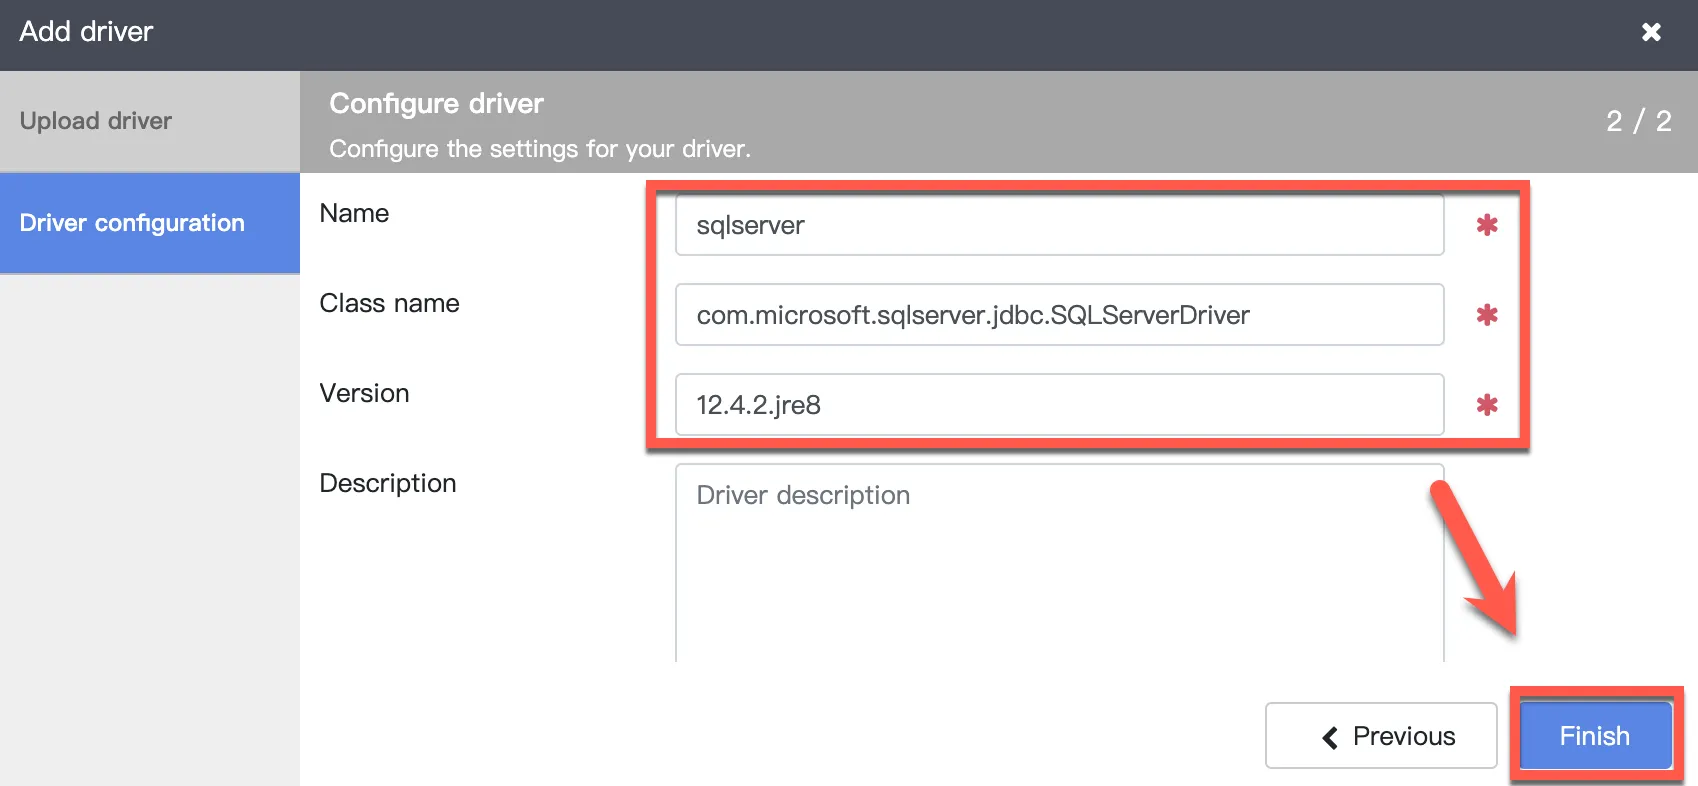
Enter sqlserver for Name
Enter com.microsoft.sqlserver.jdbc.SQLServerDriver for Class name
Keep Version as default
Start Synchronization
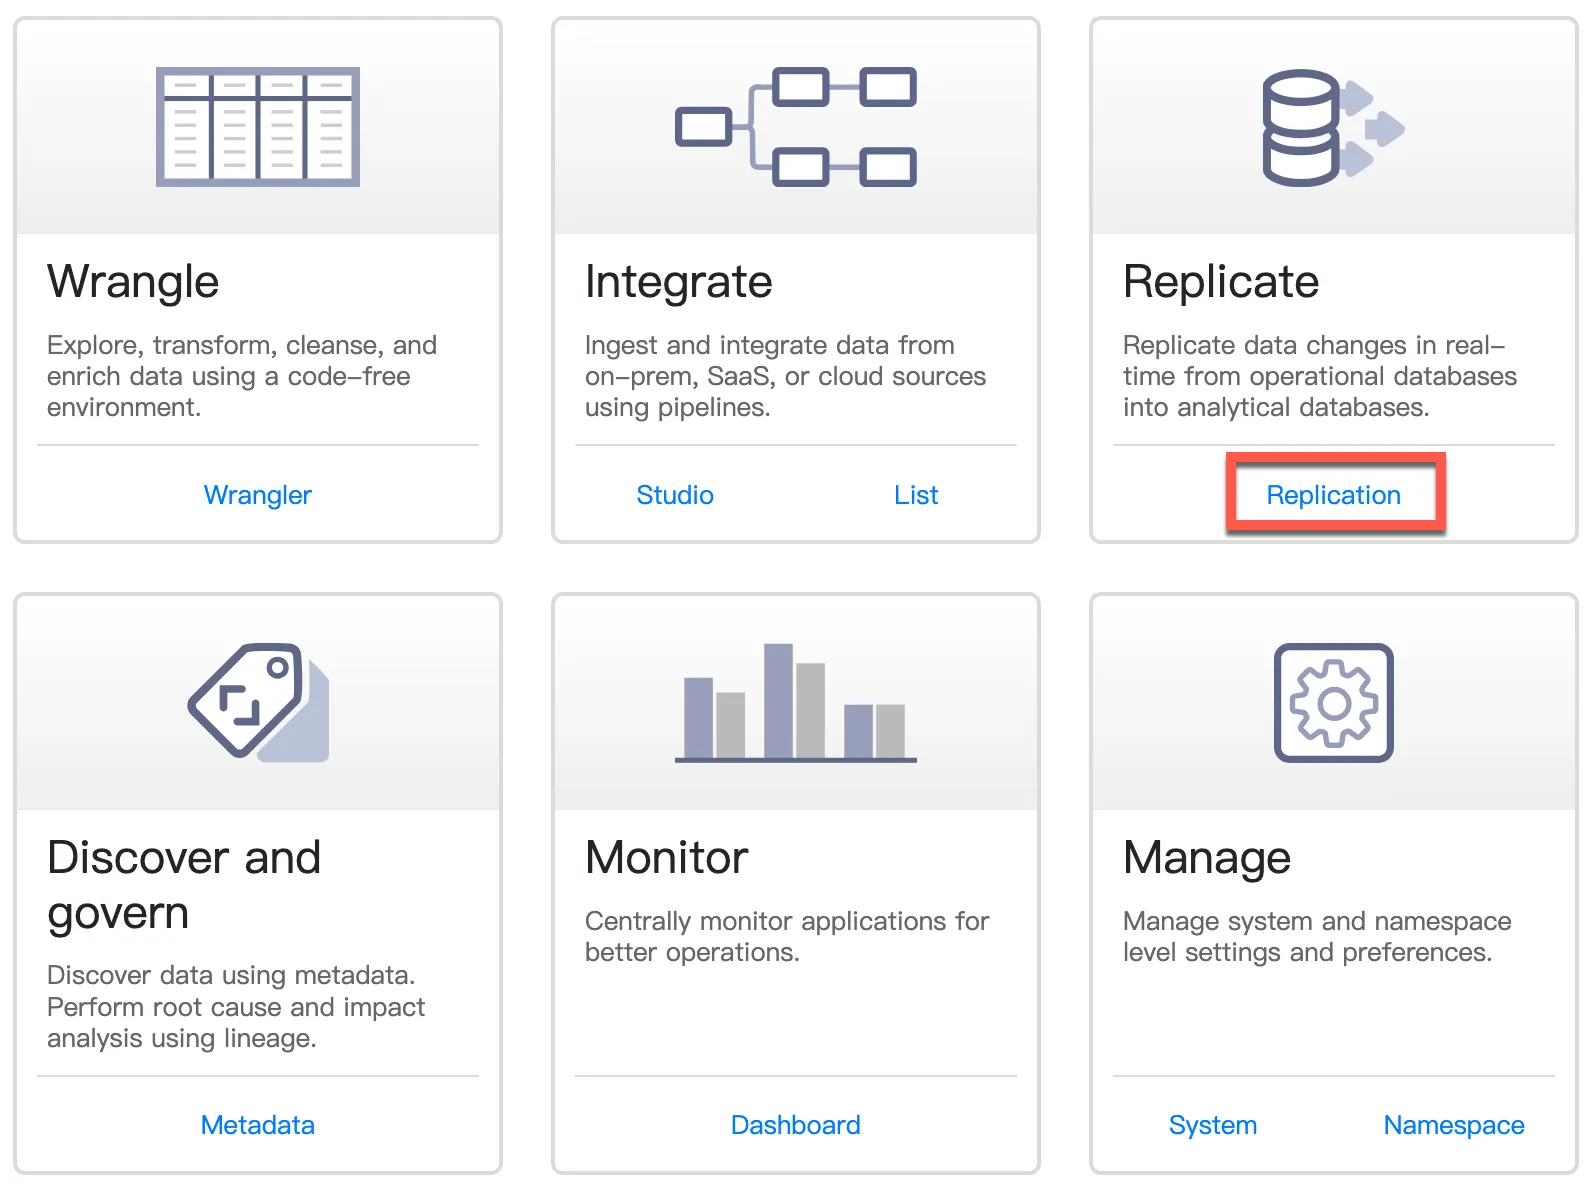
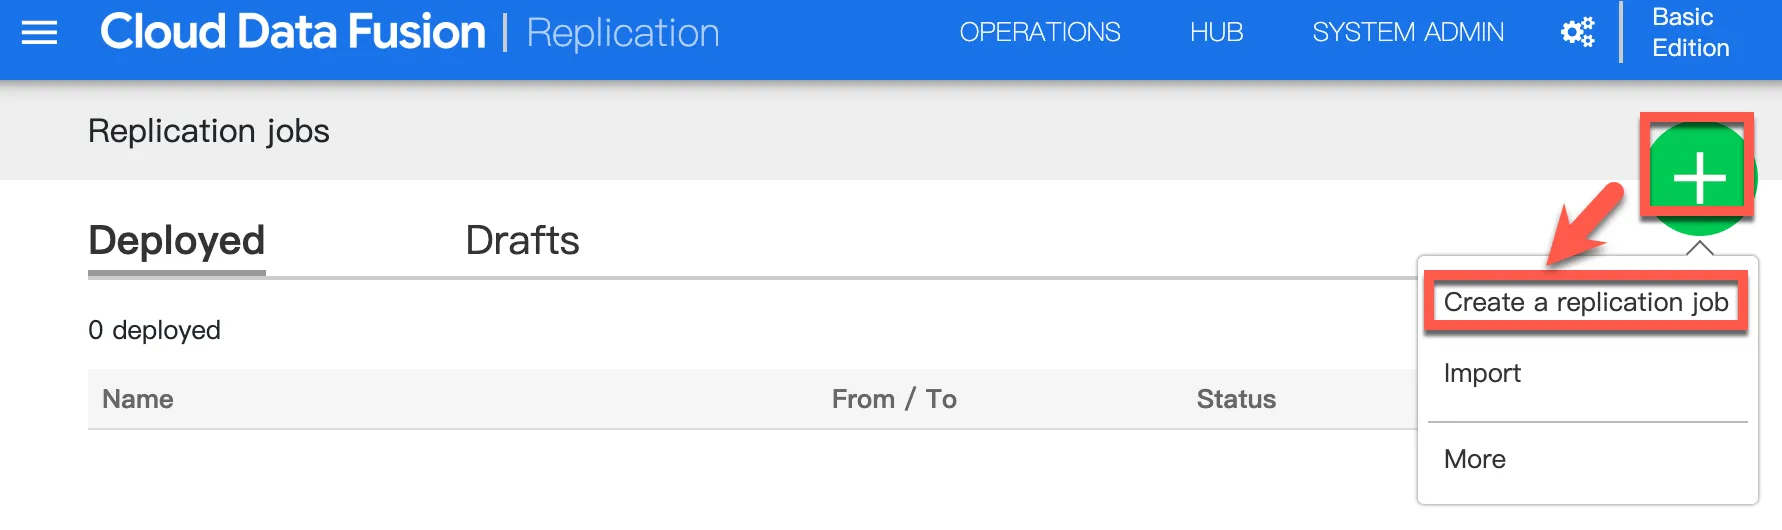
Return to the main menu and click Replication
Create a replication job
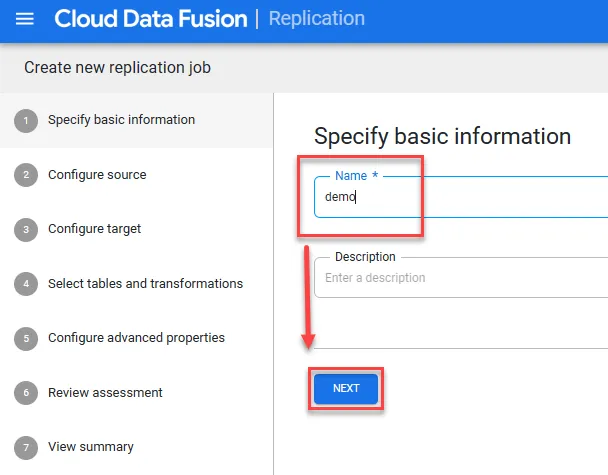
Enter a name
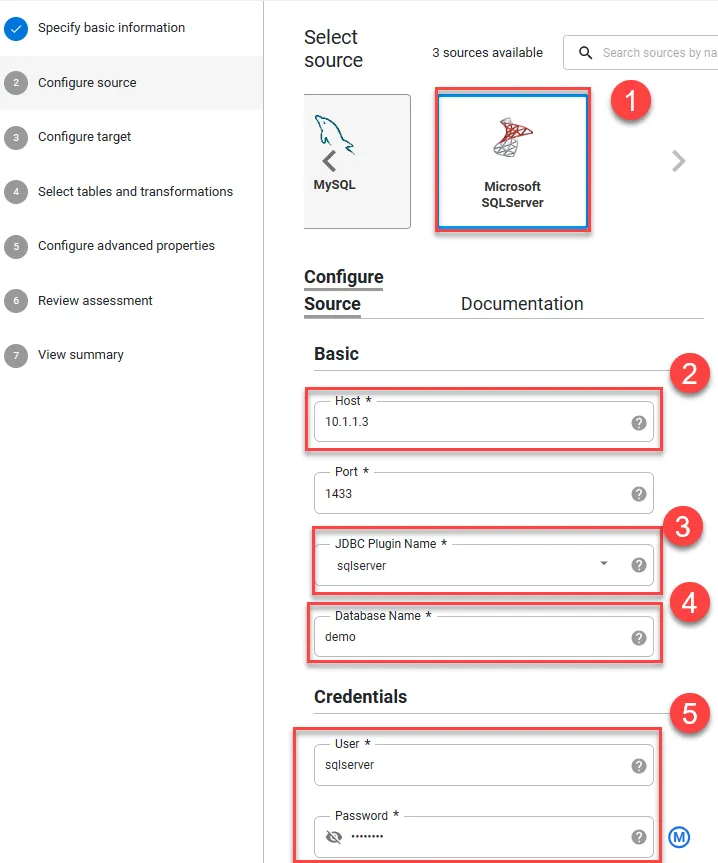
- Select SQL Server
- Enter the IP of the CloudSQL Proxy GCE
- Select the driver configured earlier
- Enter the name of the database to be synchronized
- Enter user credentials
Click Next
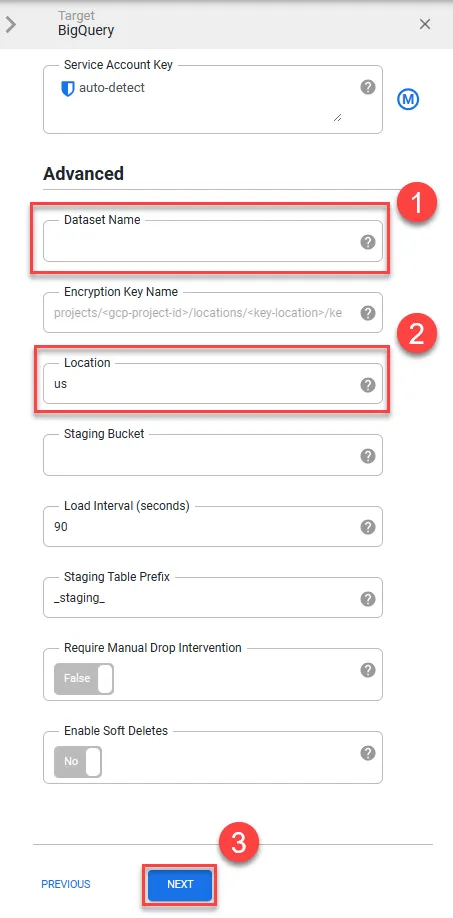
- You can set a pre-created Dataset name
- Select data location
- Next
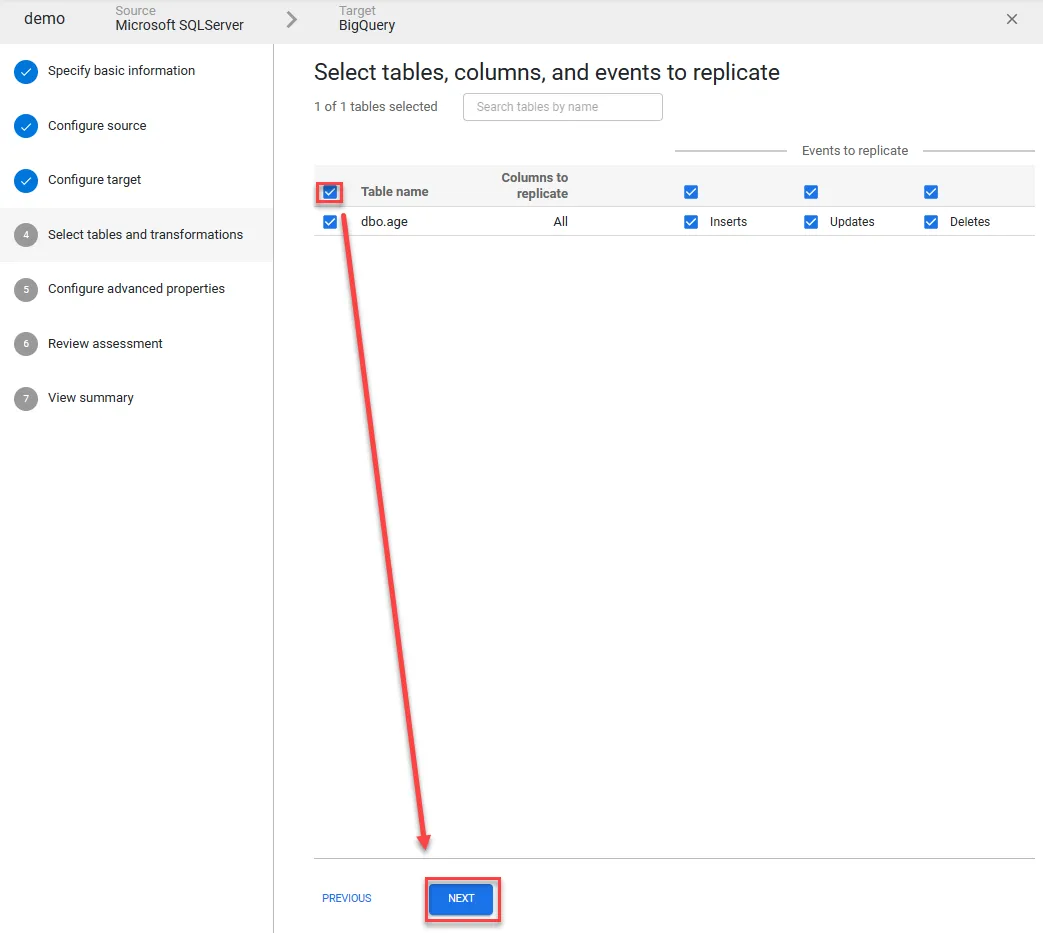
Select the tables to synchronize, then click Next
Click Next
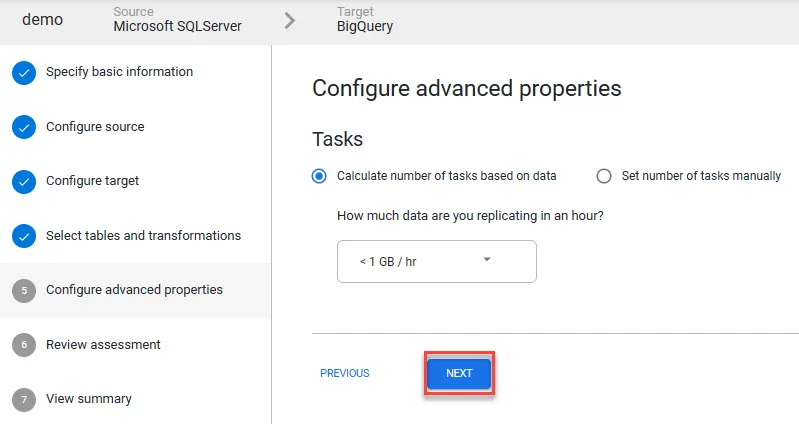
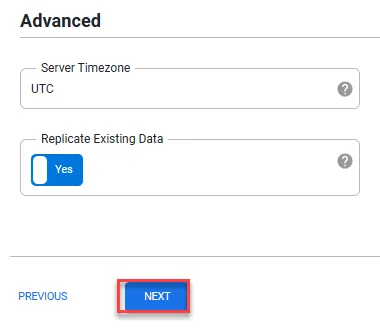
Use default values, then Next
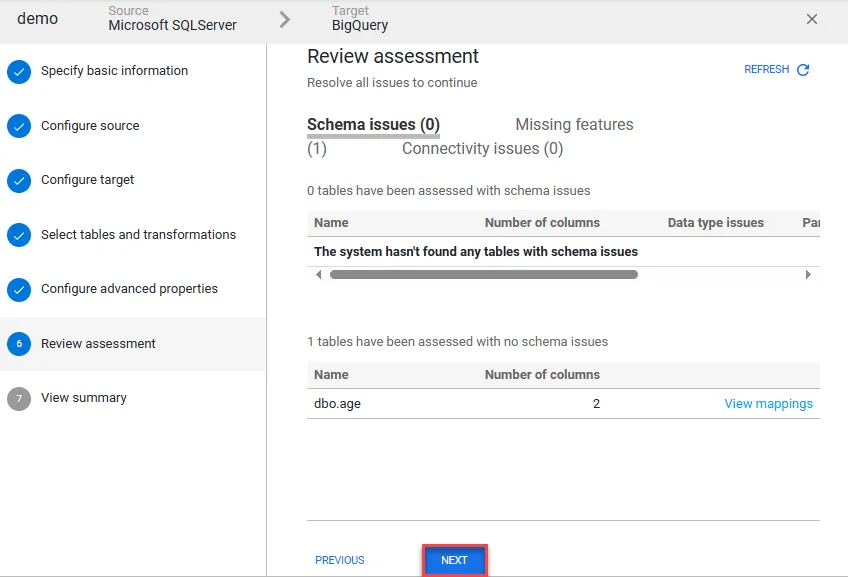
Use default values, then Next
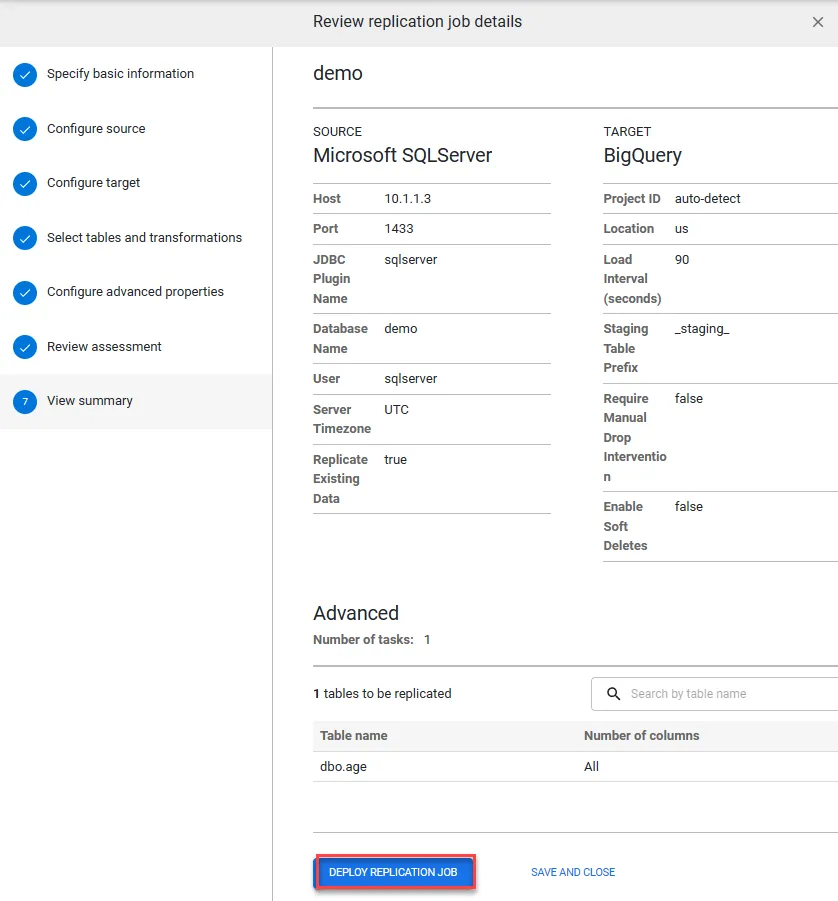
Click Start
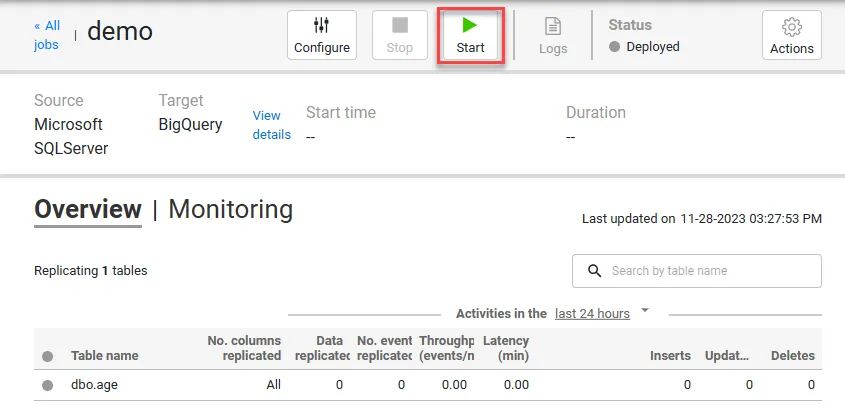
Starting will take some time
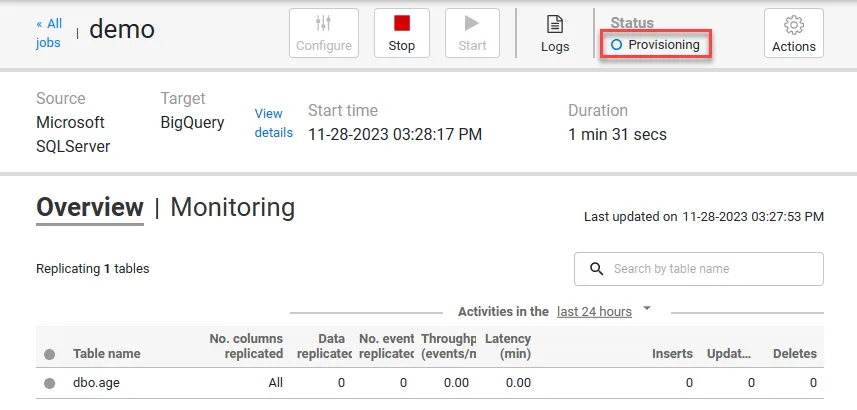
Once started, you can click Logs to check the status
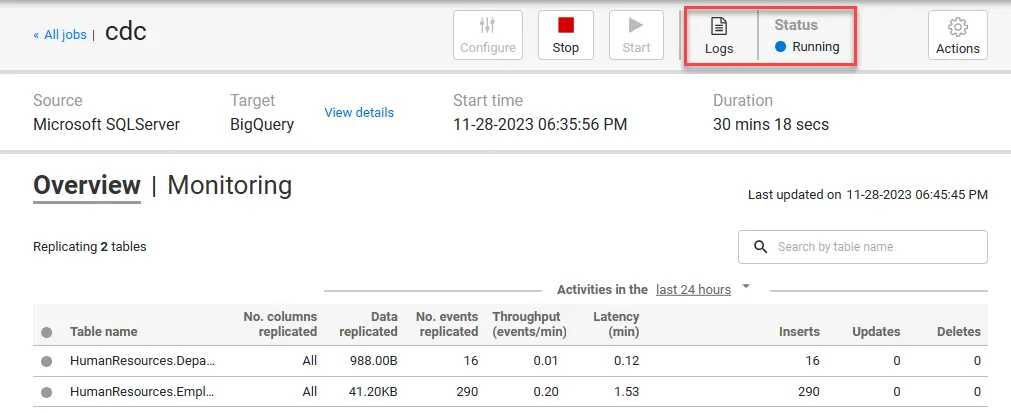
Add new data in the SSMS database
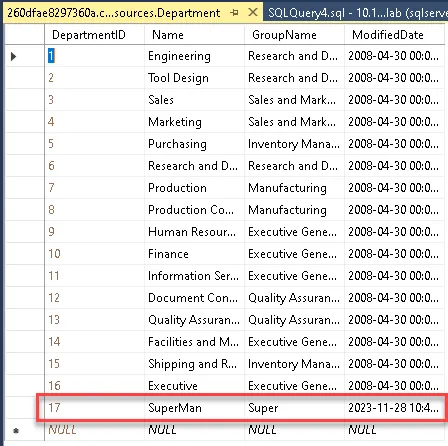
You should then be able to see the newly added records in BQ

Troubleshooting
Table Without Primary Key
Tables without a Primary Key cannot synchronize normally. Please ensure that tables have a Primary Key

CloudSQL Proxy VM Unable to Connect to CloudSQL
When testing the connection from CloudSQL Proxy VM to CloudSQL, insufficient permissions were found
1root@cdc-proxy:/opt# sqlcmd -S tcp:127.0.0.1,1433 -U YOUR_USERNAME -P YOUR_PASSWORD -C2
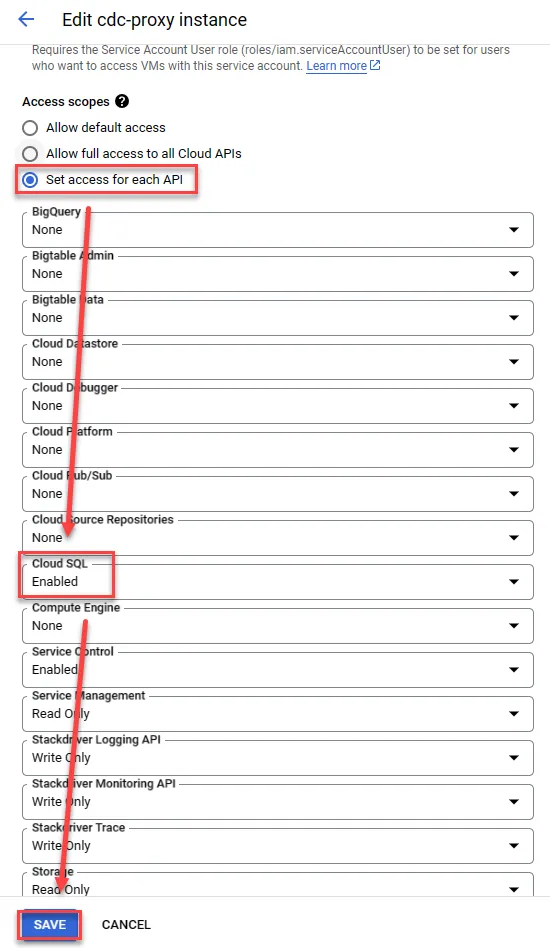
32023/12/06 03:10:36 [timotion-bigquery:asia-east1:cdc-mssql] accepted connection from 127.0.0.1:5669342023/12/06 03:10:36 [timotion-bigquery:asia-east1:cdc-mssql] failed to connect to instance: failed to get instance: Refresh error: failed to get instance metadata (connection name = "timotion-bigquery:asia-east1:cdc-mssql"): googleapi: Error 403: Request had insufficient authentication scopes.5Details:6[7 {8 "@type": "type.googleapis.com/google.rpc.ErrorInfo",9 "domain": "googleapis.com",10 "metadata": {11 "method": "google.cloud.sql.v1beta4.SqlConnectService.GetConnectSettings",12 "service": "sqladmin.googleapis.com"13 },14 "reason": "ACCESS_TOKEN_SCOPE_INSUFFICIENT"15 }16]17More details:18Reason: insufficientPermissions, Message: Insufficient Permission19Sqlcmd: Error: Microsoft ODBC Driver 18 for SQL Server : Client unable to establish connection because an error was encountered during handshakes before login. Common causes include client attempting to connect to an unsupported version of SQL Server, server too busy to accept new connections or a resource limitation (memory or maximum allowed connections) on the server..20Sqlcmd: Error: Microsoft ODBC Driver 18 for SQL Server : TCP Provider: Error code 0x68.21Sqlcmd: Error: Microsoft ODBC Driver Server : Client unable to establish connection.22Sqlcmd: Error: Microsoft ODBC Driver 18 for SQL Server : Client unable to establish connection due to prelogin failure.If using the default GCE service account, you’ll need to adjust the access scope. First, click on the VM
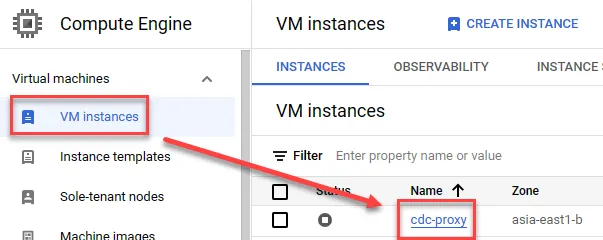
Click Edit
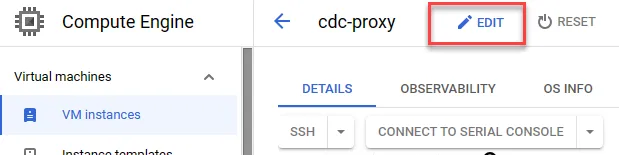
Enable CloudSQL and save
Also, confirm whether the sqladmin.googleapis.com API is enabled. If not, using sqlcmd will result in the following error:
1Sqlcmd: Error: Microsoft ODBC Driver 18 for SQL Server : Client unable to establish connection because an error was encountered during handshakes before login. Common causes include client attempting to connect to an unsupported version of SQL Server, server too busy to accept new connections or a resource limitation (memory or maximum allowed connections) on the server..2Sqlcmd: Error: Microsoft ODBC Driver 18 for SQL Server : TCP Provider: Error code 0x68.3Sqlcmd: Error: Microsoft ODBC Driver 18 for SQL Server : Client unable to establish connection.4Sqlcmd: Error: Microsoft ODBC Driver 18 for SQL Server : Client unable to establish connection due to prelogin failure.Click here to enable the API