Cloud Identity and GCP Org Creation
Scenario
To create a GCP organization using the free version of Cloud Identity, you must have a personal domain.
Process and Description
- Create Cloud Identity
- Create GCP Organization
- By default, it will provide a best practice approach for creation
Execution Steps
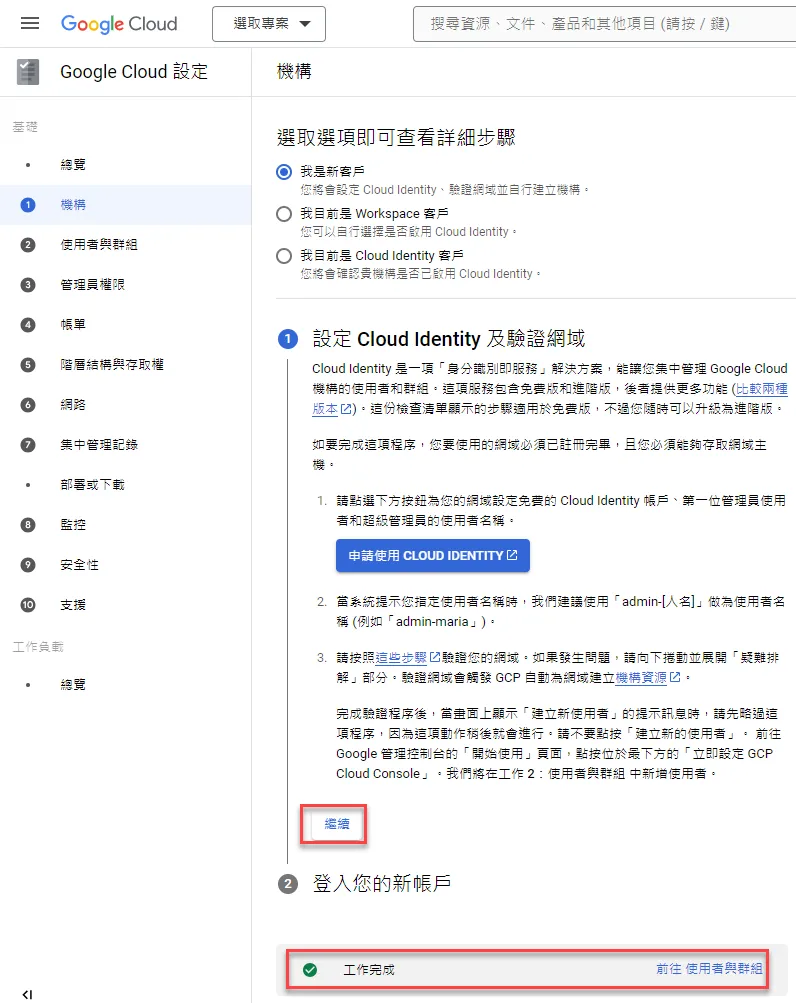
Apply for Cloud Identity
Go to the following URL and follow the instructions to apply and register
https://support.google.com/cloudidentity/answer/7389973?hl=zh-Hant
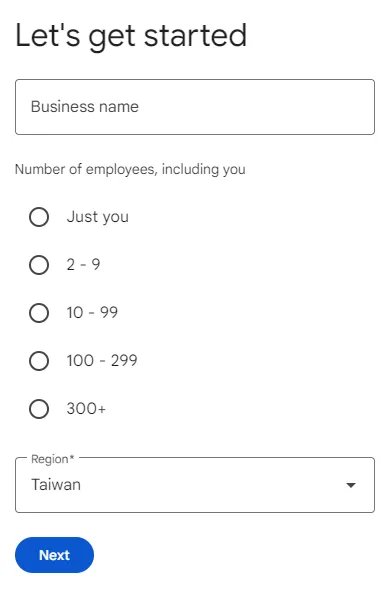
After registration, follow the instructions to set up Cloud Identity
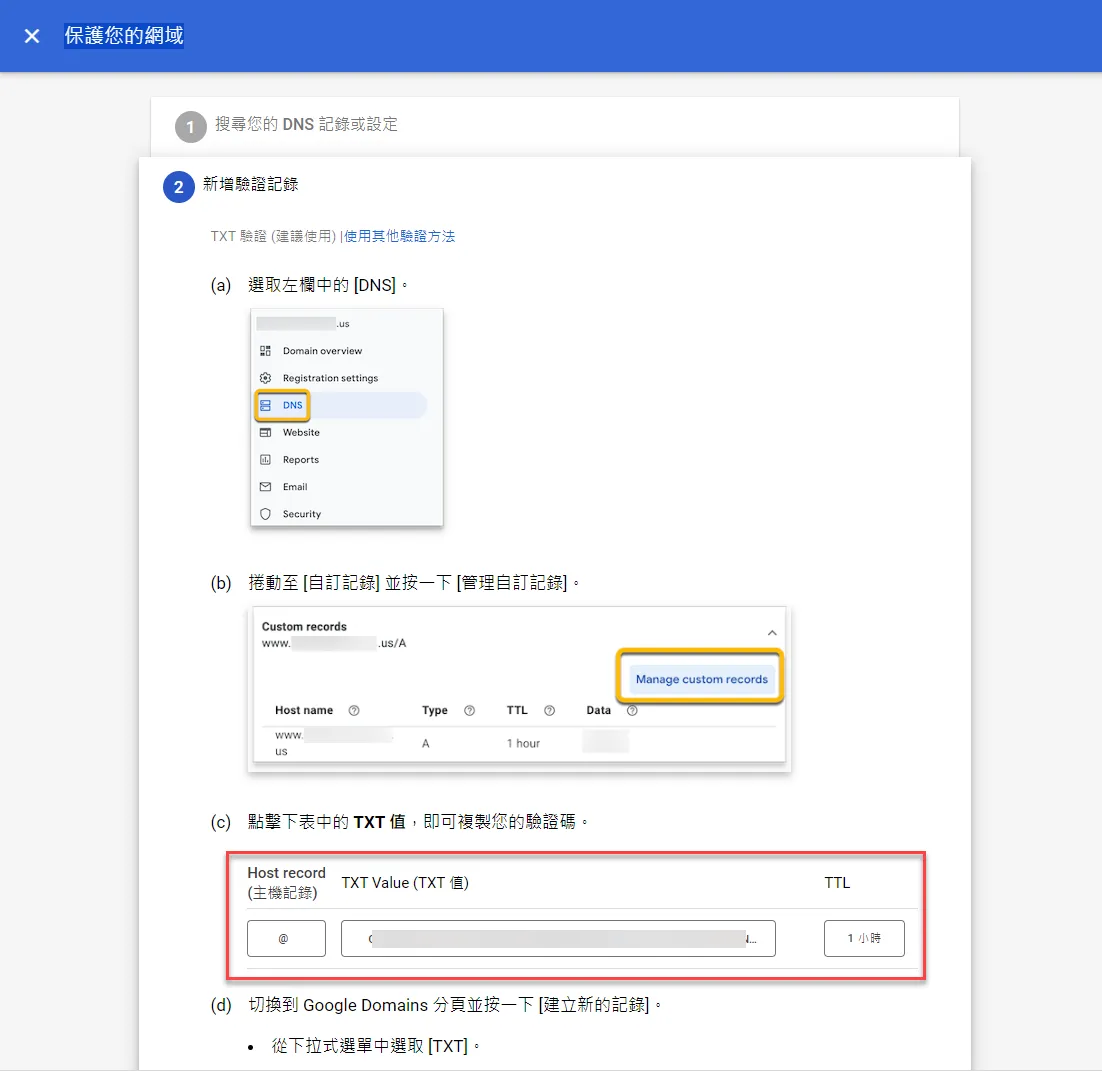
Here you need to protect DNS
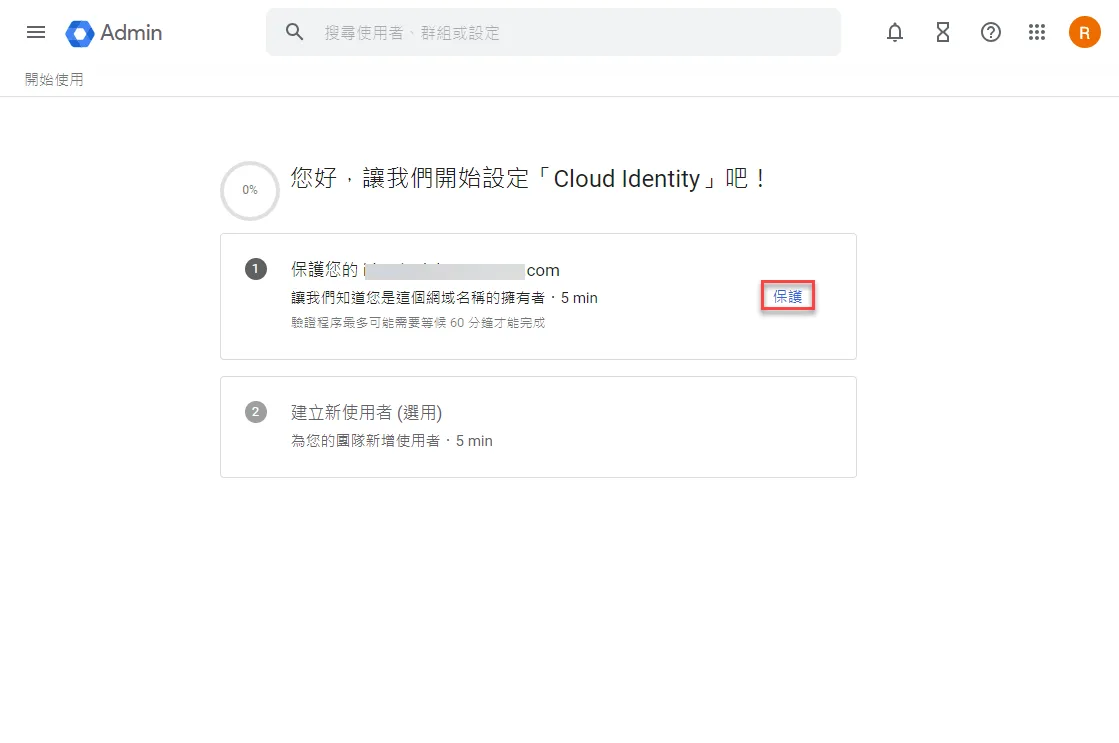
Set up DNS
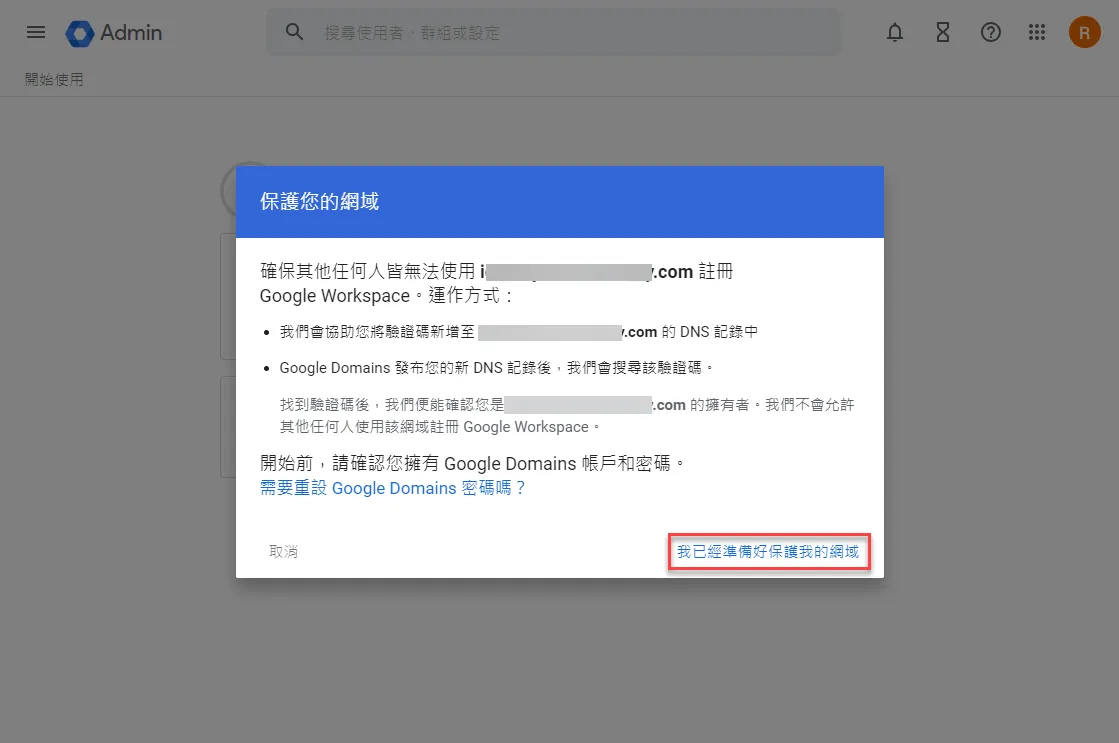
Notification that DNS configuration is required
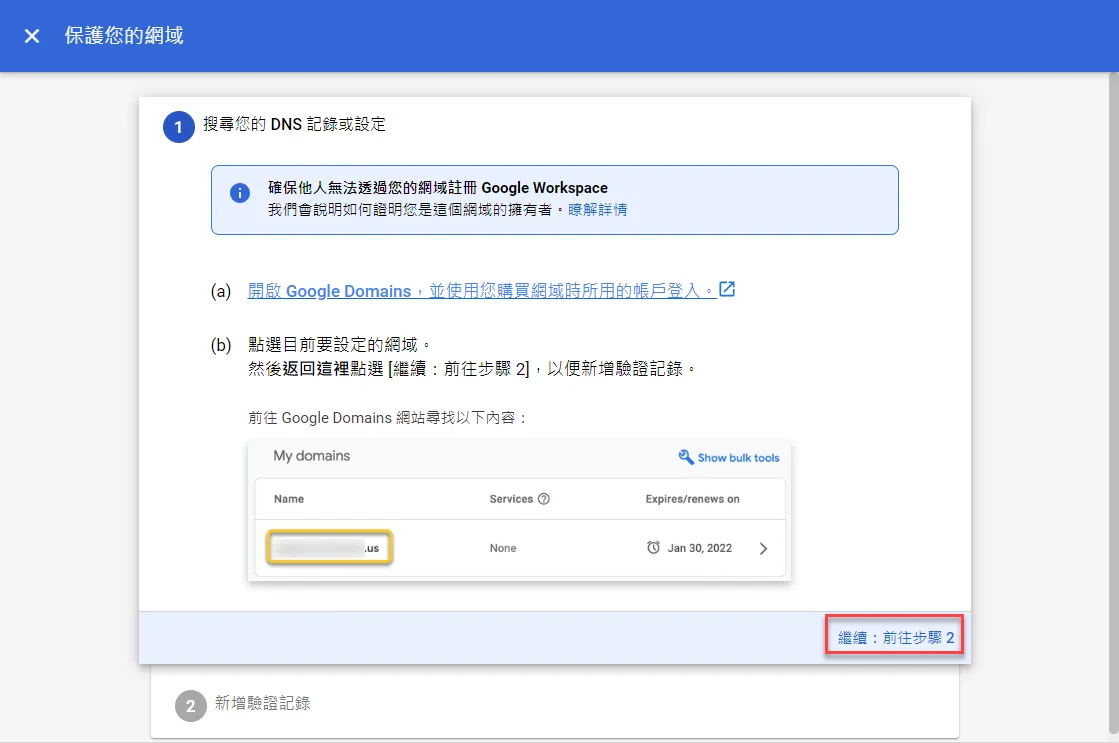
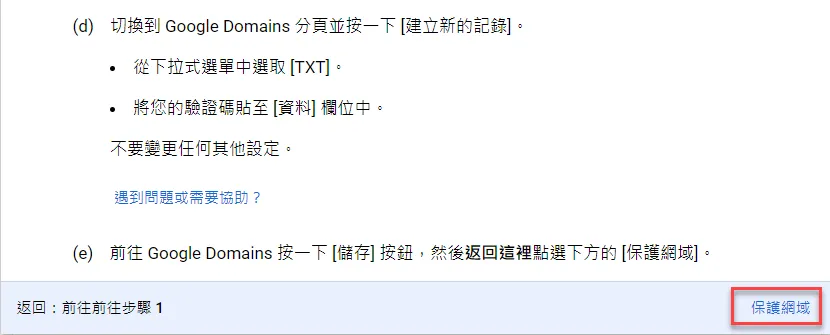
Follow the instructions to copy the TXT record to the DNS host configuration
After completion, click to protect the domain
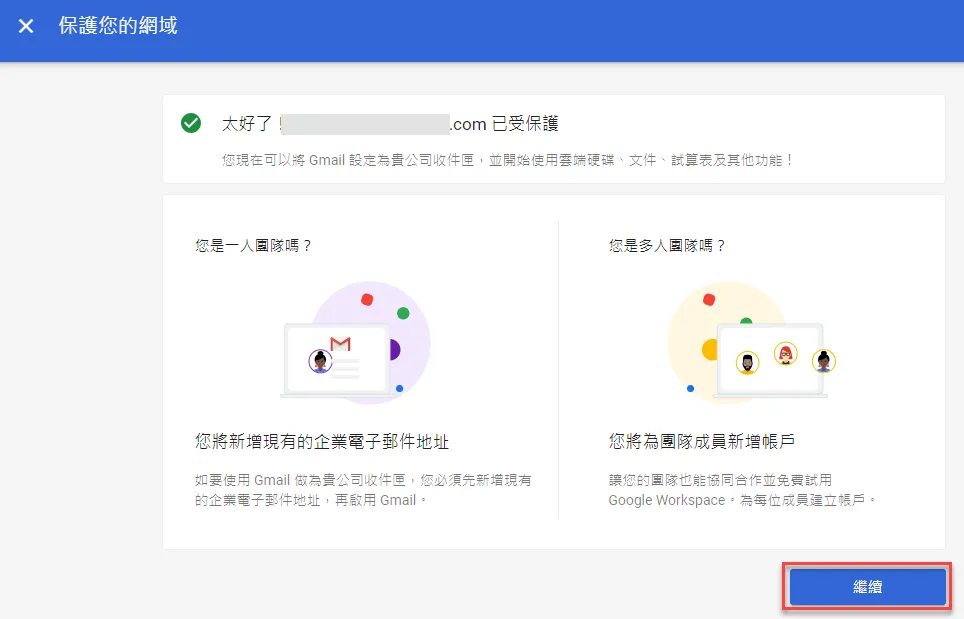
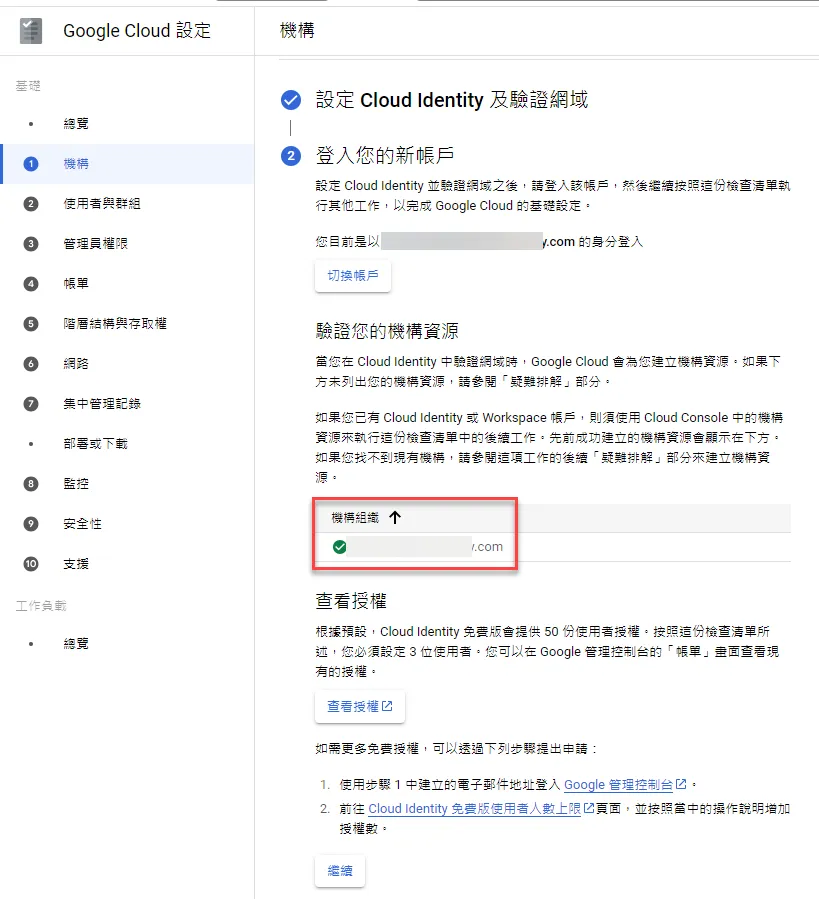
After successful verification, a protection success prompt will appear
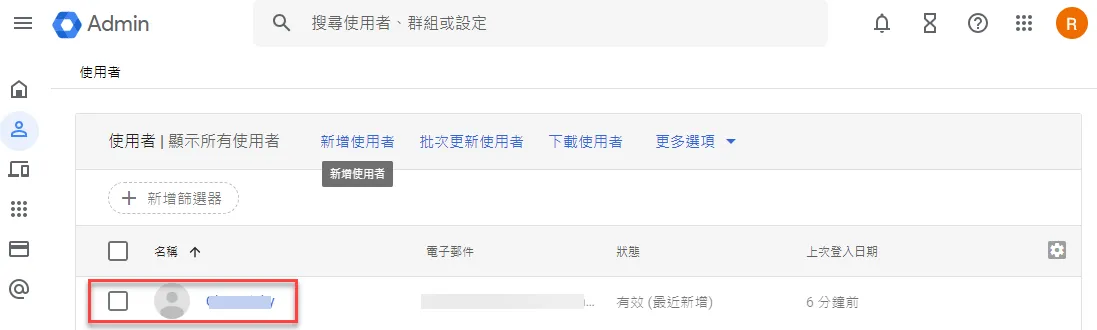
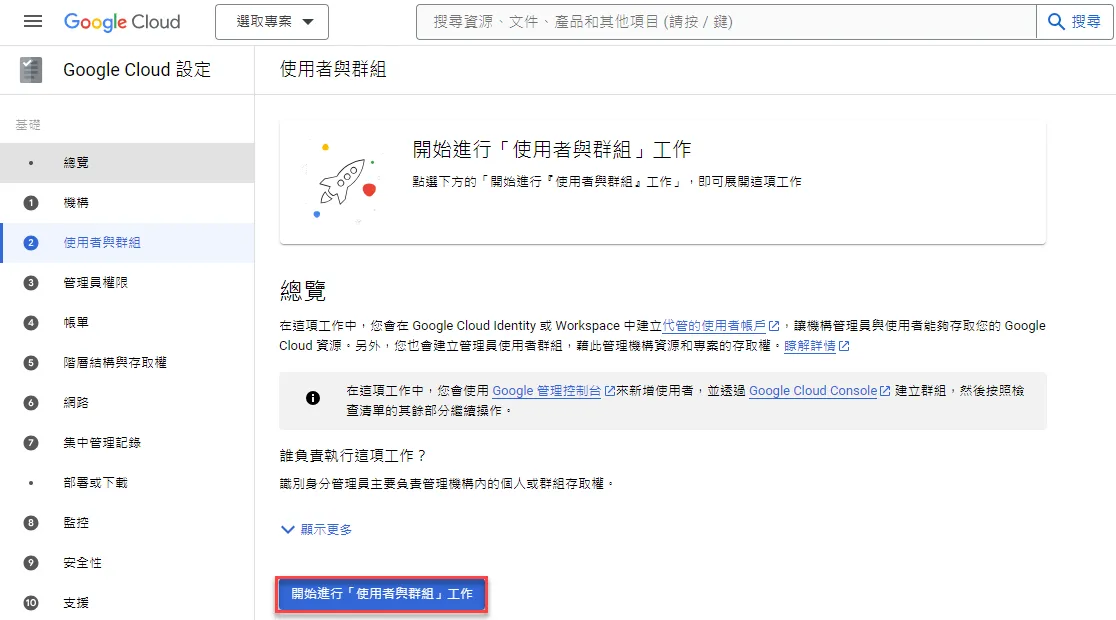
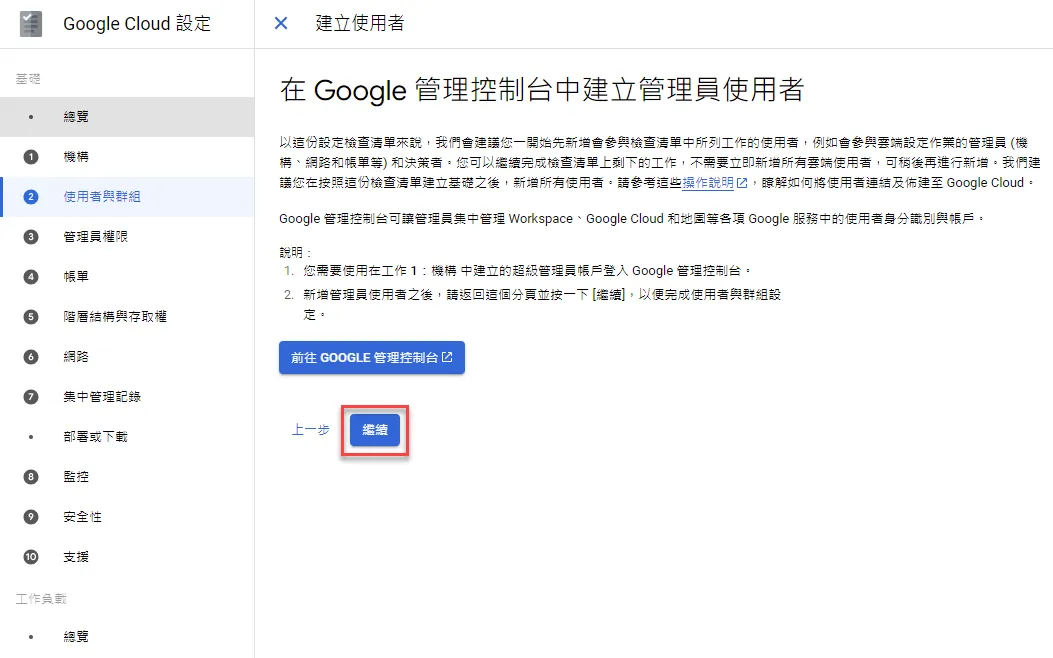
Create Users
Create a Cloud Identity user, who is also the first administrator

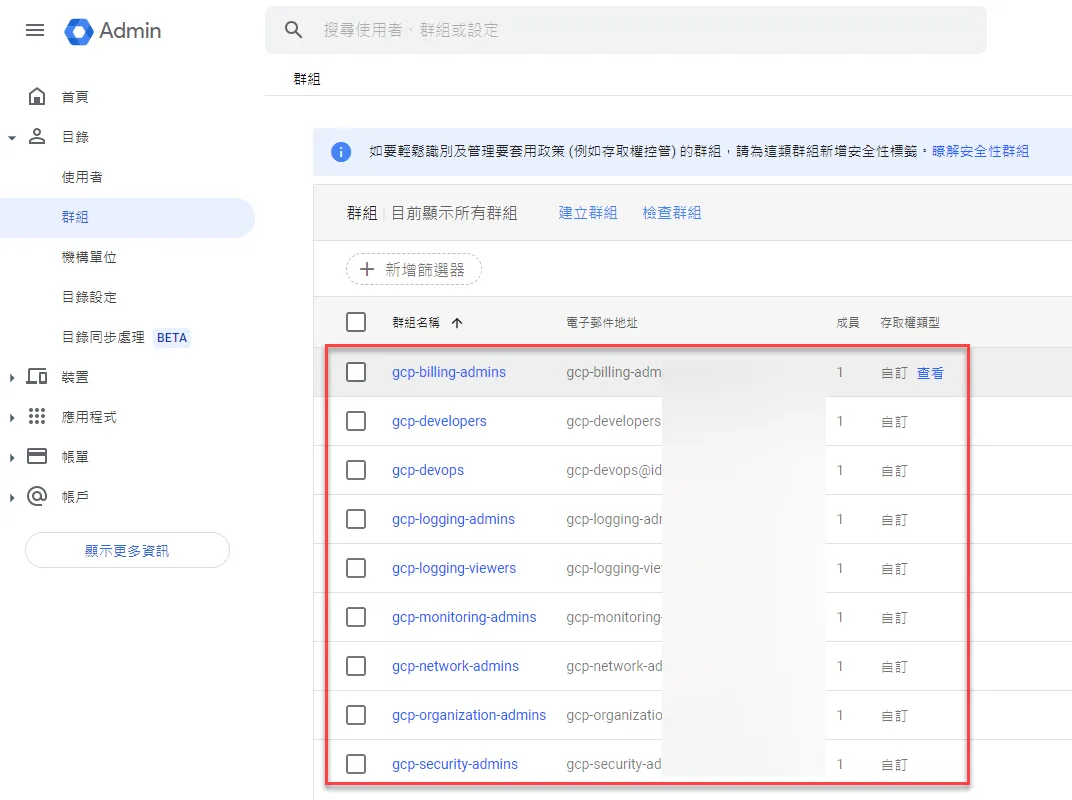
After creation, it will appear in the user panel
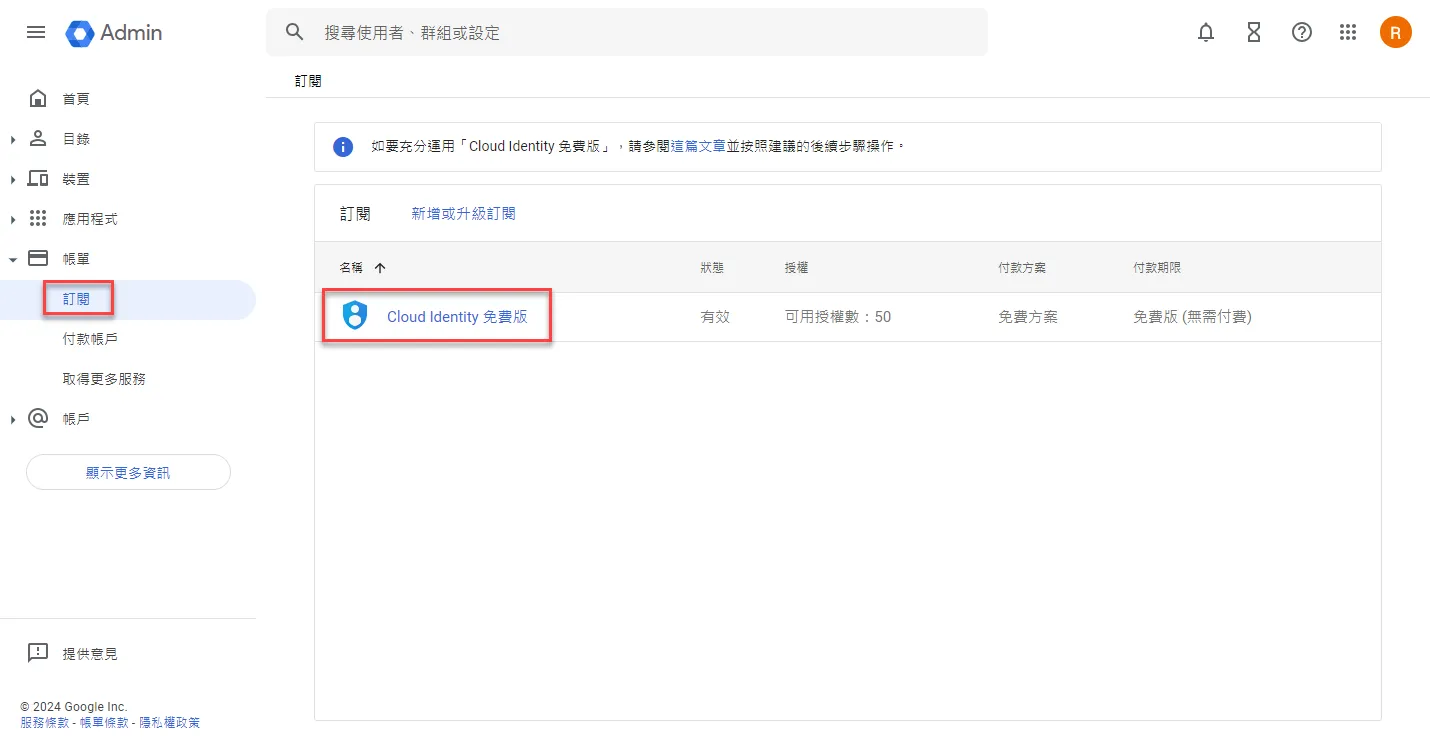
View the subscription, you can see that the free version only has a quota of 50 people, meaning 50 people can manage and control GCP, and there are no other Google Workspace office features
Additional confirmation can be performed

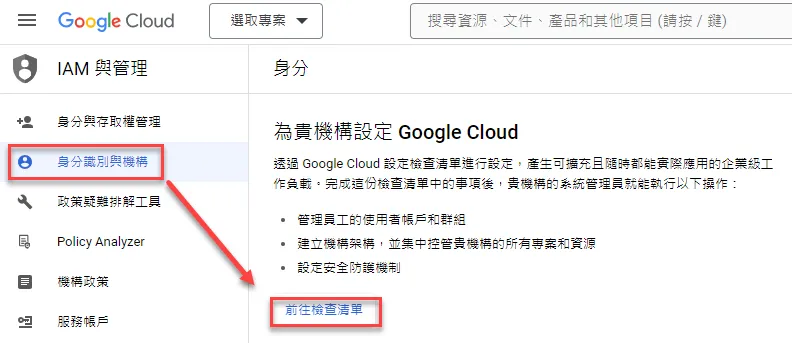
Create GCP ORG
Confirm Organization Creation
Create an organization in GCP
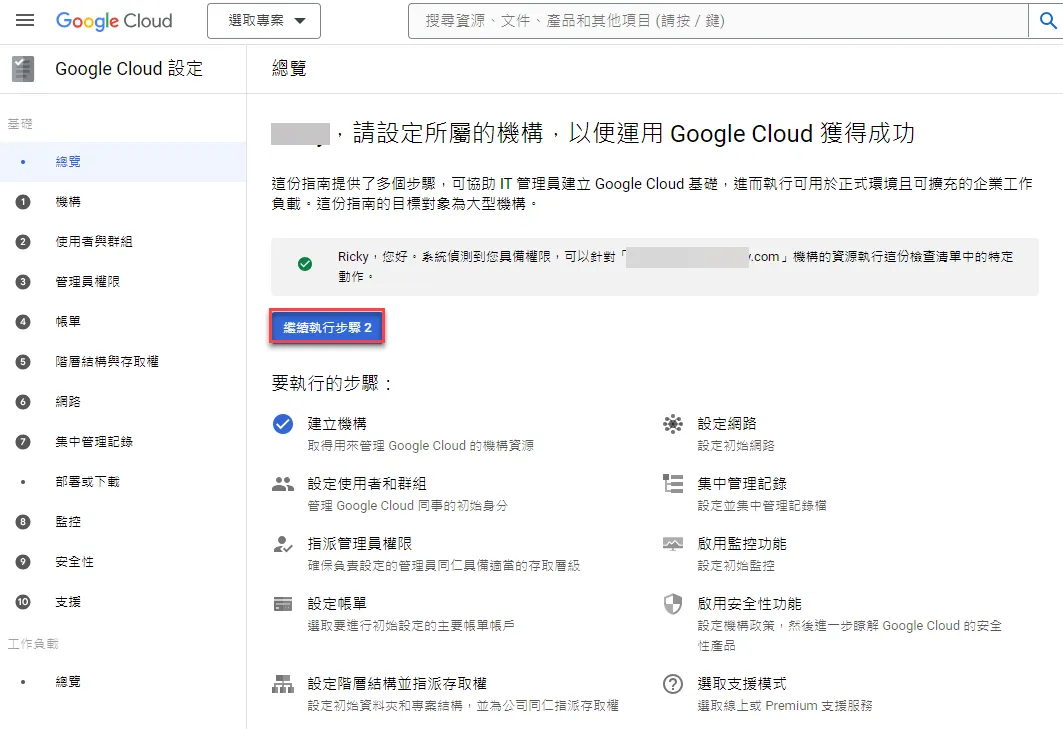
Once Cloud Identity is created, it means the organization is automatically created. Click to proceed to step 2
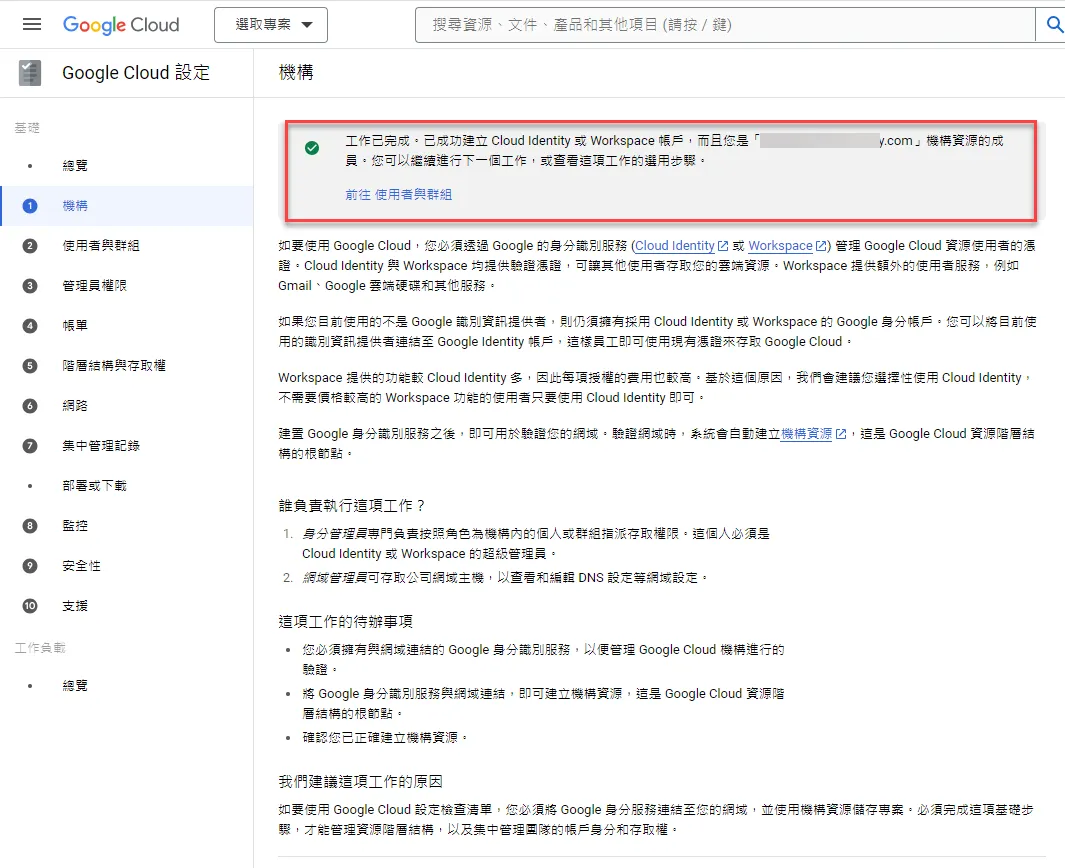
As long as the verification is successful, a green checkmark will appear at the bottom
This will also prompt what domain and identity are being used to enter
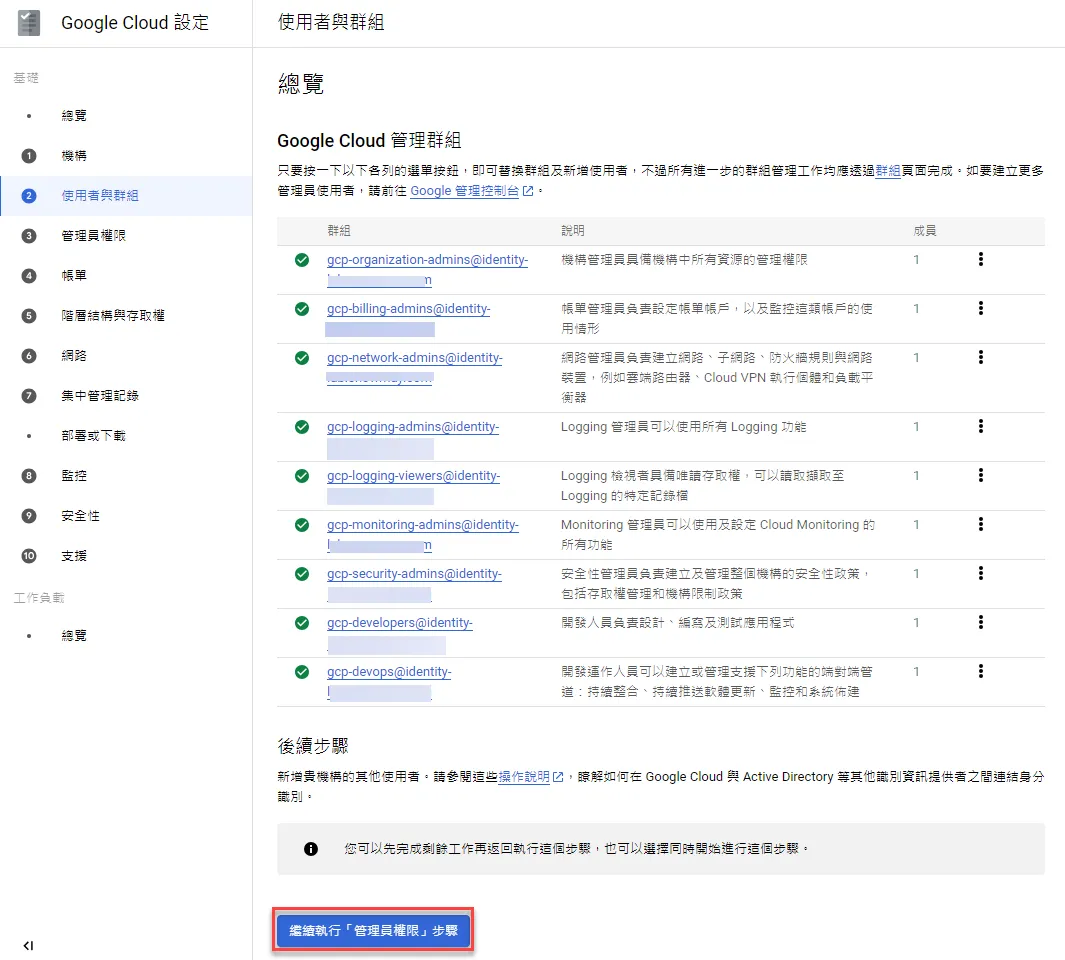
Create Groups
If using the GCP ORG feature for the first time, there is now a wizard to assist in automatically creating related groups
If you have no other ideas, you can create groups according to the official recommendations. These groups will be created in both Cloud Identity and GCP, and given appropriate GCP permissions
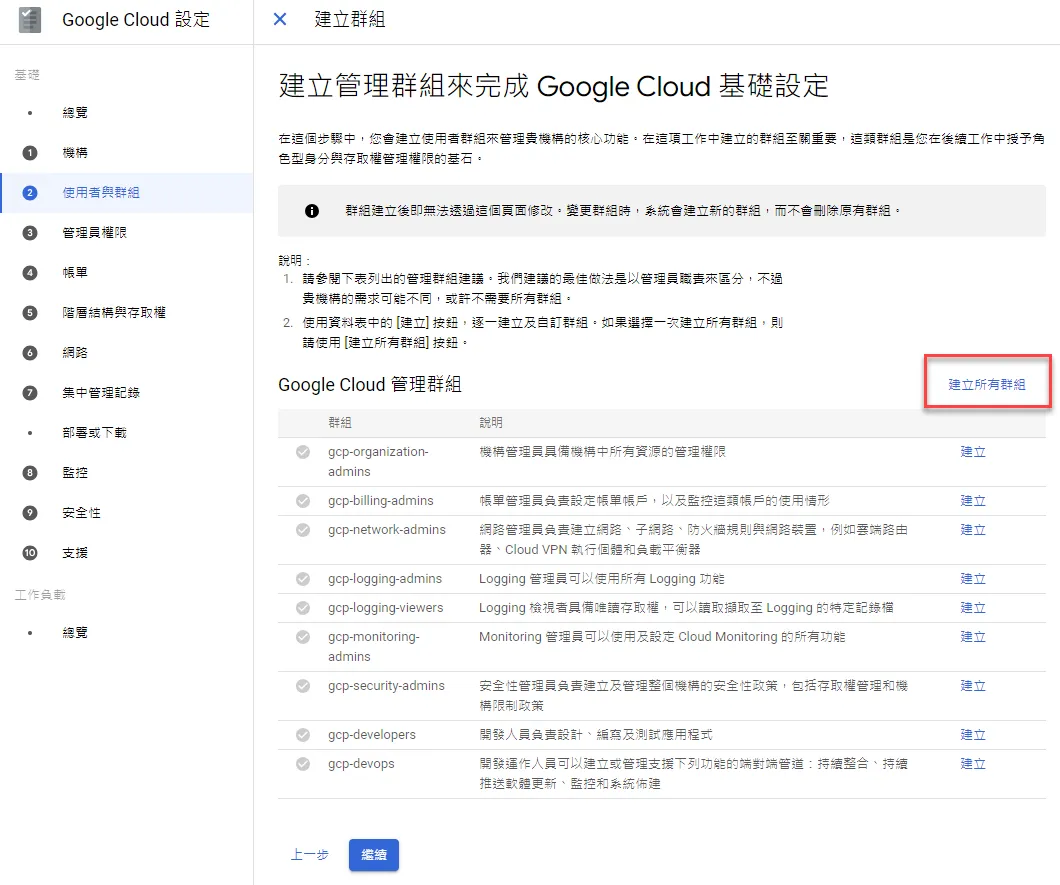
You can click to view which groups will be created and their descriptions
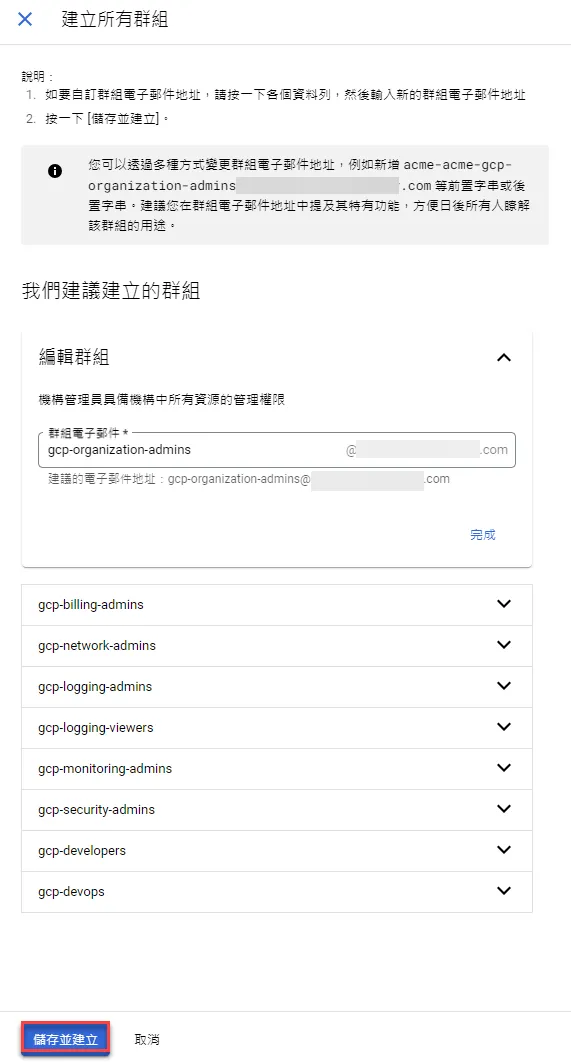
After clicking create, Cloud Identity will also synchronize the creation
After creation is complete, click continue
Create administrator users, click continue
You can add members to groups according to your needs, or add them later
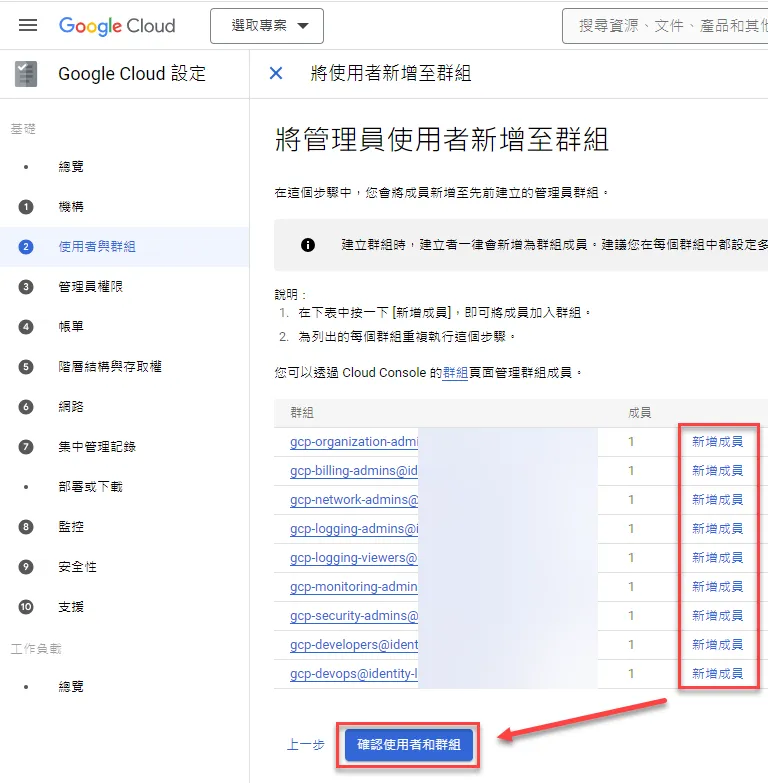
If there is only one person in the group, it will also remind you

After confirming that everything is fine, click continue to the next step
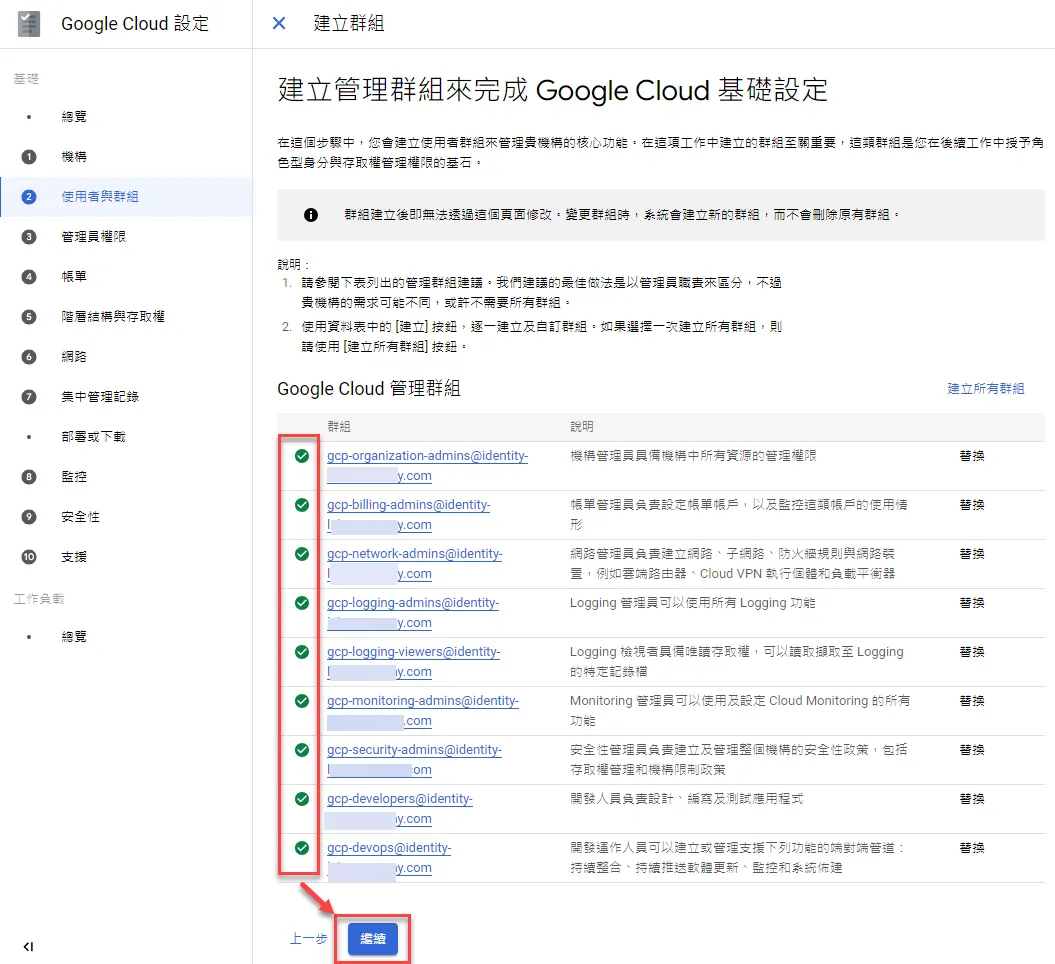
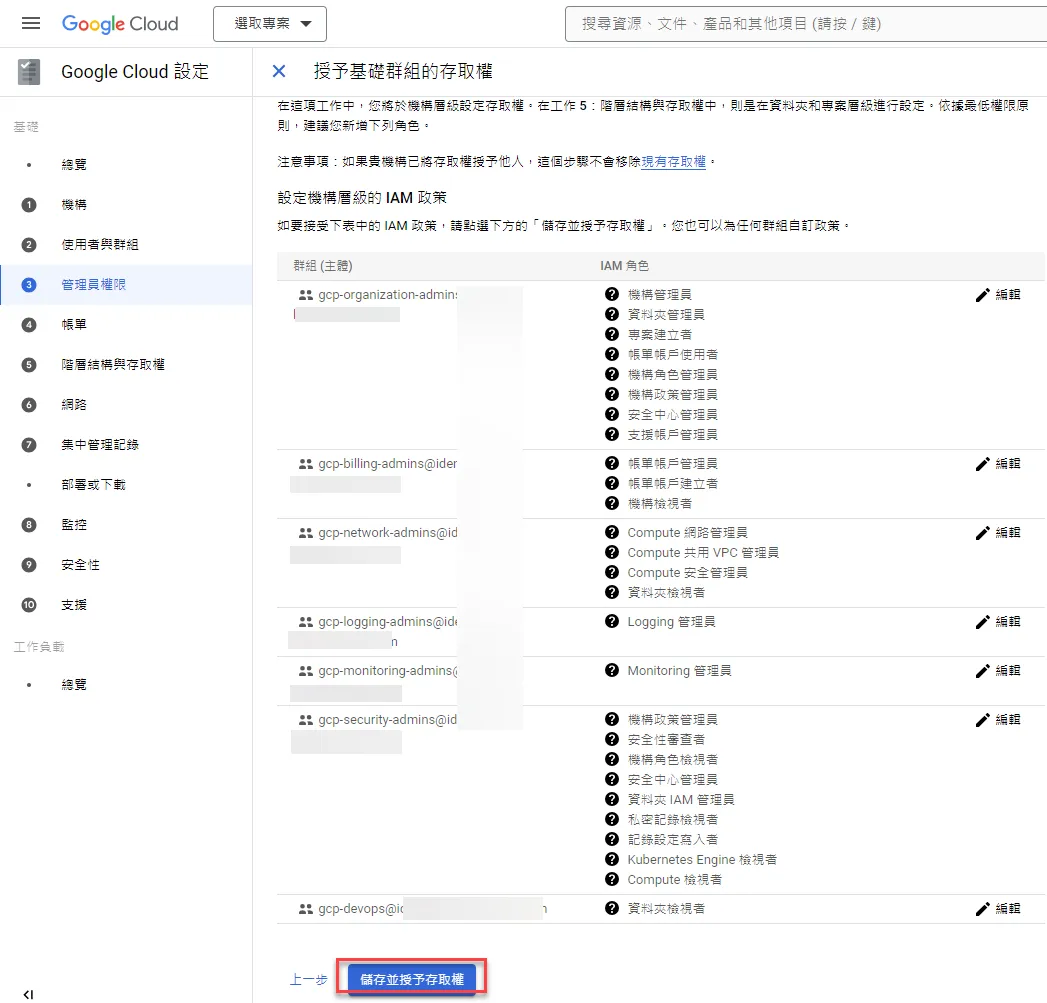
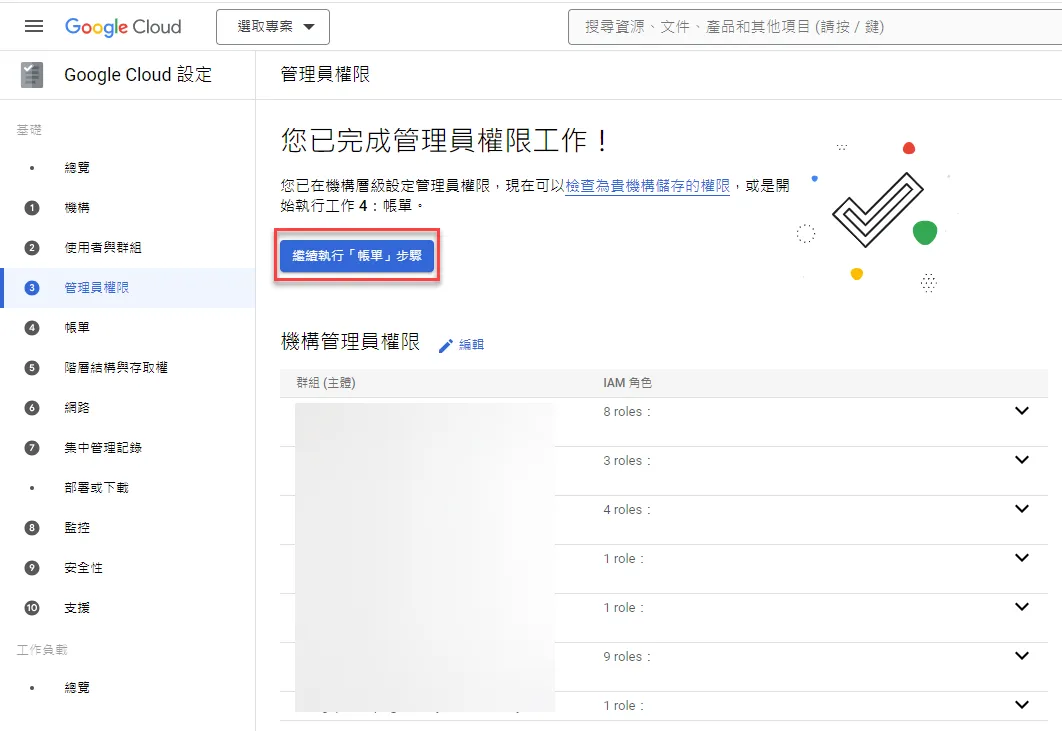
Grant Administrator Permissions
Next, click continue to the next step to start granting related permissions to groups
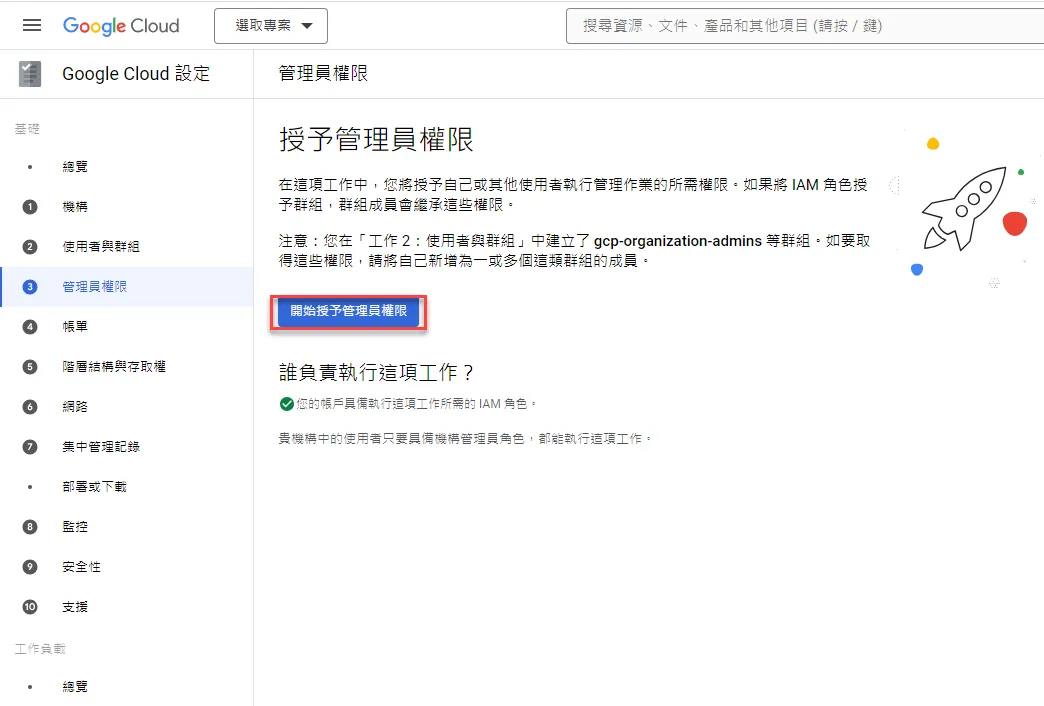
By default, corresponding permissions will be given to each group, you can use the default for now
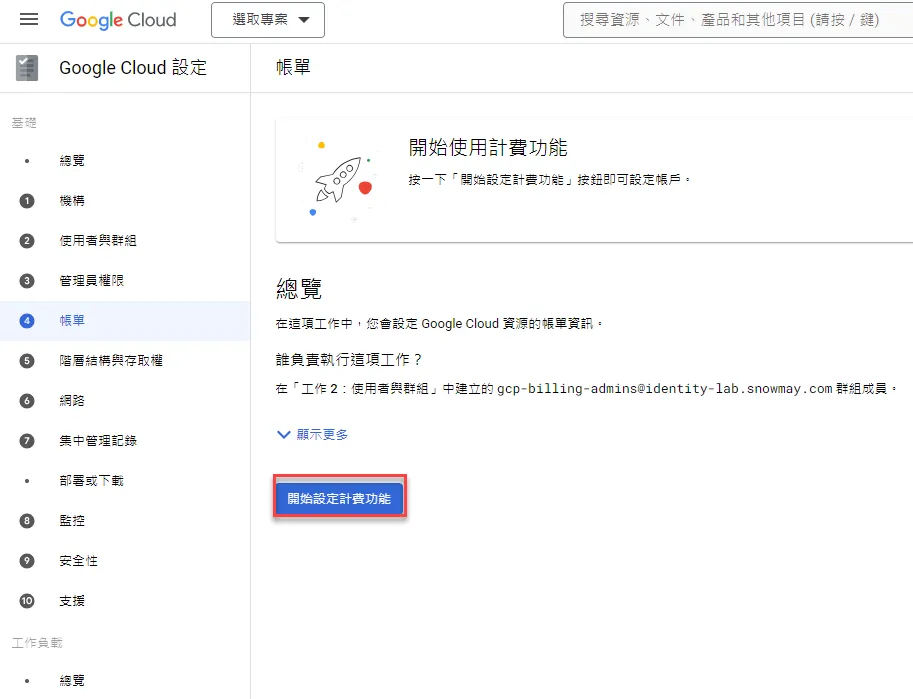
Billing Setup
After completion, start setting up billing
Click to start setting up billing functionality
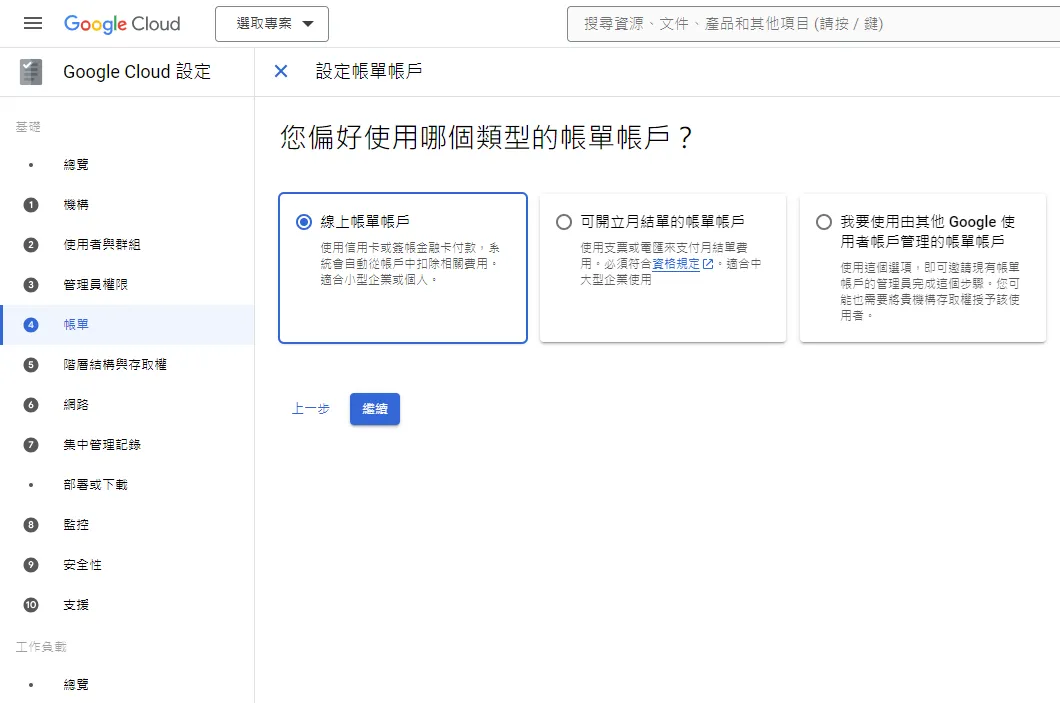
Choose billing according to your actual situation
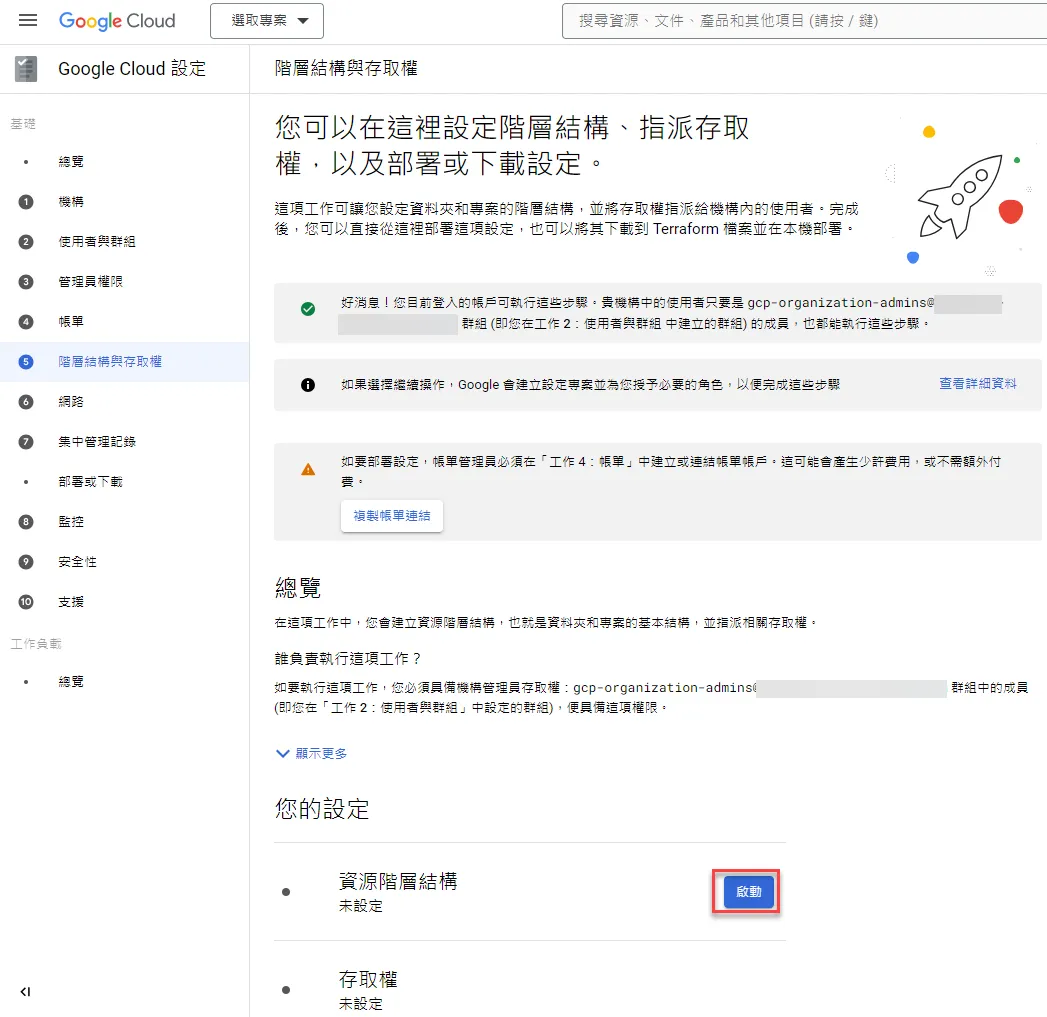
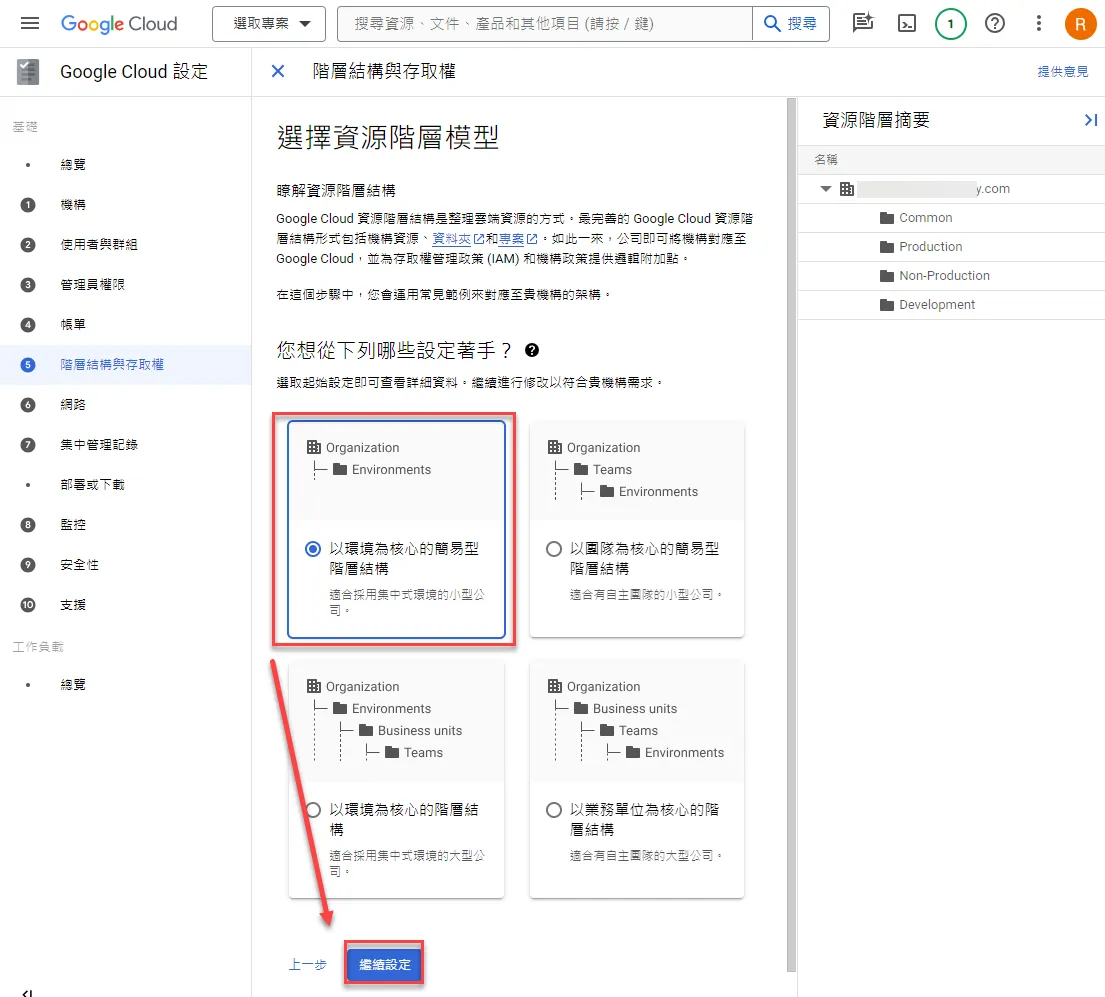
Organization Structure Setup
You can set up the hierarchical structure of the organization, and official templates are also provided. This step can be skipped and manually created later if needed
You can choose from these four types according to your needs
After selection, you can modify the folder name
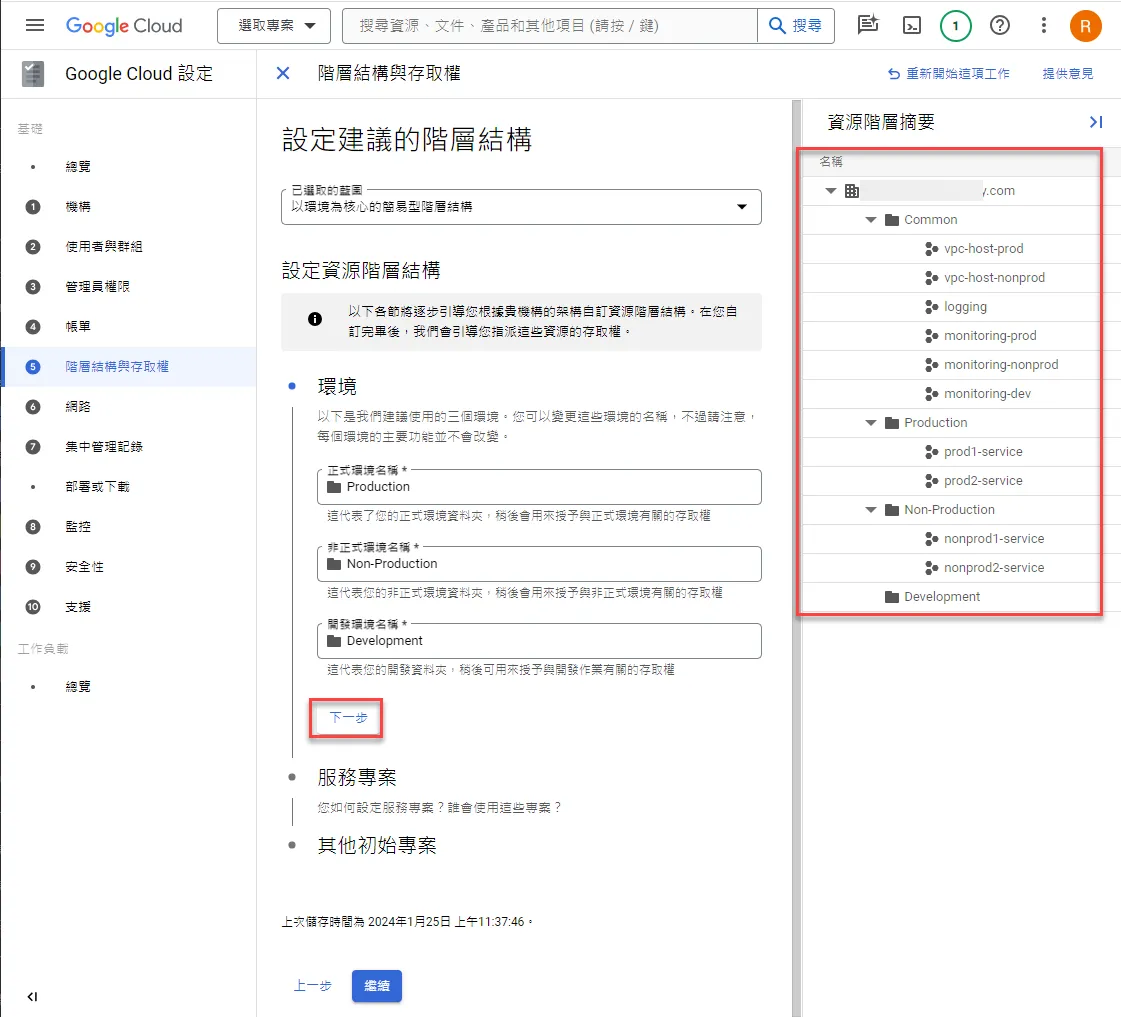
You can also adjust project names and configure user groups
After completion, click next
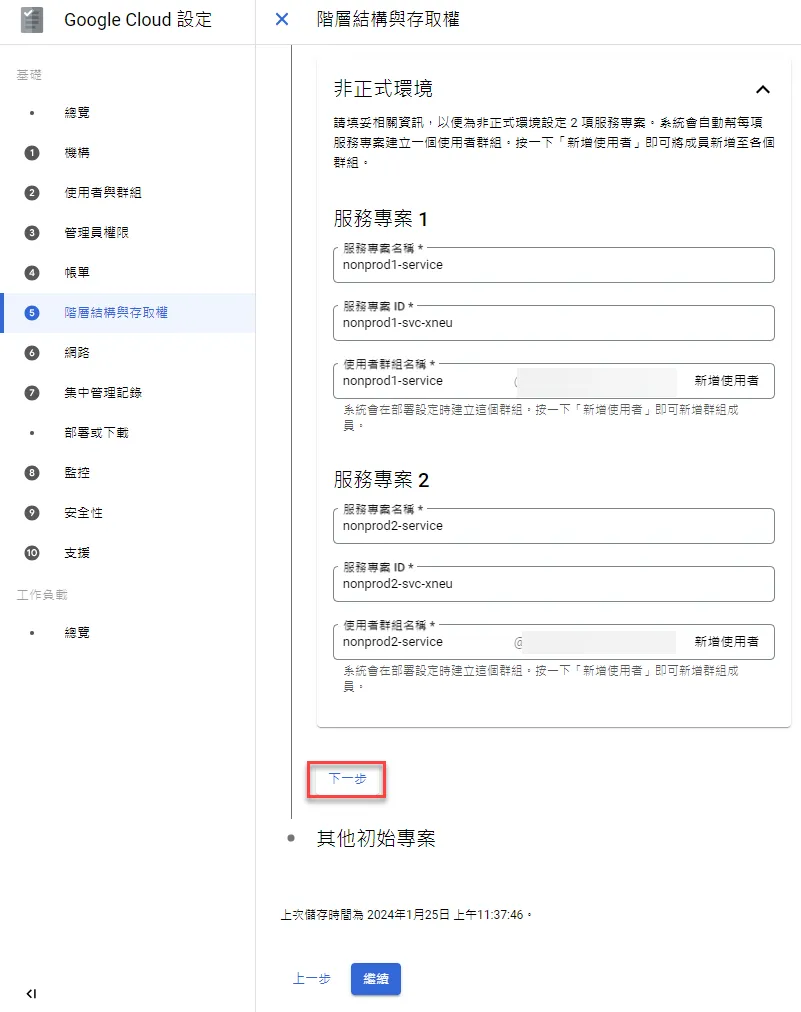
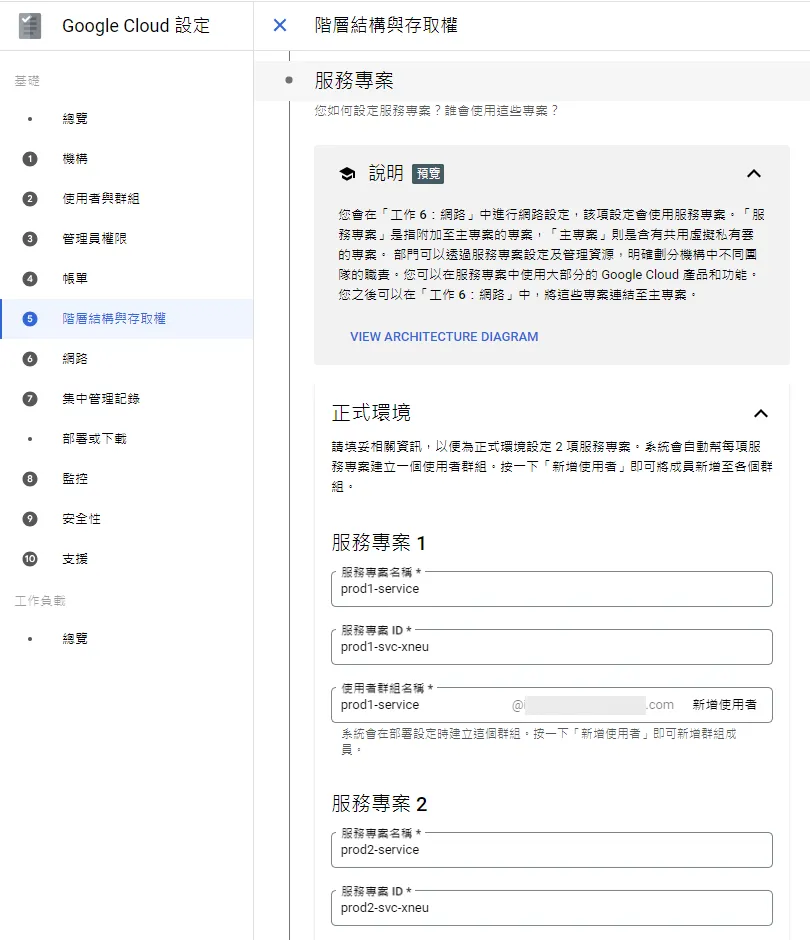
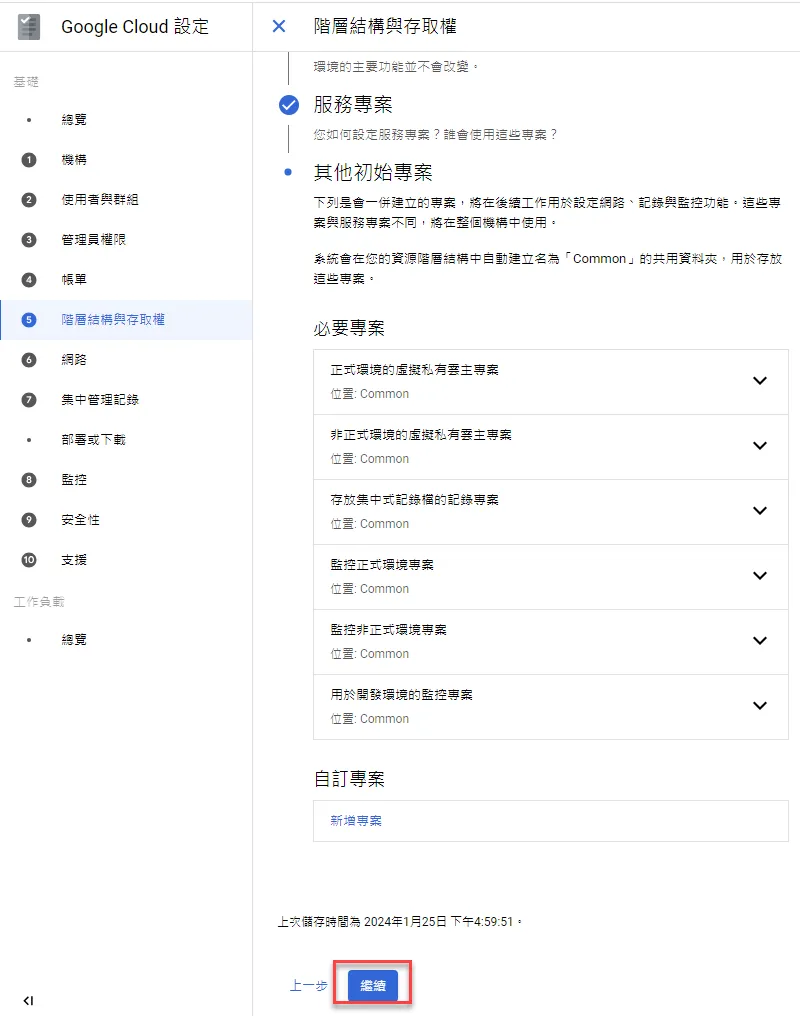
Some other initial projects will also be configured, click continue if everything is fine
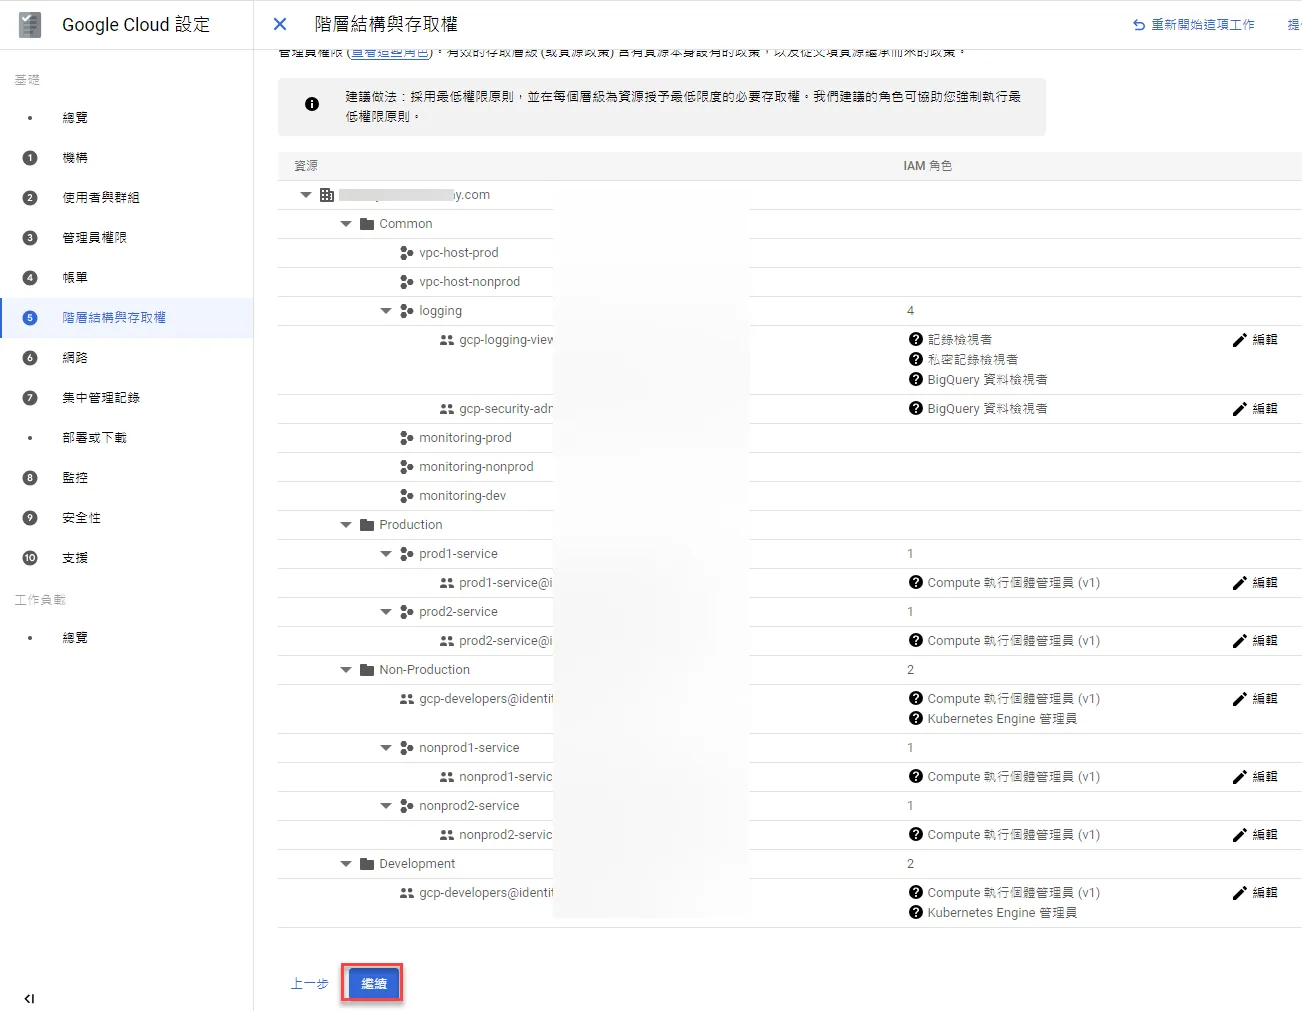
Confirm the complete resource structure, click continue if there are no issues
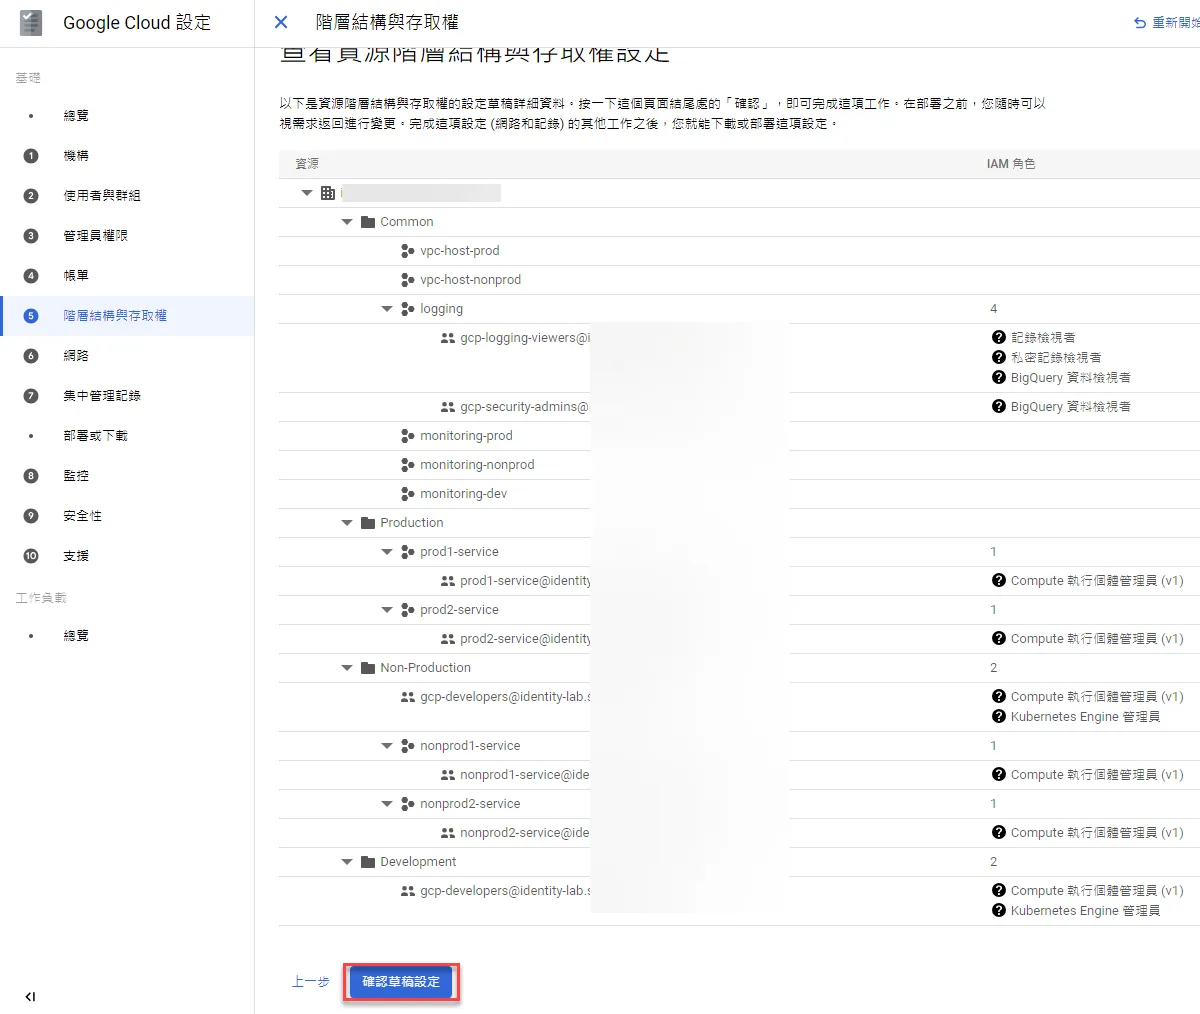
Click confirm draft if everything is fine
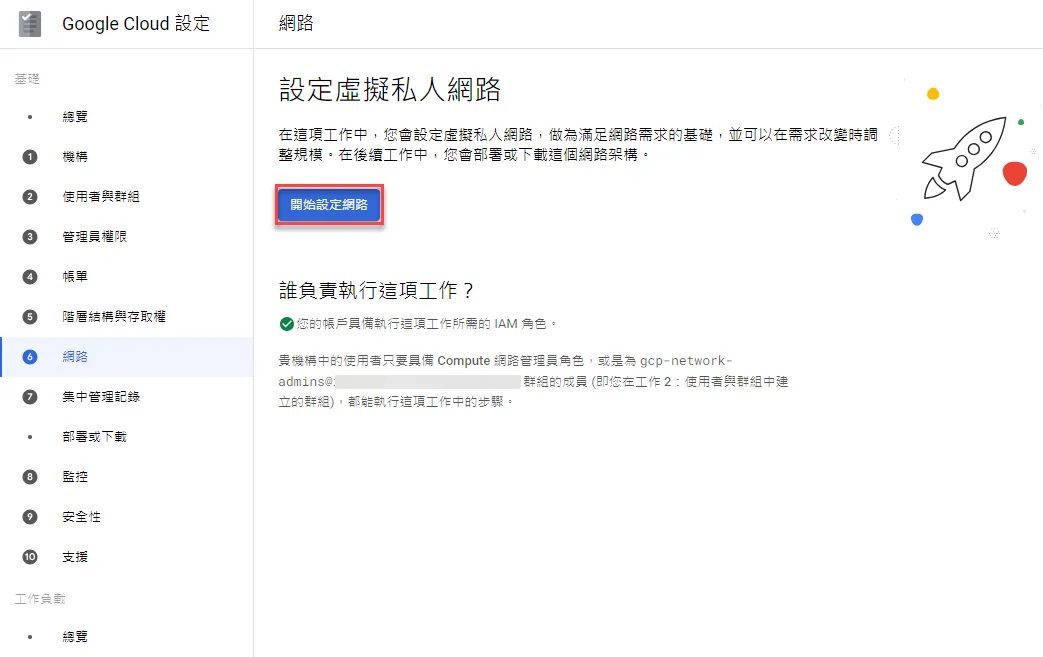
Network Configuration
Next, proceed with network configuration
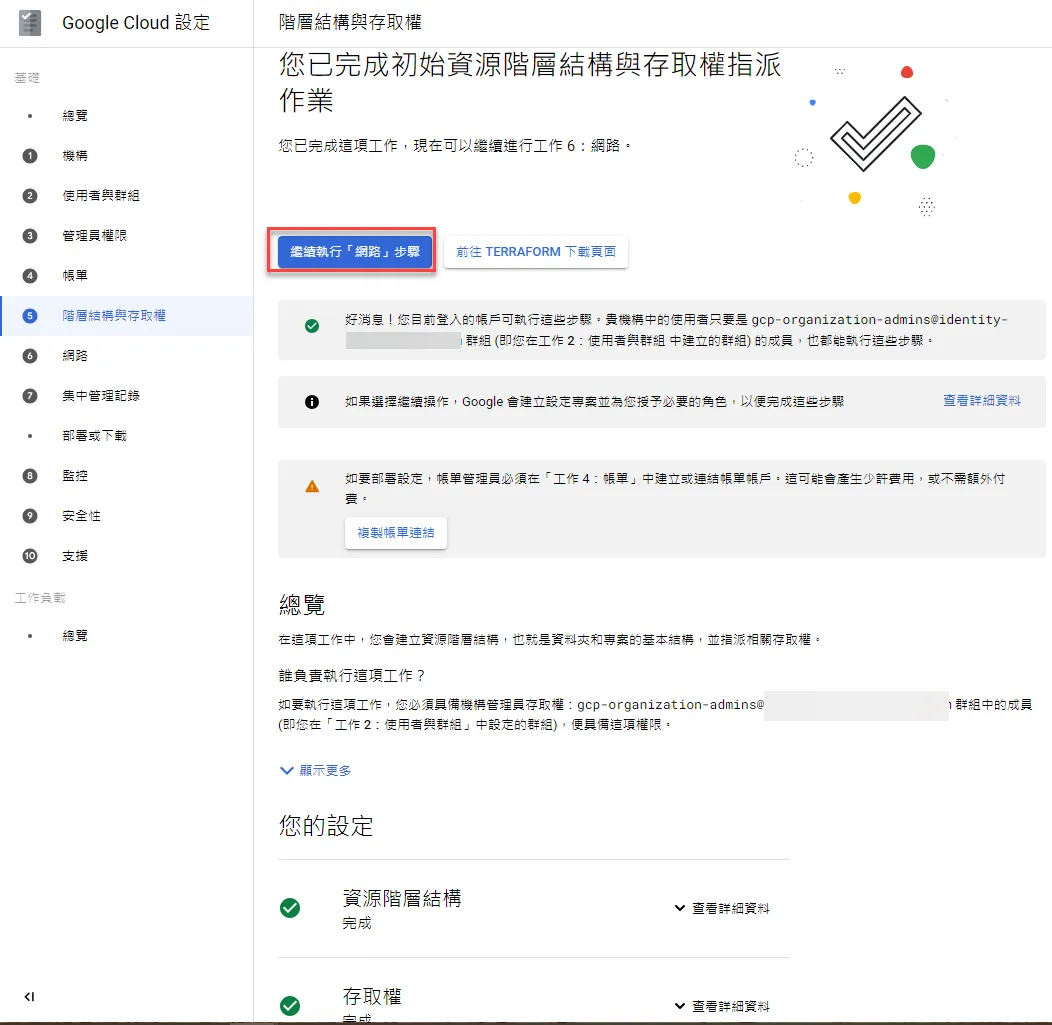
Click to start setting up the network
A reference description page appears, click continue
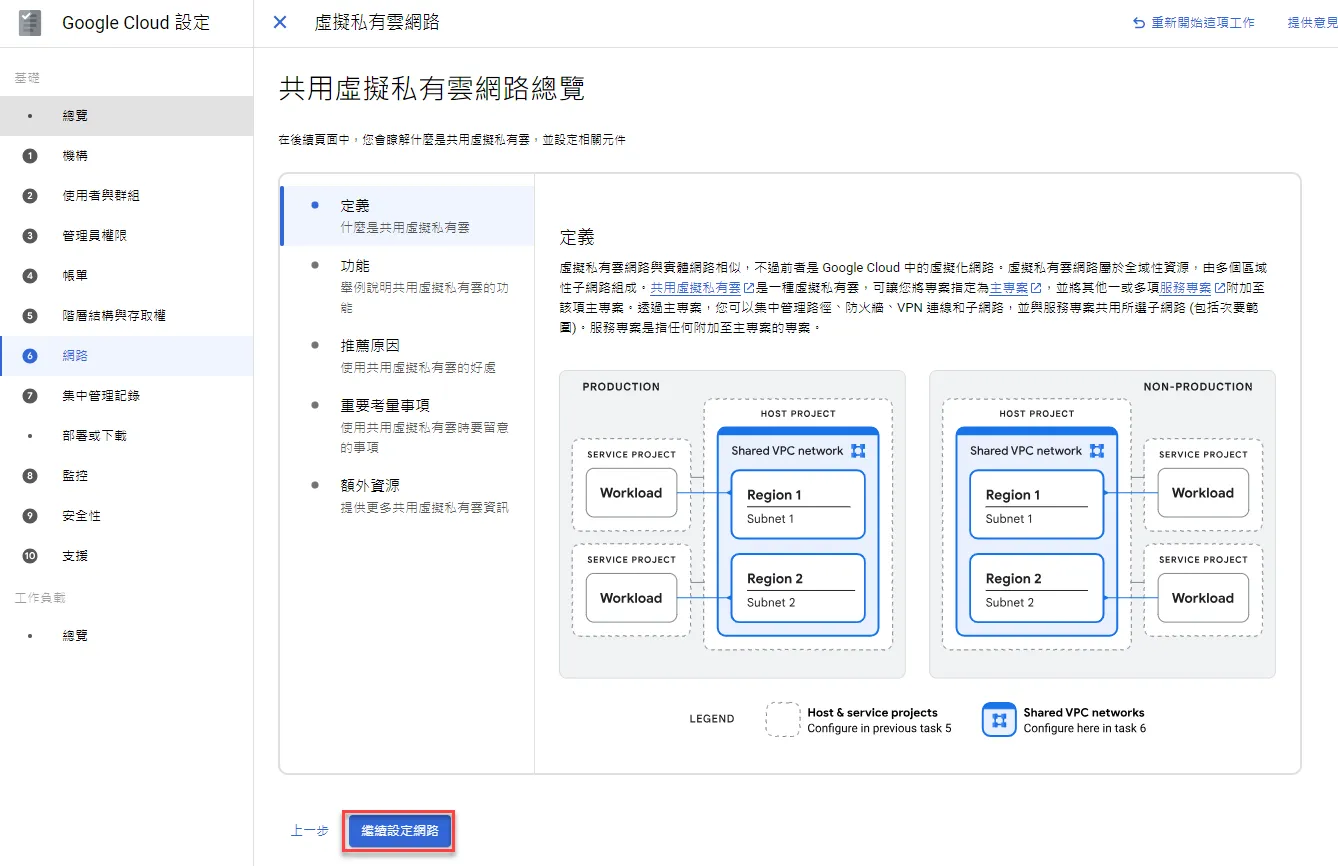
Click to configure

Configure according to requirements
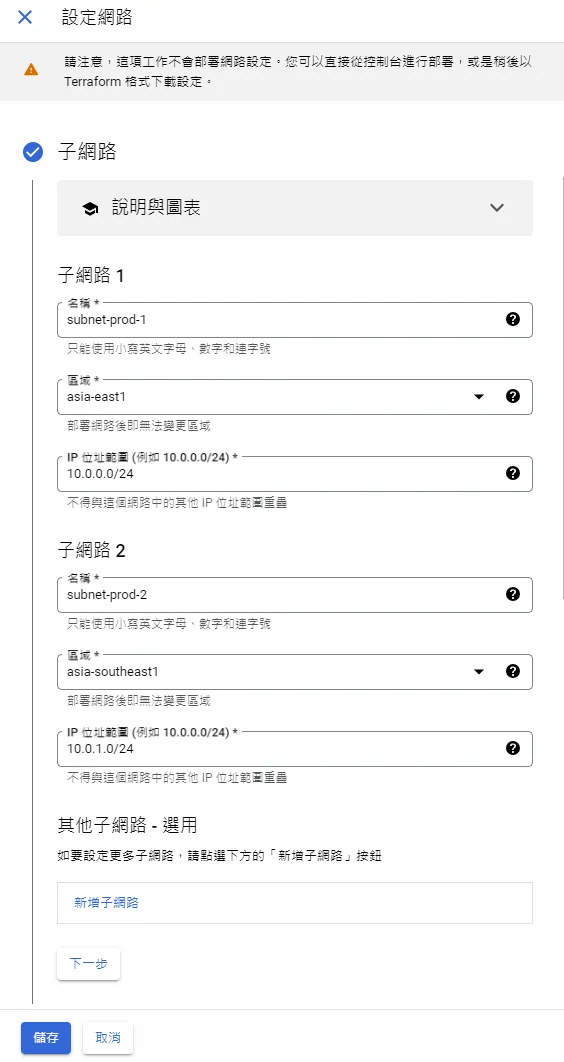
Set up firewall rules

Ensure IP is normal and all other functional requirements are configured
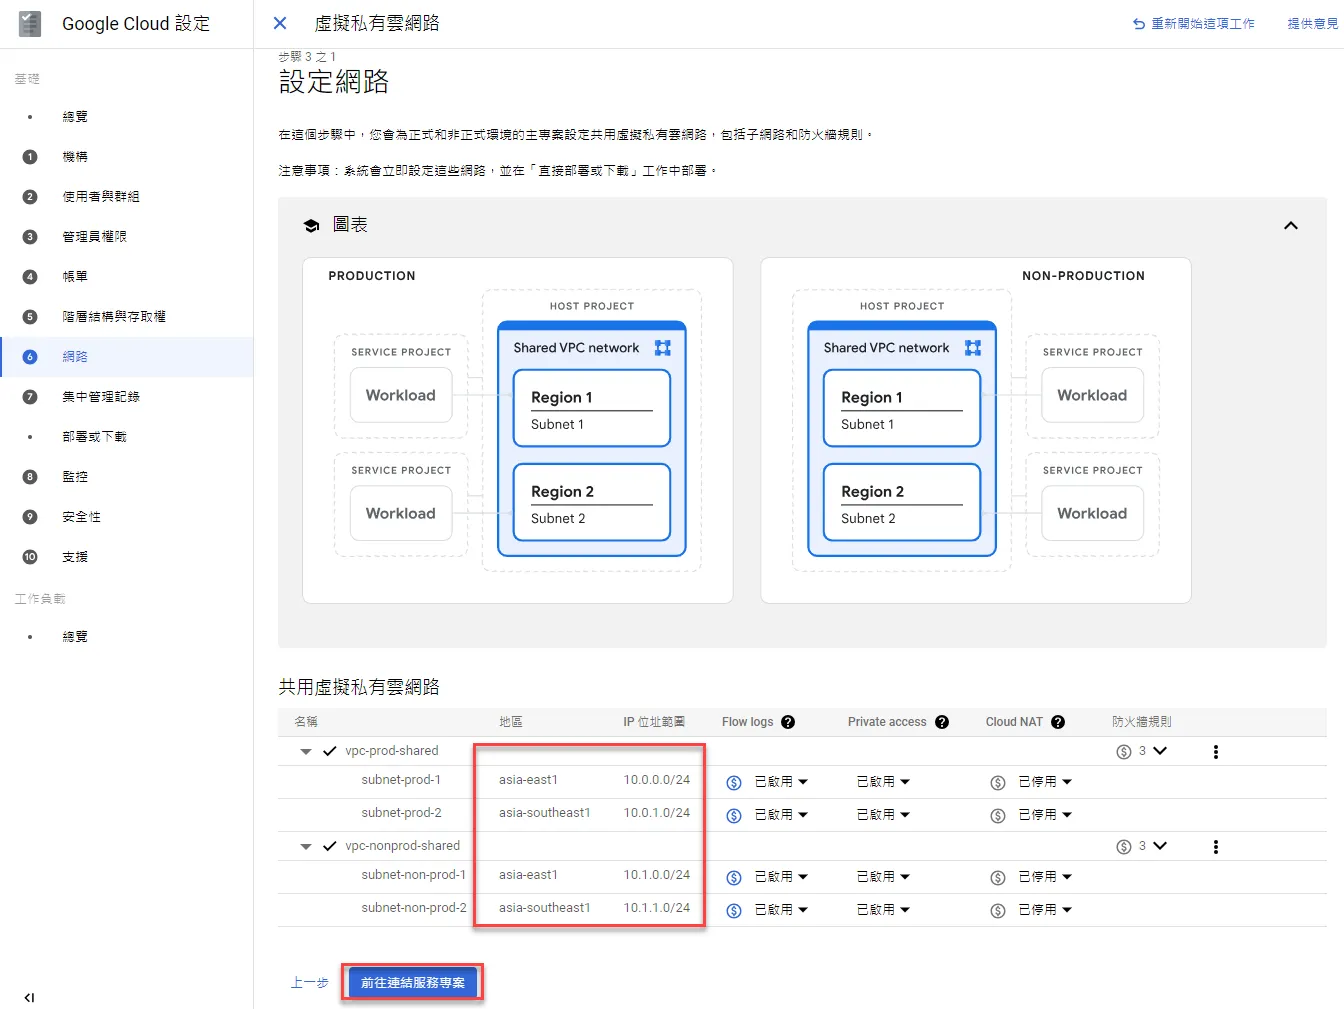
Set up corresponding projects
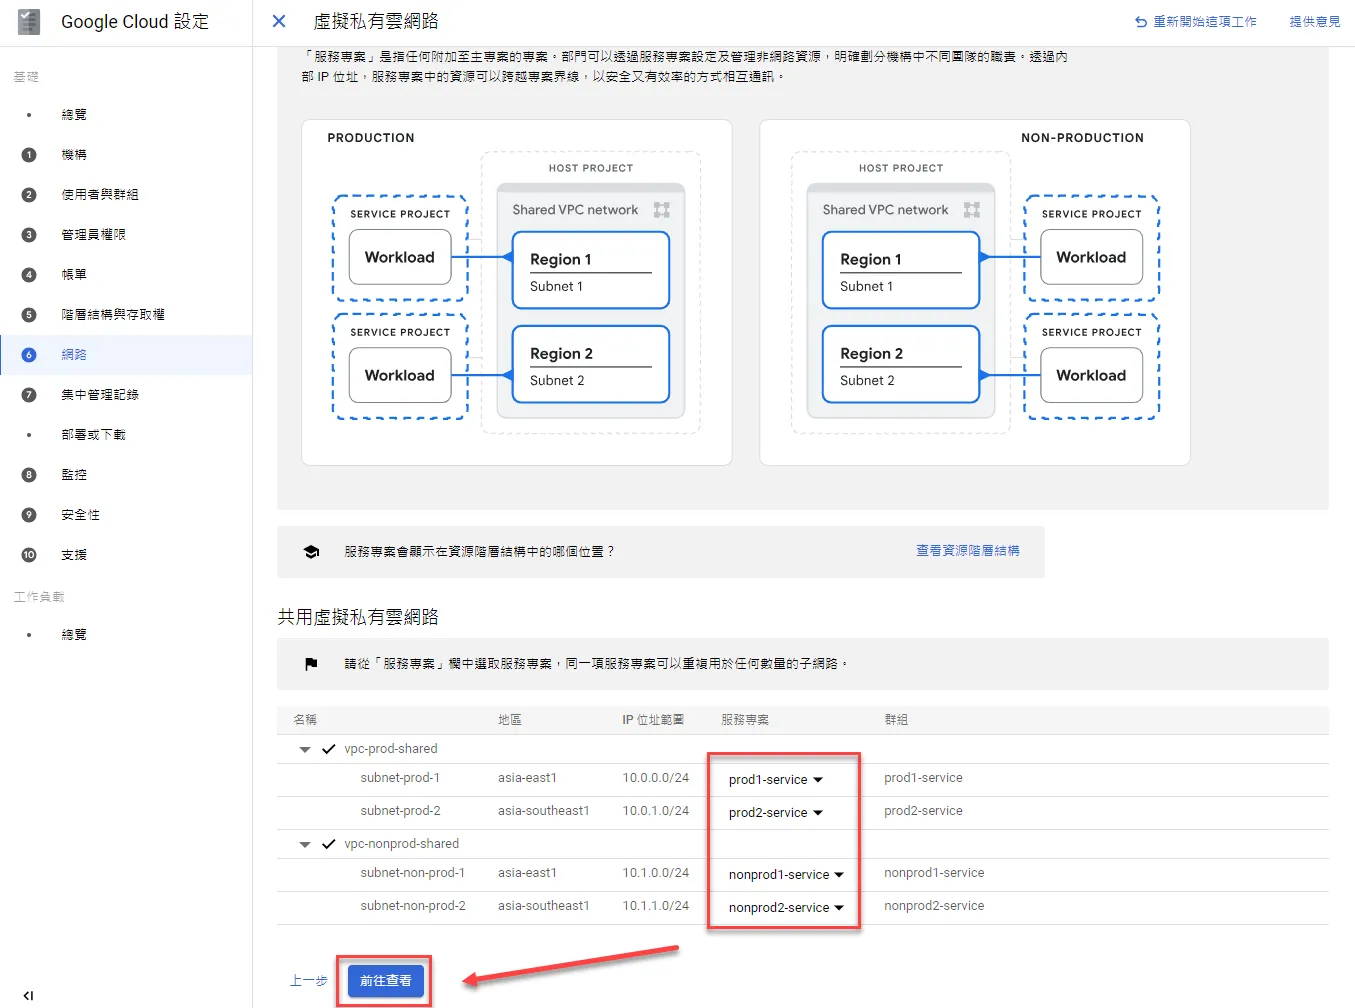
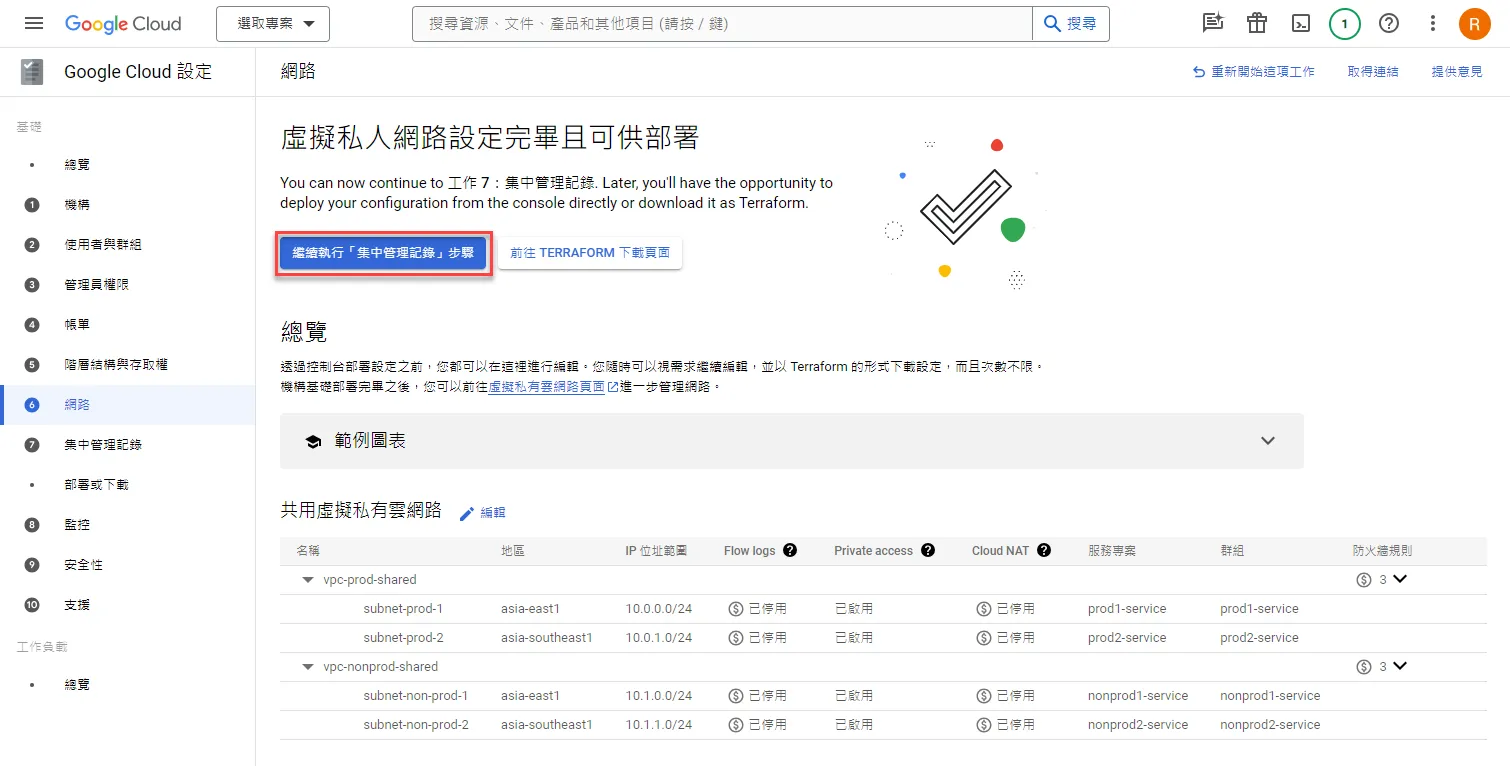
After configuration is complete, click confirm

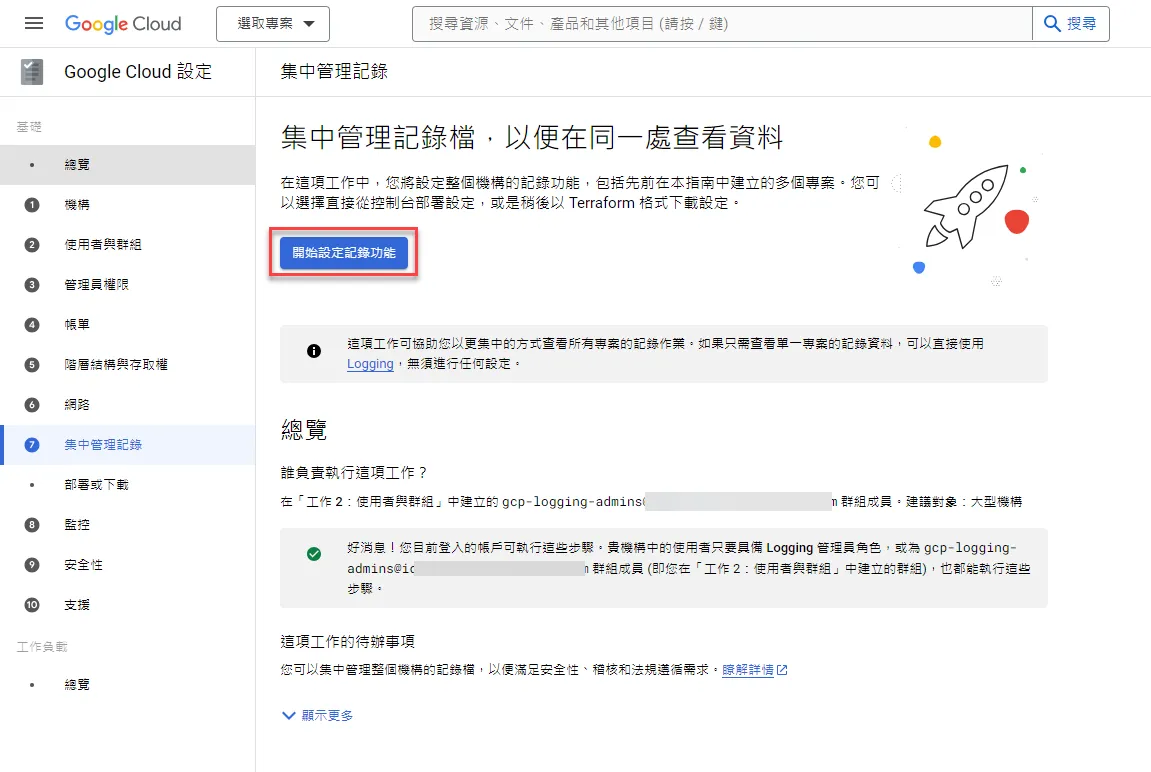
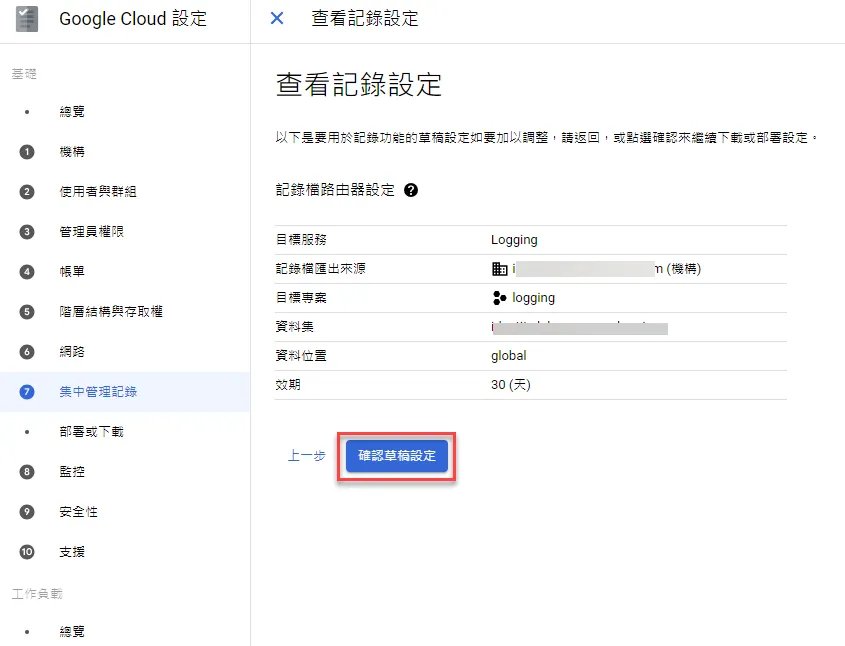
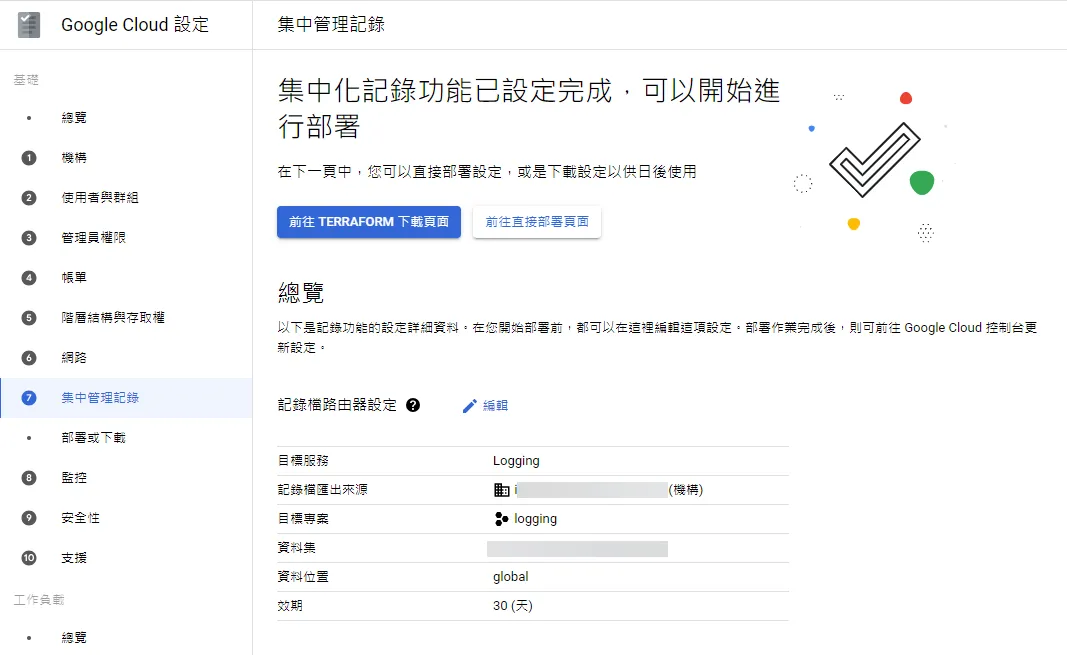
Set Up Centralized Logging
Click continue
Click to start configuration
Set up the name
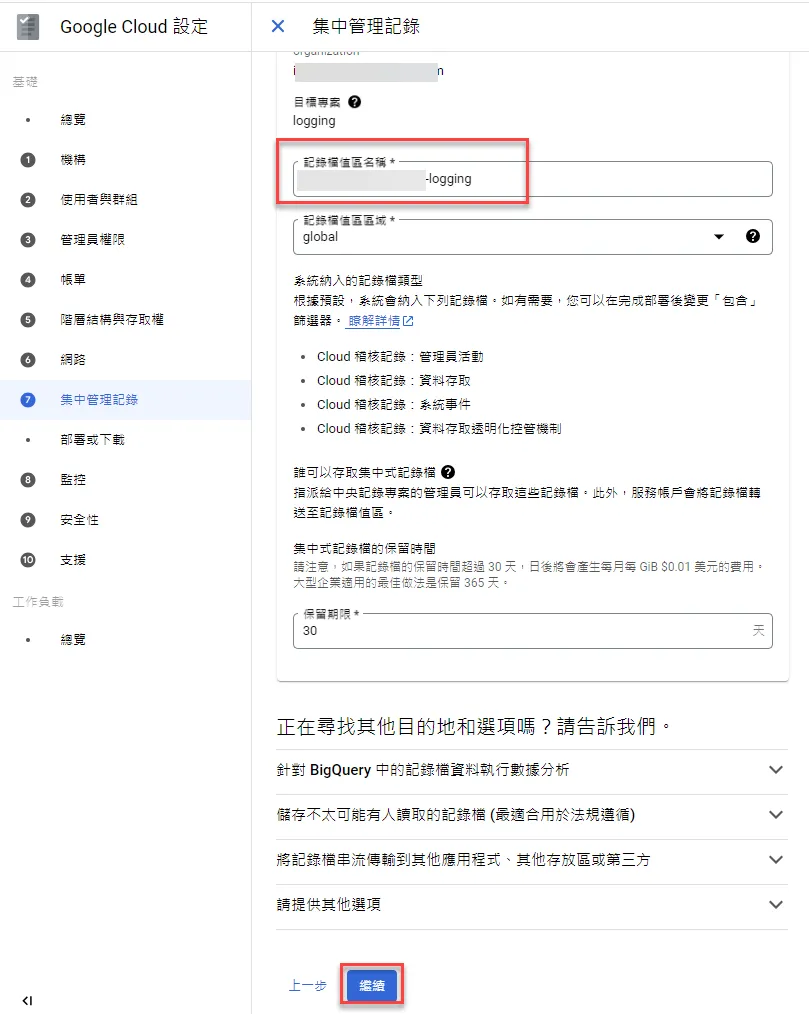
Confirm the draft
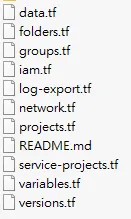
Download Deployment Script
You can download Terraform
Click to download in Terraform format
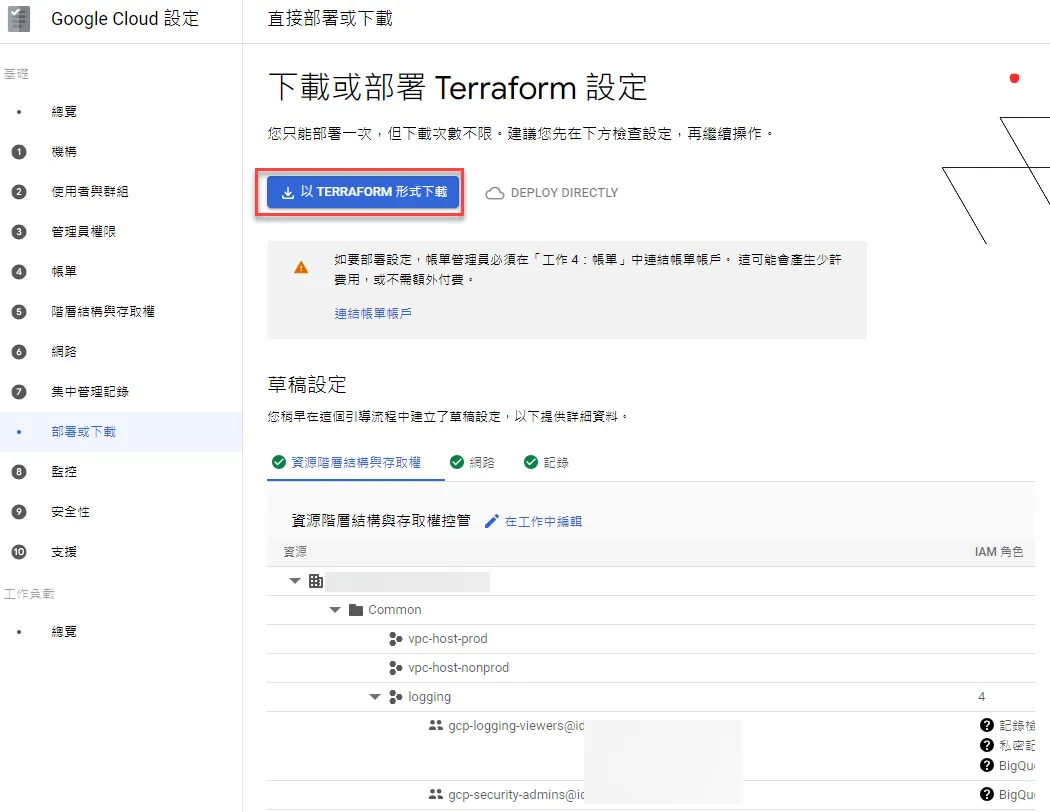
You can download Terraform configurations according to your needs
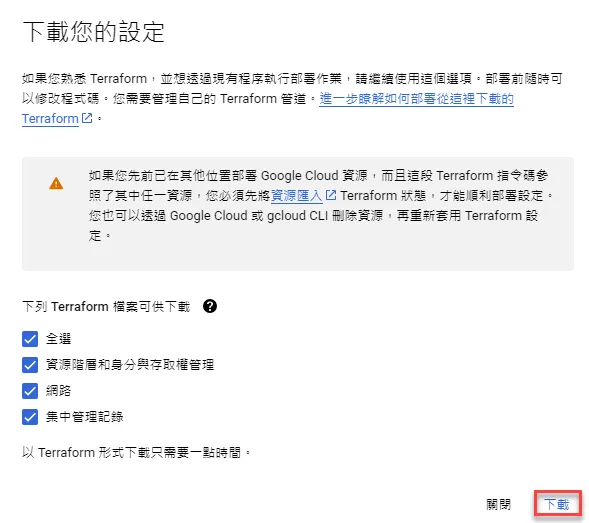
After downloading, you can see various configuration files
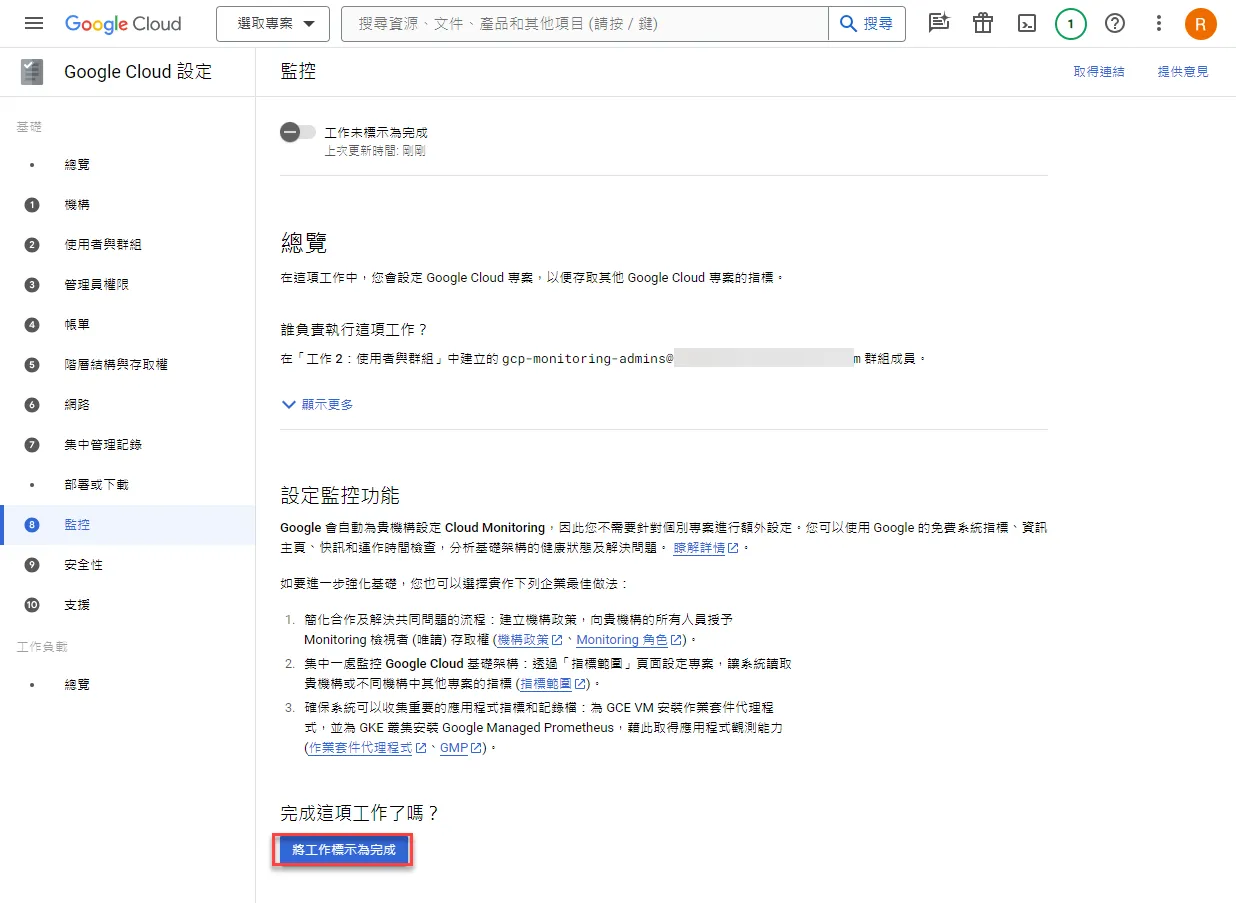
Other Settings
You can set up monitoring according to your needs
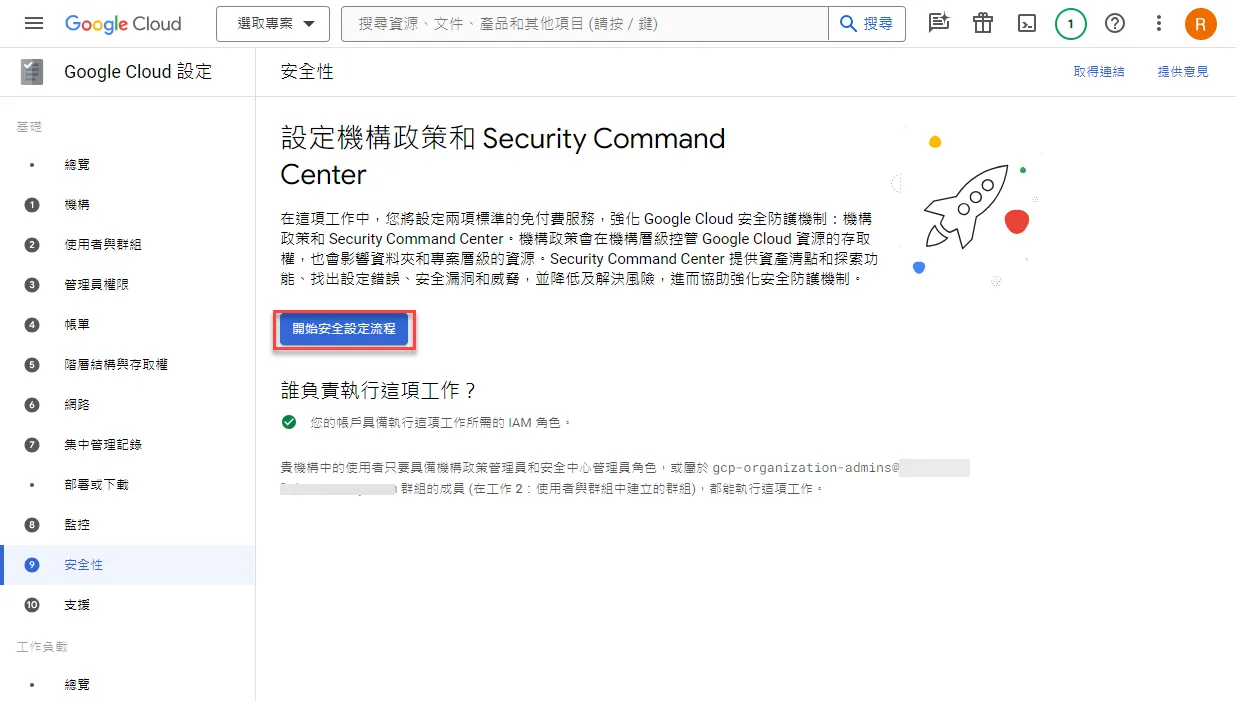
You can set up SCC according to your needs
You can select and apply according to your needs

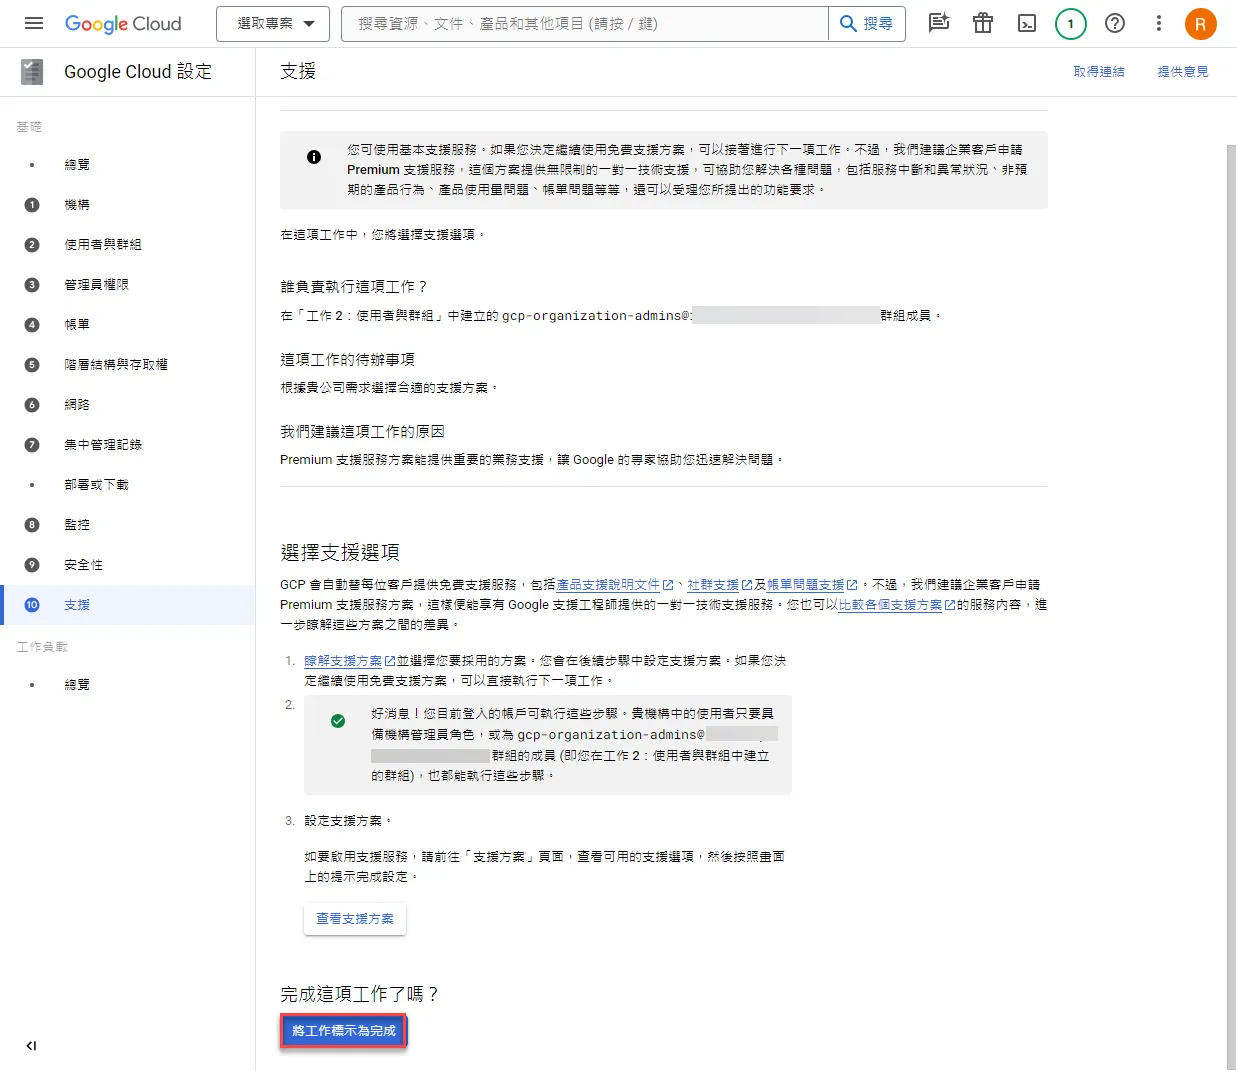
Support plans can be purchased according to your needs
This completes the process of creating a GCP Organization from scratch