GWMMO Outlook Migration
Purpose
Use GWMMO for client-side email migration tasks
Steps
Install GWMMO
You can refer to this tutorial for migration:
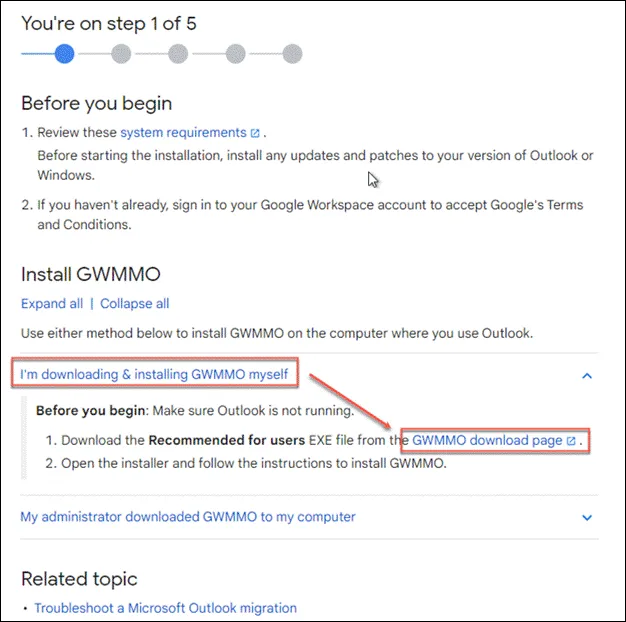
Or download the GWMMO program from the following link:
Google Workspace Migration for Microsoft® Outlook

After downloading, click on the installation file to automatically install

Migrate Data from Outlook
Original Data in Outlook
- Emails
- Folders
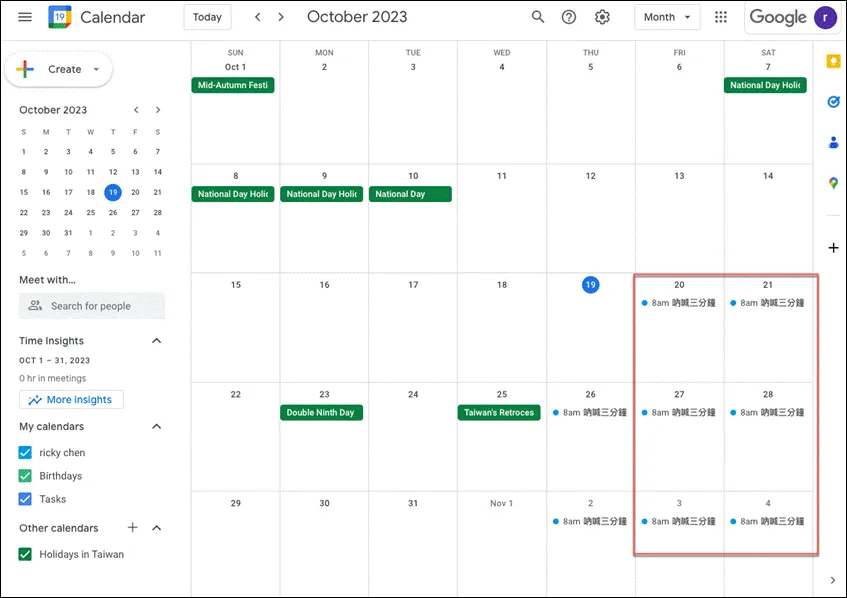
- Calendar
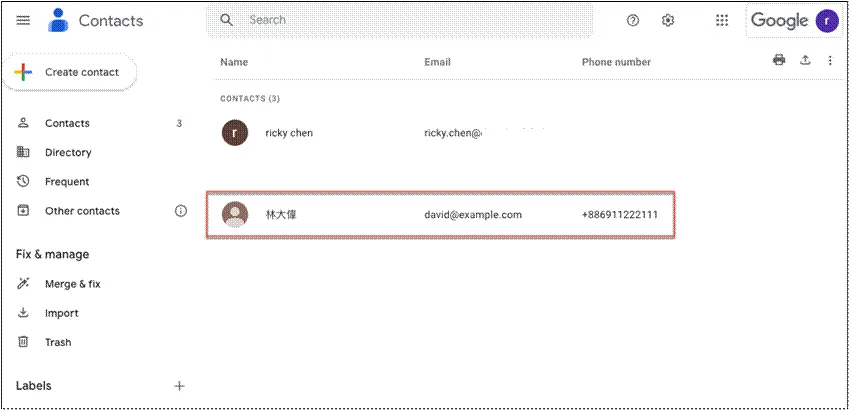
- Contacts
Perform First Migration Using GWMMO
After installation, the program will automatically open for relevant settings
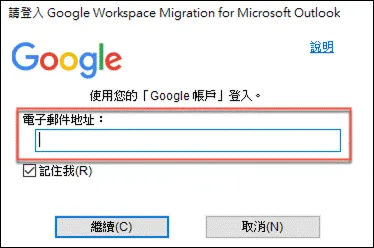
Enter your company’s GWS account here
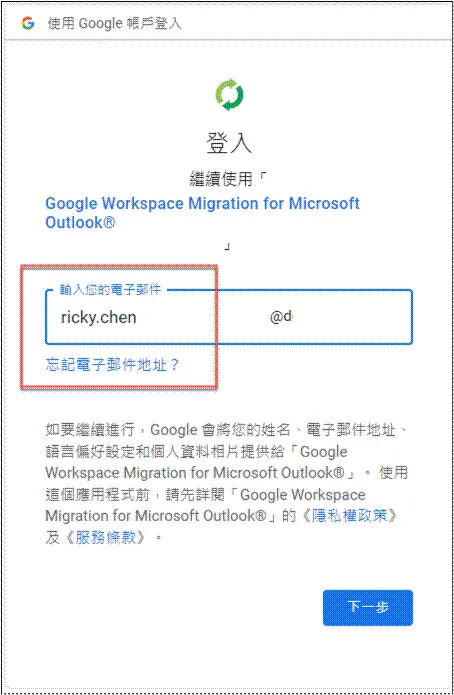
Then a browser will open for login authentication again
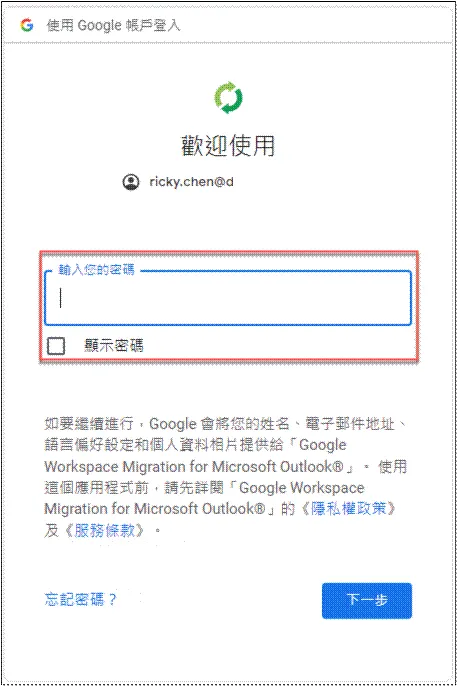
Enter password
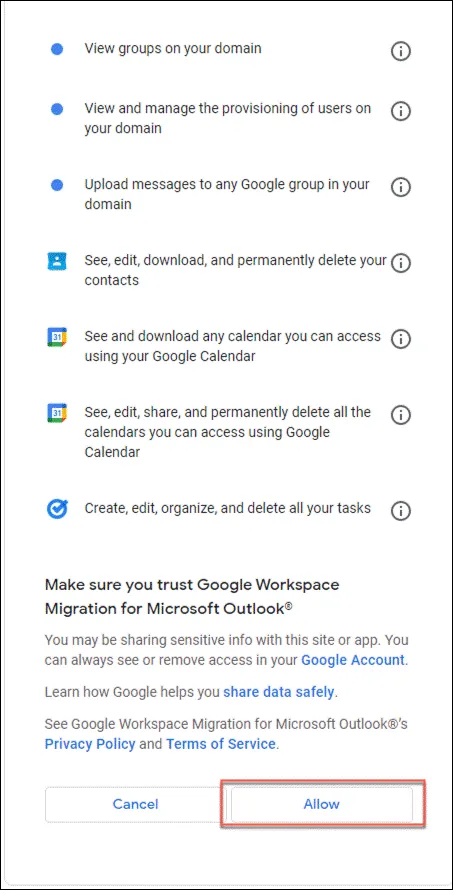
Prompted for required permissions, click allow
-
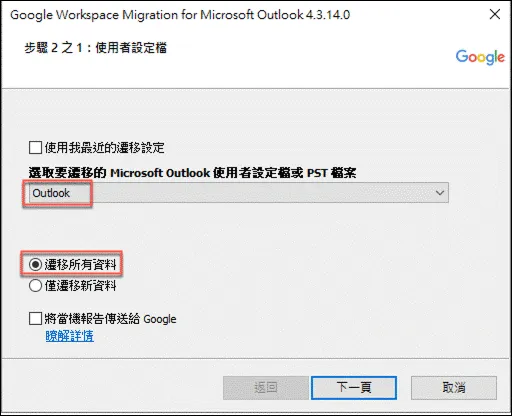
The screen then returns to the GWMMO program, where you can choose to migrate current Outlook settings (Exchange data file default is OST), or PST files
-
For differences between OST and PST, refer to the official explanation, or unofficial comparison table
-
As this is the first migration, choose to migrate all data
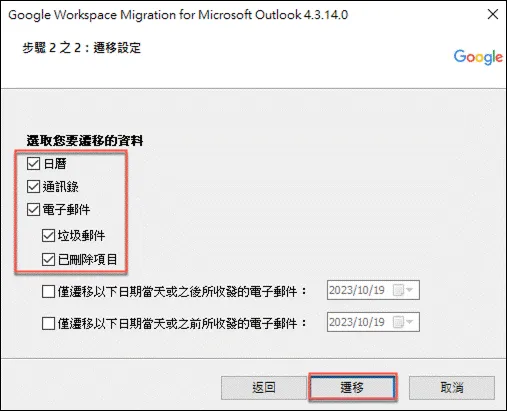
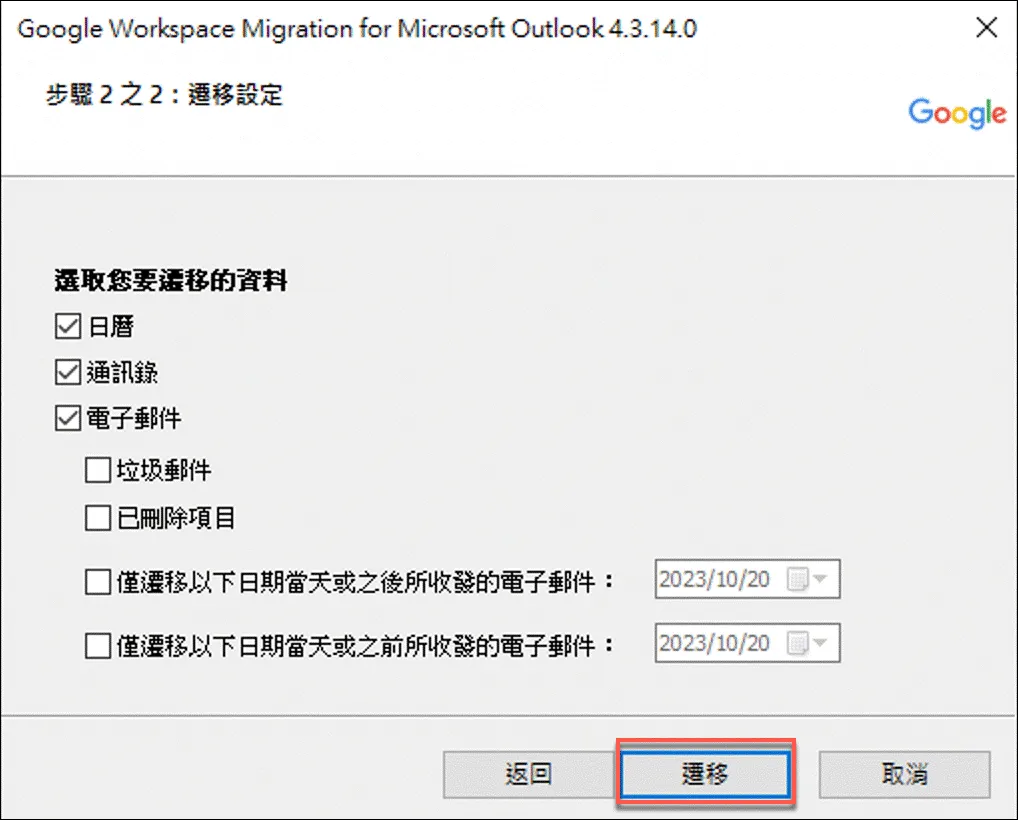
Choose the data to migrate, and if needed, you can also migrate emails from a specific period
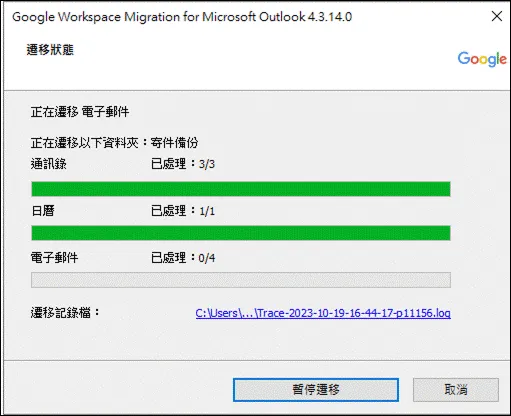
Start migration, migration time depends on the amount of data
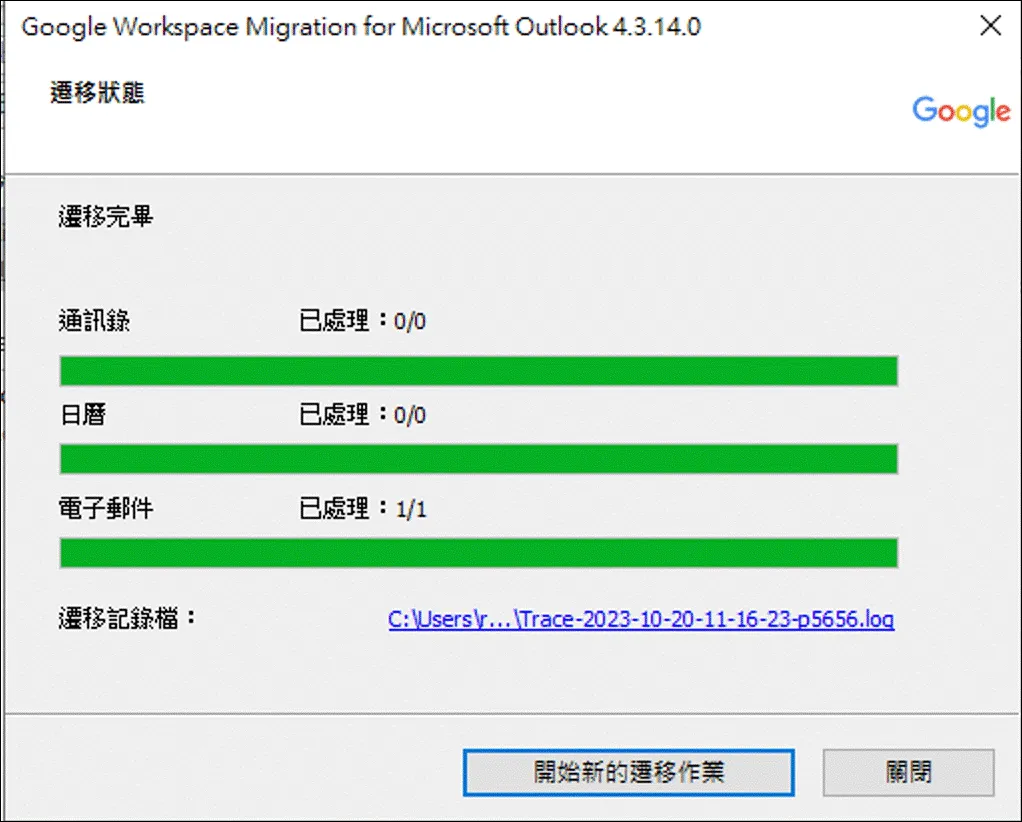
A prompt will appear when migration is complete
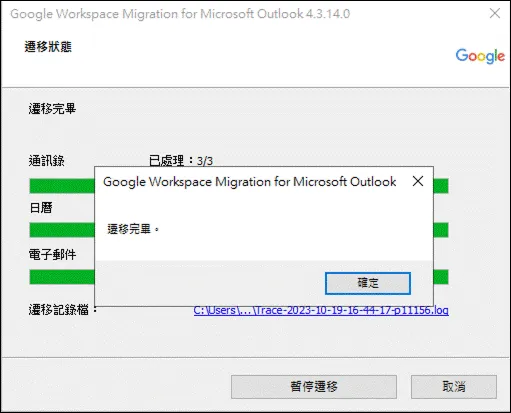
You can close the window after migration is complete
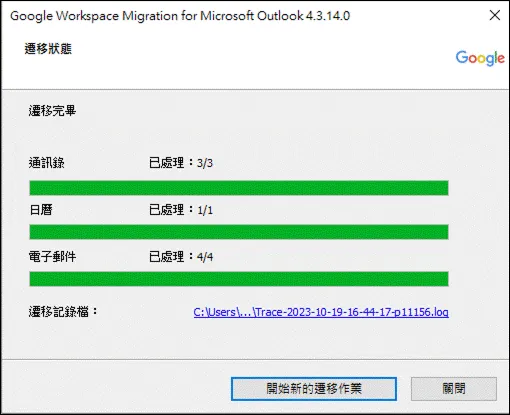
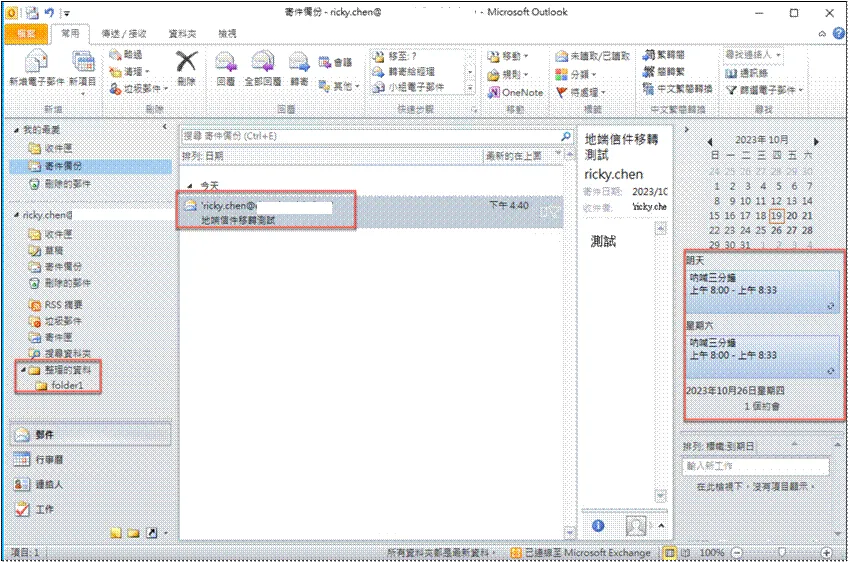
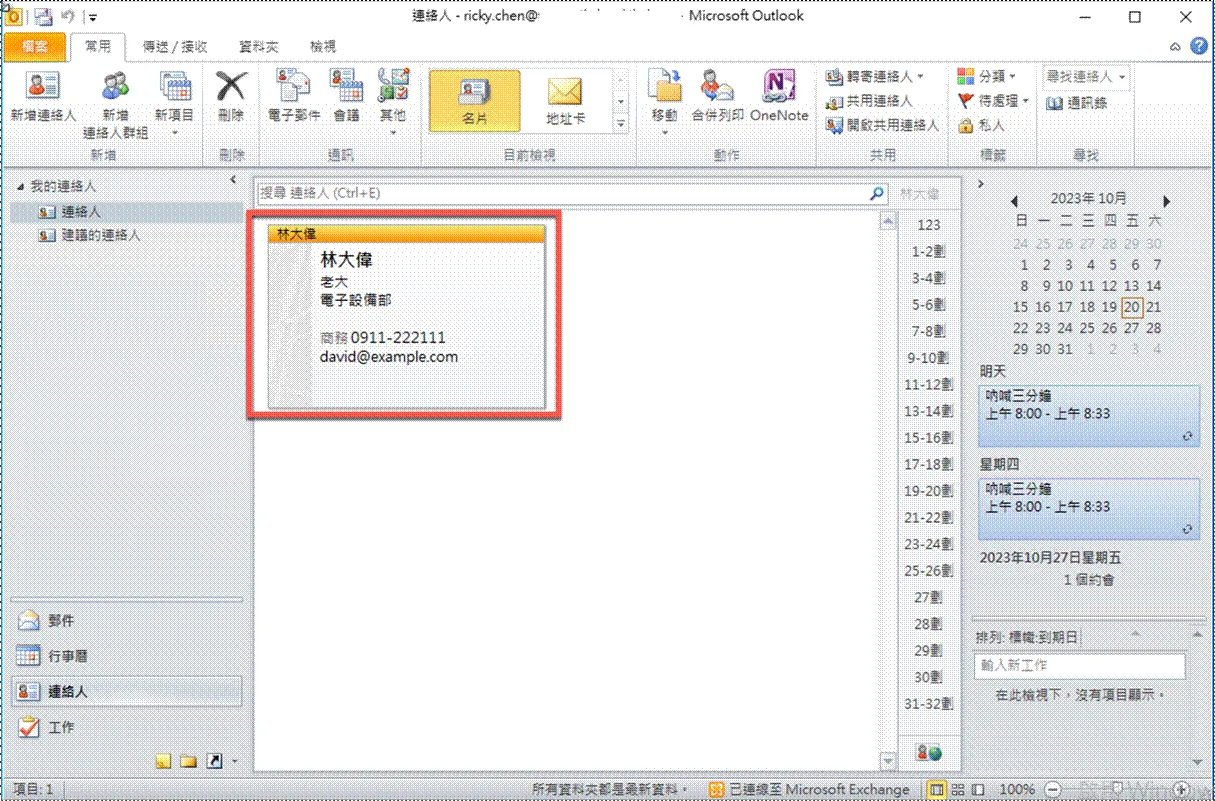
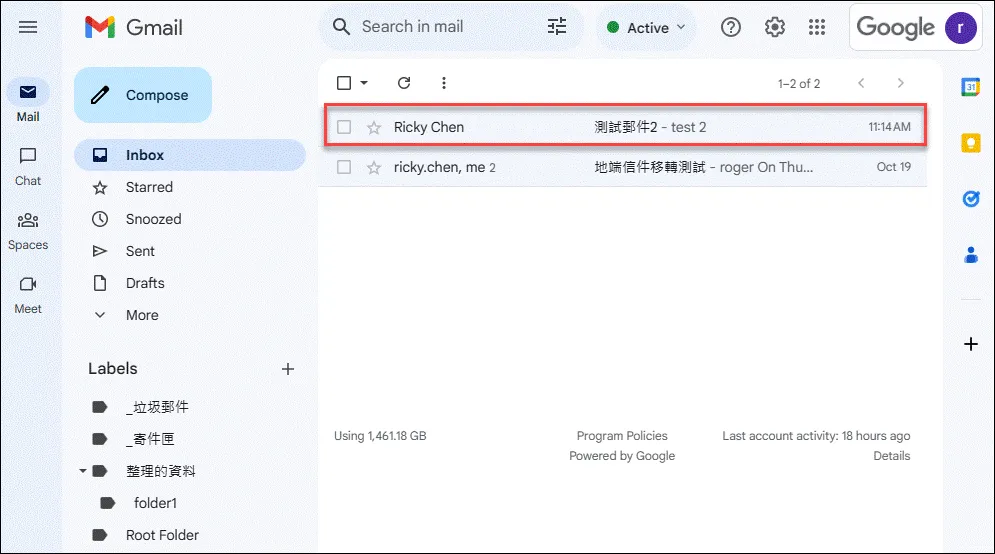
After synchronization, you can see the same data presented in GWS
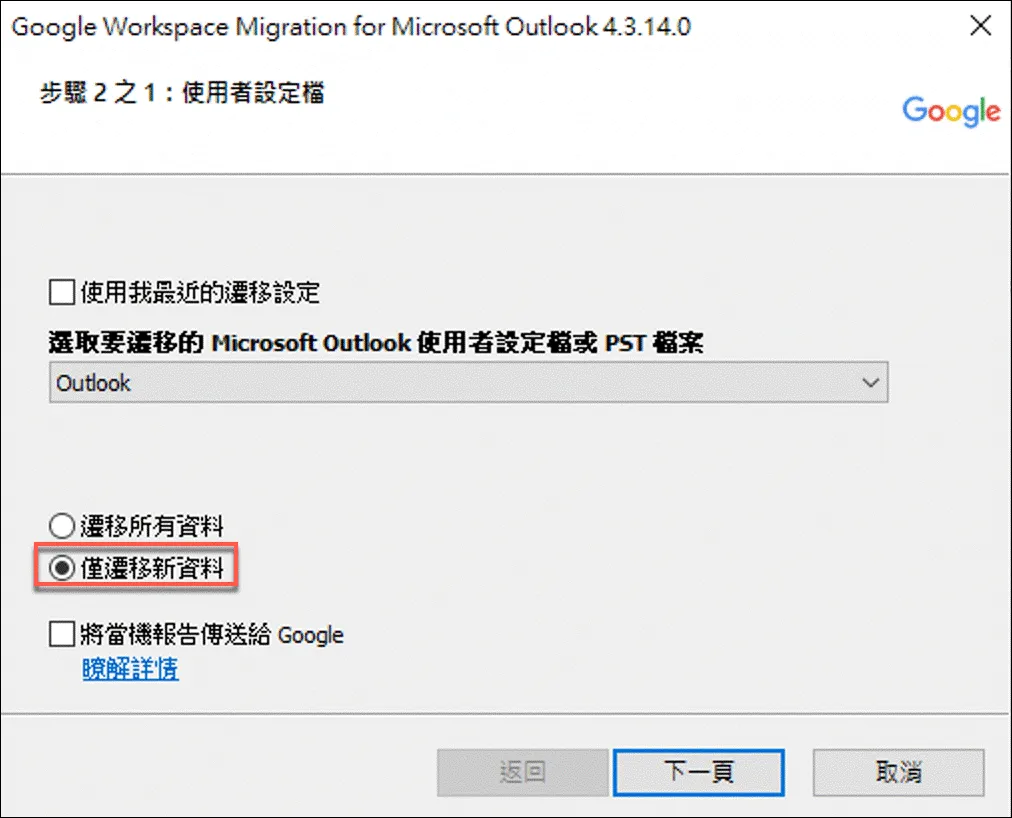
Perform Subsequent Data Migration Using GWMMO
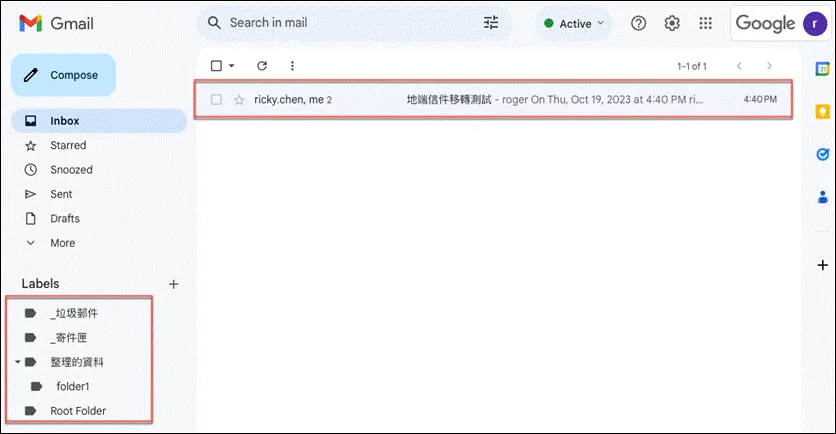
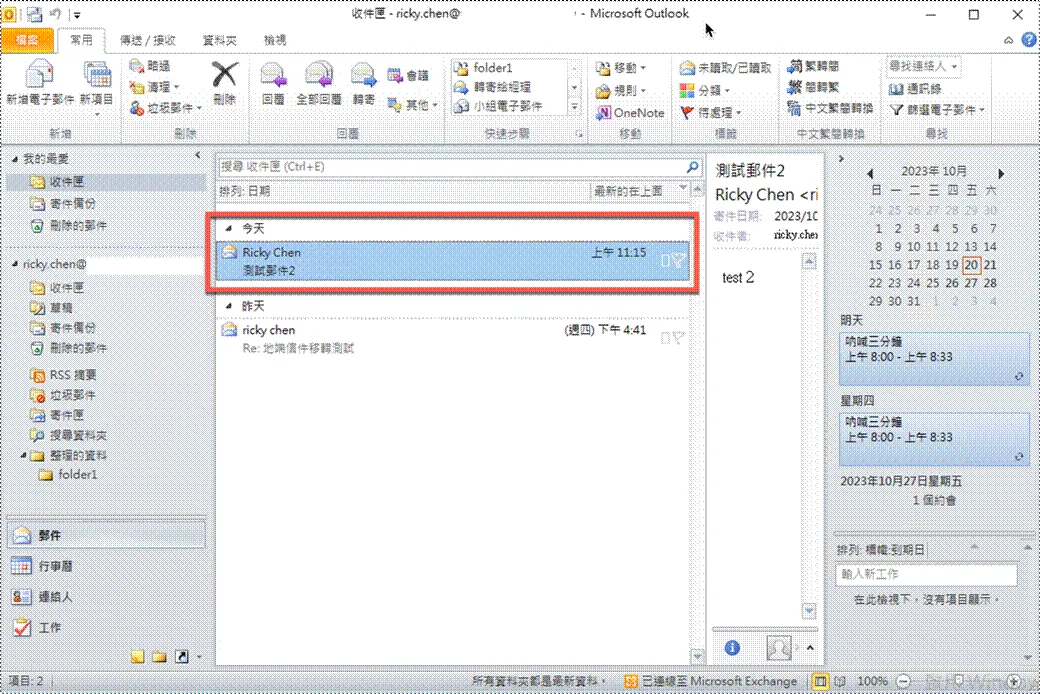
Add a new email
After opening GWMMO, click Migrate only new data
Click migrate
You can see that only one email is being processed
Check in GWS to see that the migration was successful
Migrate Data from PST File
Initial steps are the same as before, just select PST when choosing migration
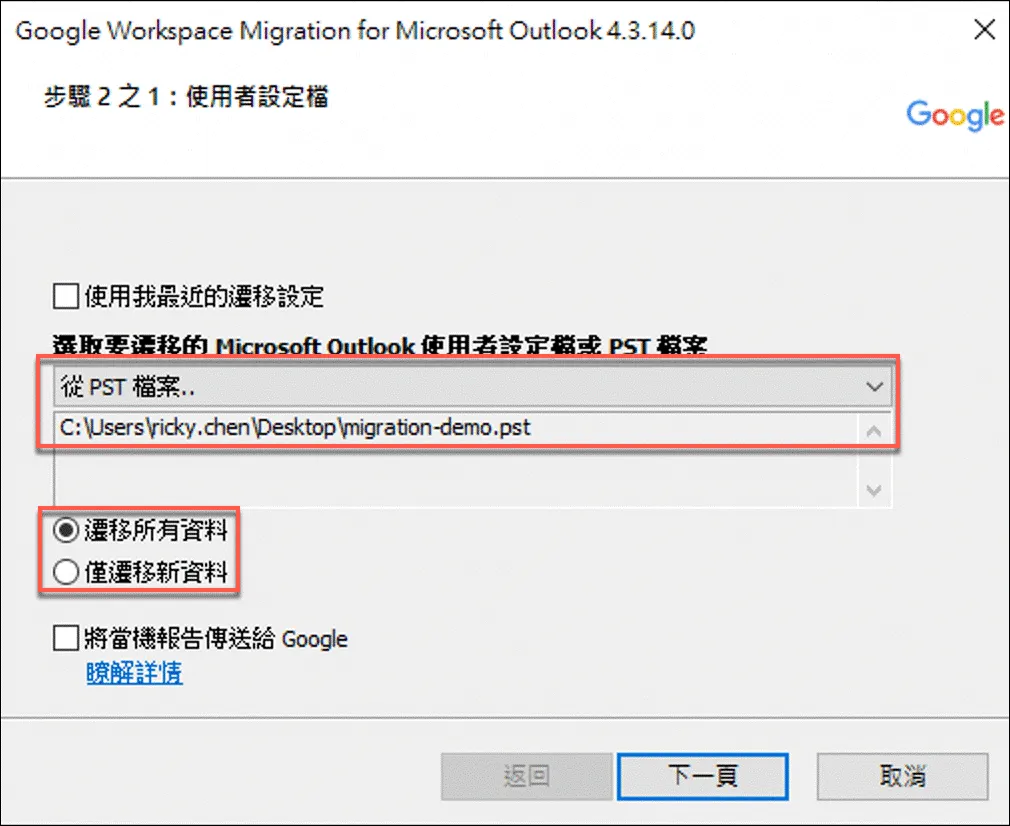
After selecting items to migrate, click migrate

Close after migration is complete
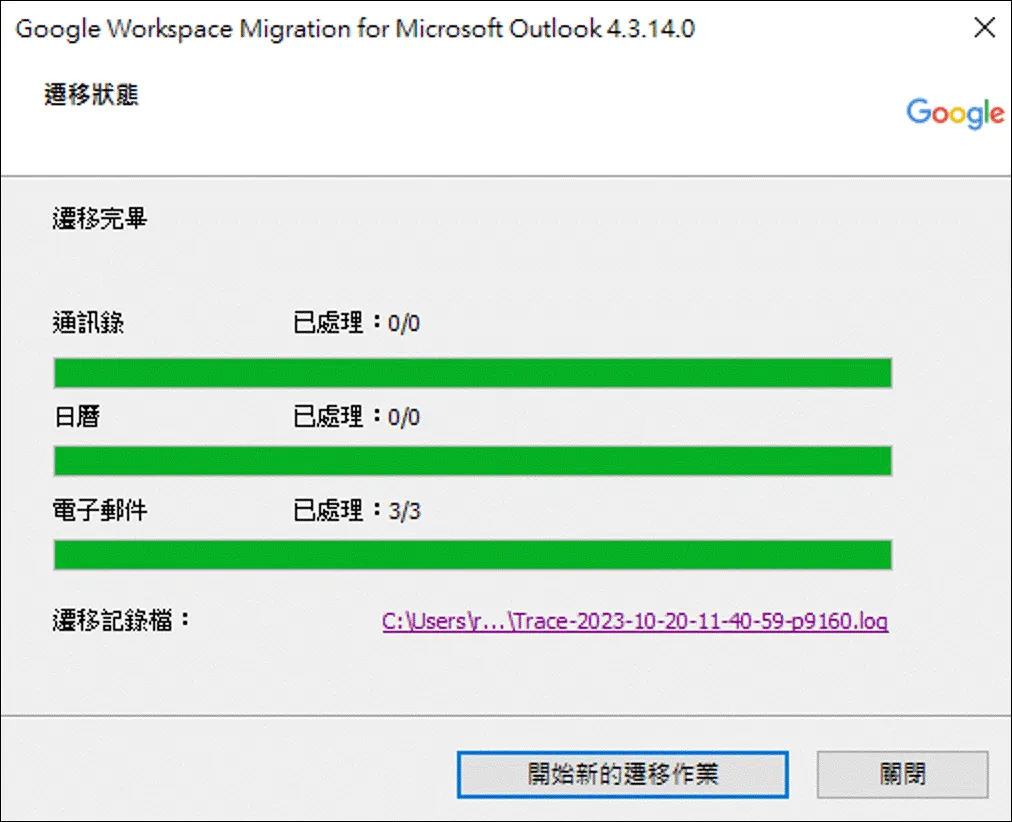
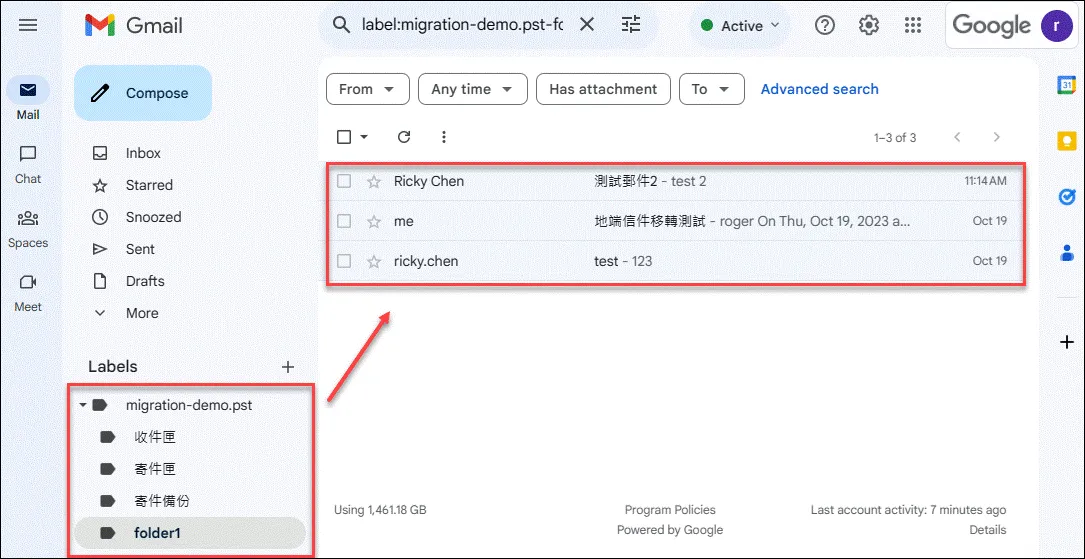
Migrated PST content
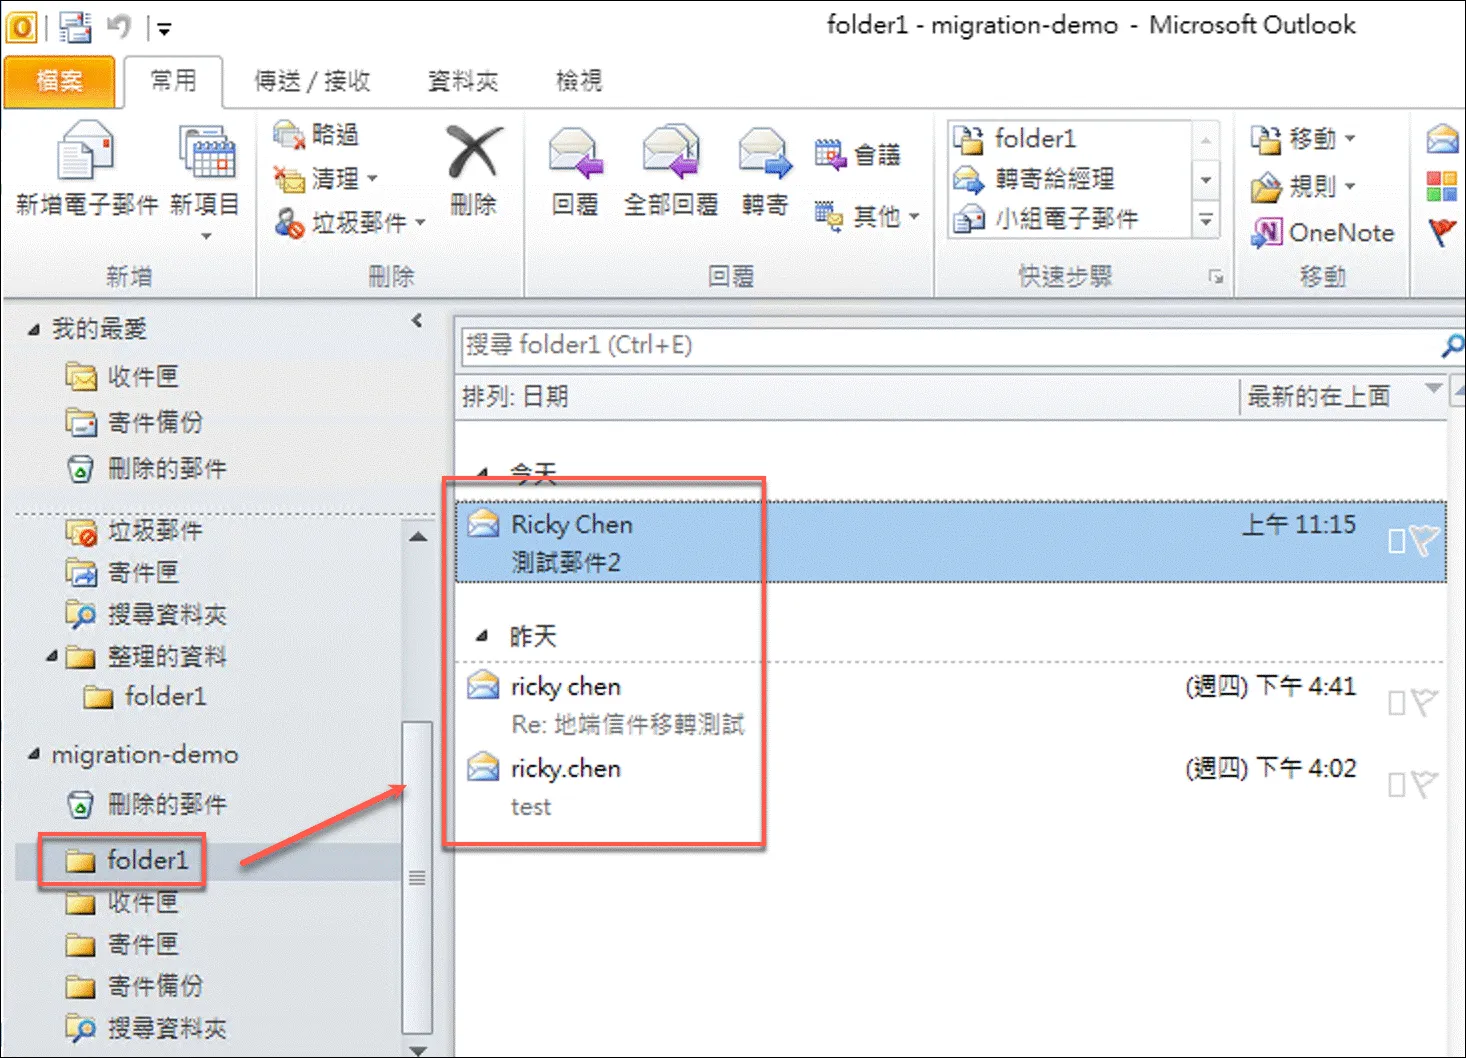
You can see that everything has been synchronized
FAQ
Repeated Migration
- What happens if you click “Migrate all data” again after a migration?
- Contacts will be duplicated. According to the documentation, GWS calendar will be overwritten, emails will not be duplicated.
Adjusting Existing Data
- If after migration, you adjust the folder location of emails in Outlook, will it affect the migration?
- No, migrated emails will not be adjusted. Even if you change the email folder location in Outlook after using GWMMO for migration, subsequent migrations will not synchronize the email location to GWS.
How to Create and Use PST Backup
Create PST Data File
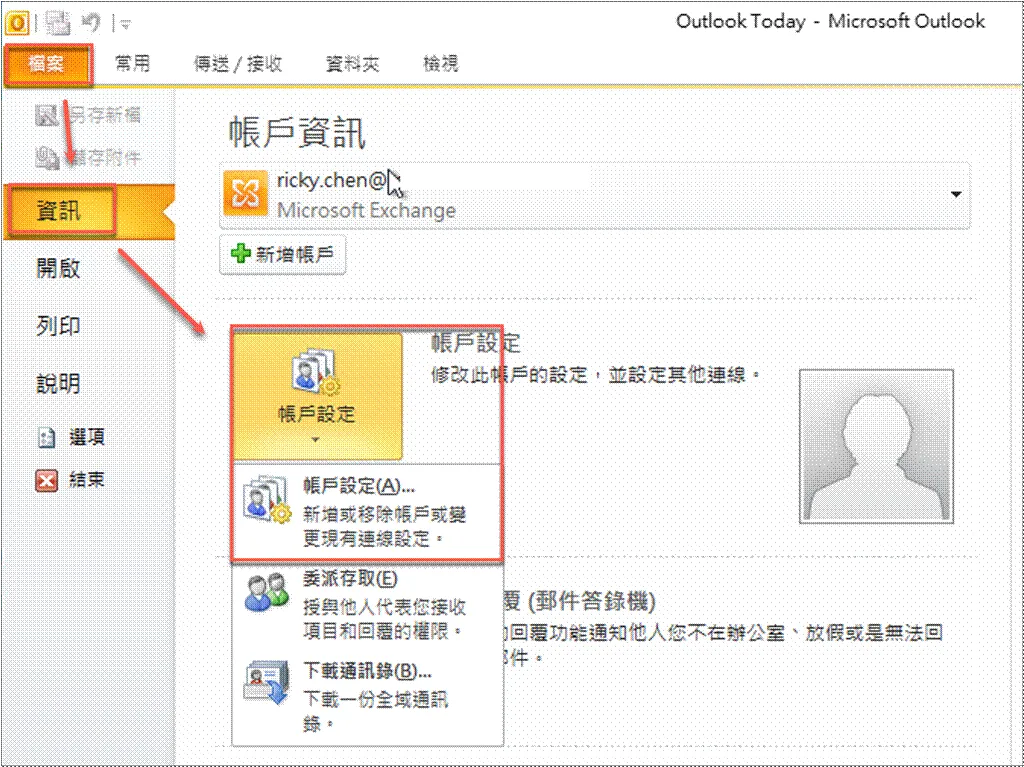
Enter Outlook account settings
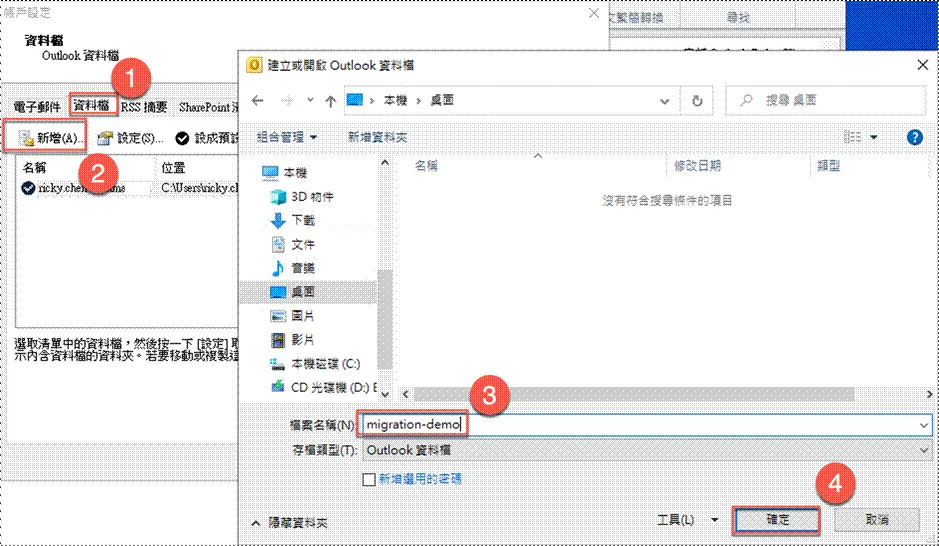
- Click “Data Files”
- Add
- Enter PST file name and choose storage location
- Confirm and close
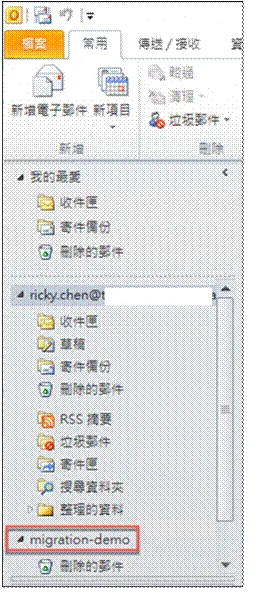
You can see the folder after PST is mounted
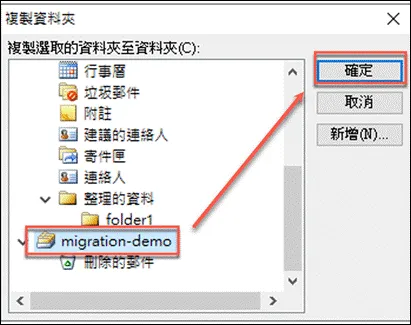
Backup Data to PST Data File
Right-click on the folder you want to backup
Click on the created PST folder to start backup