Enable Private Google Access and CloudDNS
目的
內網中的主機或服務,可不透過外網,便可直接連線至 GCP 服務,如 GCS。
Scenario
- 建立 VPC 並設定開啟 Private Google Access (PGA)
- 建立
googleapis.comPrivate DNS Zone
步驟
建立 VPC 網路
開啟 CloudShell 進行建立作業
設定環境變數
1export NETWORK_NAME="wp-network"export SUBNET_NAME="wp-network-asia-east1"export2PROJECT_ID="$DEVSHELL_PROJECT_ID"export REGION="asia-east1"建立 custom VPC 與其 subnet
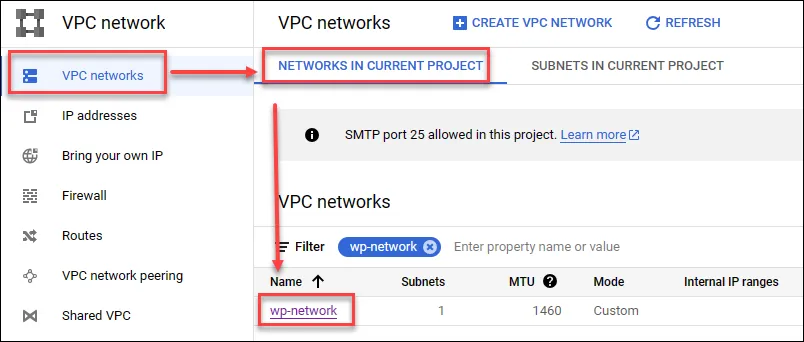
1# create network and allow-iap2gcloud compute networks create ${NETWORK_NAME} --subnet-mode custom3gcloud compute networks subnets create ${SUBNET_NAME} --network ${NETWORK_NAME} \4--region ${REGION} \5--range 10.1.0.0/166gcloud compute firewall-rules create allow-ssh \7--network ${NETWORK_NAME} \8--source-ranges 35.235.240.0/20 \9--allow tcp:22建立完成後,可在 VPC Network 看見所見好的 VPC
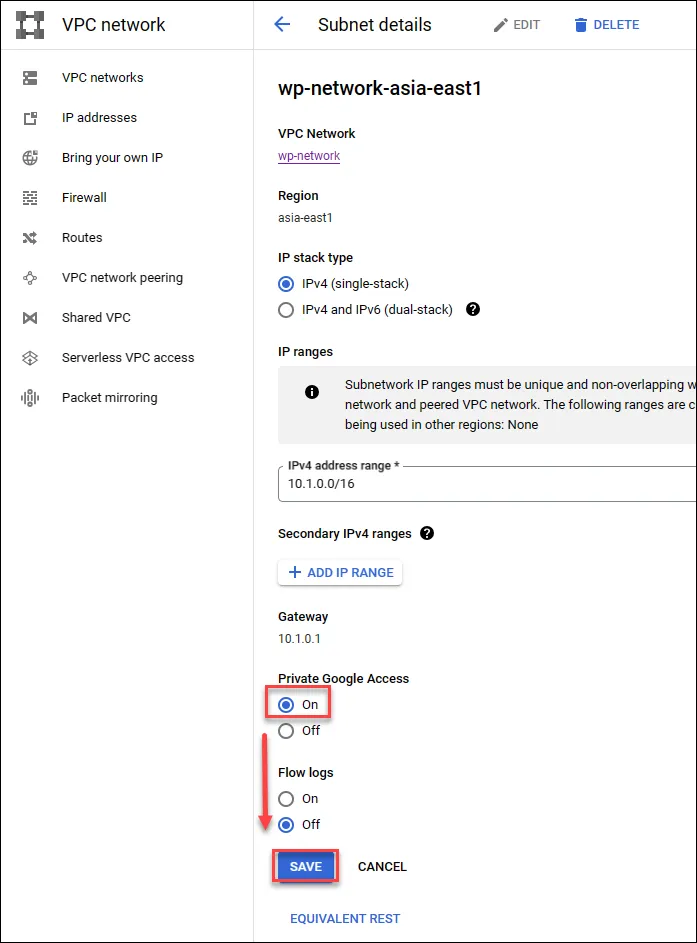
開啟 PGA
開啟 PGA 可使 VPC 內網直連至 GCP 內部服務,如 GCS,而不用從外網連接
點選所建立的 subnet
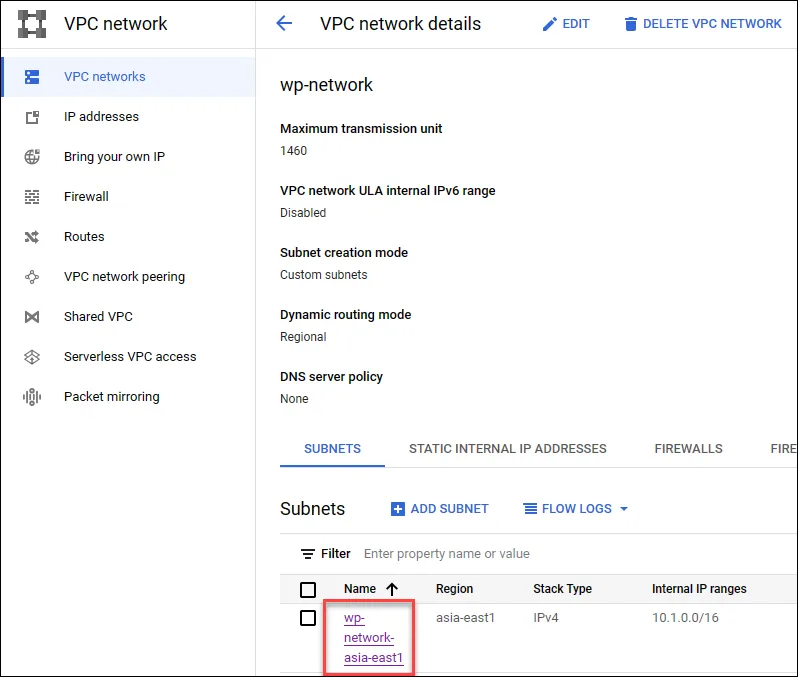
點選編輯
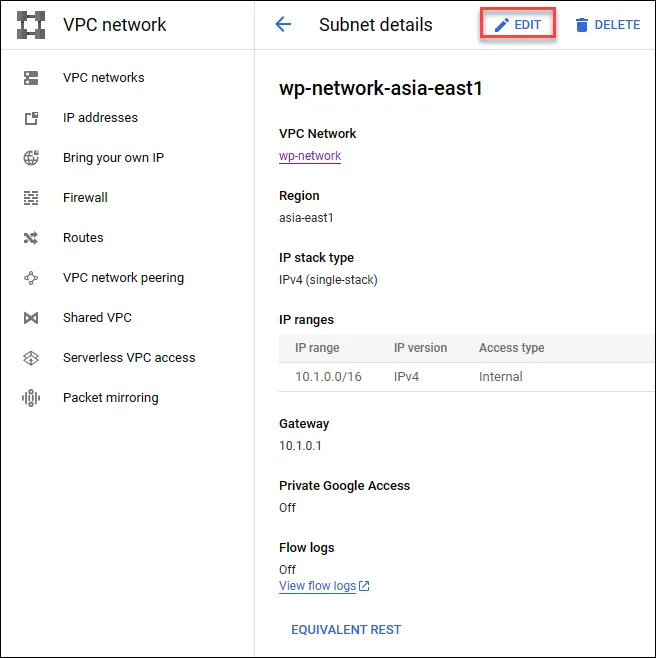
開啟 PGA 功能後存檔
設定 Private Cloud DNS
為確保所有流量都走在 GCP 內網,因此除了開啟 PGA 功能外,還會加上 CloudDNS 設定,將 GCP 相關 API 都透過 GCP 內部網路進行傳輸,而非使用 public ip 進行對接。
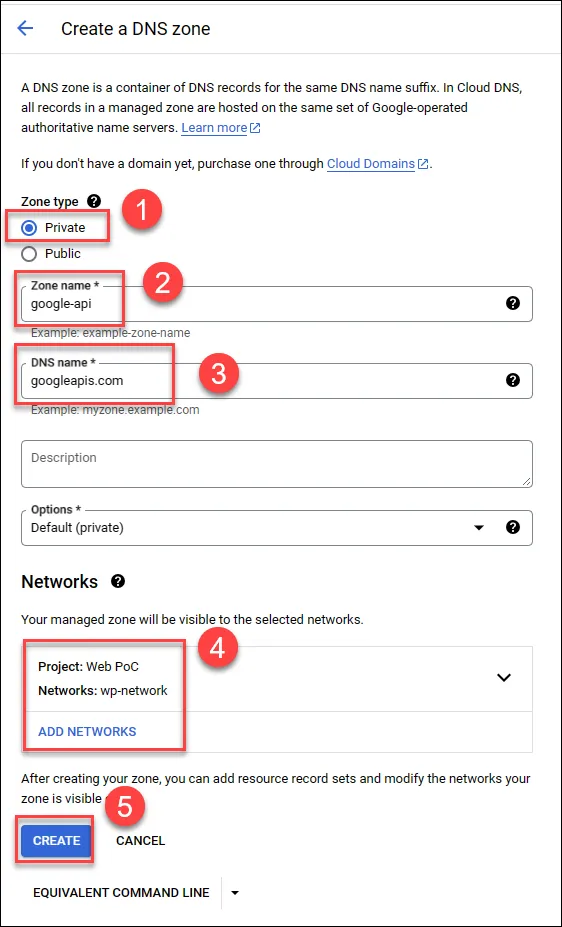
於 CloudDNS 建立 Private Zone

- 選擇 Private
- 輸入名稱
- 輸入
googleapis.com - 選擇目標 VPC
- 建立
建立紀錄
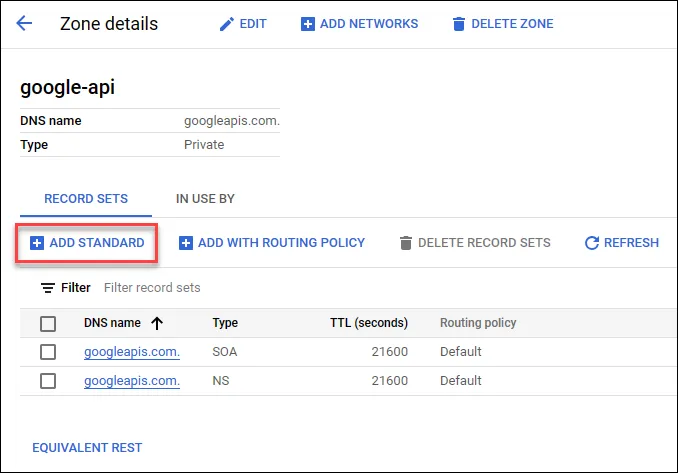
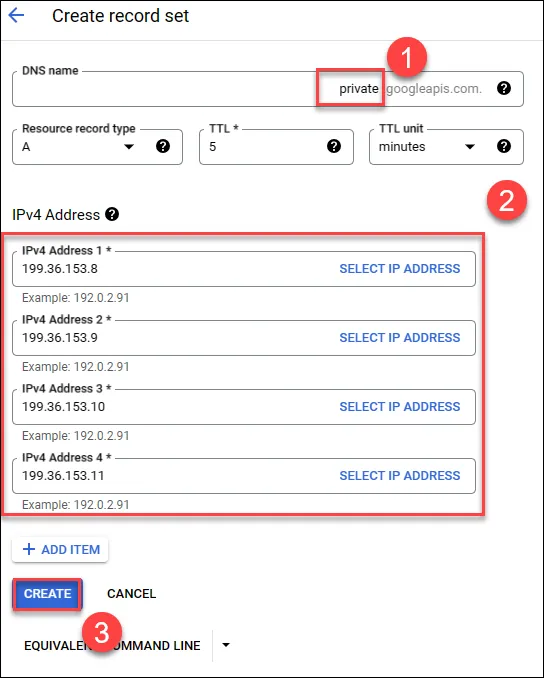
- 建立 private A record
- 輸入
199.36.153.8, 199.36.153.9, 199.36.153.10, 199.36.153.11的 ip - 建立
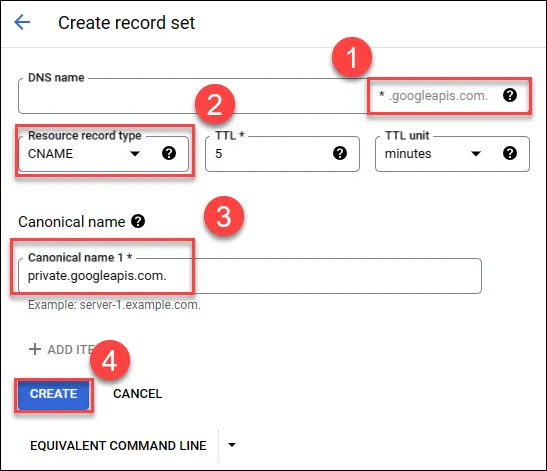
- 建立
*record - 選擇 CNAME
- 將 CNAME 轉到
private.googleapis.com. - 建立後即完成